
That annoying vibration in your RC boat does more than slow you down. It’s wrecking your motor bearings. Your battery drains faster. What should be smooth performance turns into a rattling mess.
What causes this? An unbalanced propeller. It’s been wobbling at thousands of RPMs since you installed it.
Here’s what most hobbyists learn too late: factory-new propellers almost never arrive balanced. That tiny imbalance grows into serious performance loss and expensive part damage.
The good news? Balancing your RC boat propeller takes under 30 minutes. You can use basic tools you likely own. The results show up right away—smoother operation, 5-15% faster speeds, and much longer component life.
Got vibration issues? Want to optimize a racing setup? This guide covers both static and dynamic balancing methods. Each step is clear and simple. Beginners become confident DIYers.
Why Balance RC Boat Propellers (Performance & Cost Benefits)
Your RC boat’s propeller spins thousands of times per minute. Even tiny imbalances create problems that cost you money and hurt performance.

The Performance Wins You’ll Measure Right Away
Vibration drops big time. Balanced propellers cut vibration by up to 75 percent. That wobble you feel through the hull? Gone. Your boat tracks straighter. Controls respond better. The difference is obvious on your first run.
Speed and efficiency jump 5-15 percent. A balanced propeller moves more water. It wastes less energy. You’ll clock faster lap times. Your battery lasts longer between charges. One racer gained 2 knots at top speed just by balancing a stock propeller—no other changes needed.
Components hit their rated performance on the first outing. Balanced props reach target RPMs right away. No tweaking required. No mystery performance gaps between identical setups. Just consistent, predictable power delivery every single run.
The Money You Save Adds Up Fast
Professional balancing costs $20-35 per propeller depending on blade count. DIY balancing costs nothing after you buy the tools.
Balanced propellers protect expensive components. Unbalanced props hammer motor bearings. They stress drive shafts. They overwork speed controllers. Replacing a fried motor costs $40-150. A damaged shaft runs $15-30. These failures happen over time. You won’t notice until components fail.
The bottom line: Fifteen minutes of balancing work prevents hundreds in repair bills. Plus, it delivers faster performance you can measure. That’s a trade worth making every time.
Signs Your RC Boat Propeller Needs Balancing (Diagnosis Checklist)
Your propeller talks to you. Catch the warning signs before small problems turn into expensive repairs.
Physical symptoms show up first. Shake or wobble travels through the hull into your hands. The drive system vibrates. The shaft rattles in its housing. These sounds aren’t normal. They’re distress signals.
Audio clues come next. Too much buzzing from the shaft area. Humming that drowns out the motor. Loud noise that wasn’t there last week. Balanced props run quiet. Unbalanced ones make themselves known.
Performance drops tell the real story. Acceleration feels slow. Top speed falls off by 10-20 percent. The boat pulls left or right instead of tracking straight. The prop wastes energy wobbling instead of pushing water. This kills your thrust power.
Heat buildup damages components. Your motor runs hotter than spec. The ESC overheats. Vibration stress cooks the bearings. These symptoms mean your prop is destroying parts right now.
Quick Diagnosis Tests You Can Run Today
The hand-spin check takes 30 seconds. Disconnect the shaft. Spin the prop by hand. Watch the center point. Balanced props spin smooth on axis. Unbalanced ones wobble all over the place.
The light test reveals hidden imbalance. Hold your prop against bright light. Rotate it slow. Uneven light shows blade differences. Matching shadows mean good balance.
The low-speed water test proves it. Run at half throttle. Feel for vibrations. Listen for odd noise. Stop right away if you detect either.
Use a prop balancer like Tru-Spin for precision. The heaviest blade drops. File it light until level.
Rule Out These Confusing Faults First
Bent shafts look just like prop imbalance. They cause consistent wobble at every RPM. Remove the prop. Spin the bare shaft. Wobble here means your shaft bent—not your prop.
Loose mounting hardware creates the same symptoms. Vibration loosens couplings over time. Tighten all connections. Lubricate moving parts. Retest before blaming the prop.
Worn bearings add extra play. Inspect for looseness. Wiggle the shaft by hand. Too much movement means you need new bearings, not prop balancing.
Debris stuck on blades throws off balance for a while. Clean well. Check for rock dings or chips. Remove foreign material before testing again.
Material-Specific Warning Signs
Nylon and plastic props chip easy. They bend from small debris hits. You’ll hear loud humming at low RPM. Wobble shows up fast. Wear patterns spread uneven across blades.
Metal propellers carry more mass. CNC-machined versions often arrive pre-balanced. Metal props hit harder with shaft vibration once they go off-balance. Noise levels spike.
Carbon fiber props make high-RPM problems worse. Chips matter more at racing speeds. Vibration grows with RPM. Balance these at your real operating range, not idle speed.
Know When Balance Is Wrong
A balanced prop spins smooth. No visible shaft movement. Quiet operation. Full speed and responsive steering.
An unbalanced prop destroys bearings 20-50 percent faster. It stresses shafts. Constant vibration risks motor failure.
Inspect before every outing. Check for damage. Verify tight mounting. Balance each season or right after any impact. That 15-minute check prevents $100+ in replacement parts.
Essential Tools for RC Boat Propeller Balancing
Start with the right balancer. Everything else follows from that choice.
Larger props need mechanical balancers. The Du-Bro Tru-Spin Prop Balancer ($44.99) handles props 36mm and above. Four large wheels give you stable readings. This same tool works for RC car wheels and airplane propellers. One tool serves multiple hobbies.
Smaller props work better with magnetic balancers. The Etti Magnetic Prop Balancer costs $34.99. Budget options exist on eBay and Amazon. For precision work, check Stump Fab or Eddie Offshore Electric custom options. Prices start at $51.85 and go up. The Integy Magnetic Prop Balancer (C26407ORANGE) fits shaft sizes from 1/8″ to 5mm. Most RC boat models use these sizes. Barcode: 91789023675.
The balance test is simple. Spin the prop. Watch what happens. Good balance means it stops anywhere without falling. Slow rotation shows you’re close. Any drop shows the heavy blade.
Sandpaper removes material with control. Stock grits 80, 120, and 220. Mount them on soft foam with super glue. The foam bends into tight corners and hub areas. Diamond-shaped or egg-shaped wheels reach spots flat paper can’t touch.
Polish for better water flow. Never Dull cuts through roughness fast. Add a Dremel with polishing wheel for buffing. Shiny blades slice water cleaner. This reduces drag.
Modeling clay checks symmetry. Press one blade into clay. Overlay the prop. Both blades should match the print. This catches thickness differences you can’t see.
Powdered graphite keeps balancers moving smooth. Put it on pins and wheels. Friction ruins accurate readings.
Setup and Installation Notes
Integy products expect you know RC systems. Instructions don’t ship in the box most times. Put threadlock on every metal-to-metal connection before you build. Check all parts fresh from packaging. Adjust as needed. Hardware sometimes looks different from product photos. This happens because of parts changes.
Pre-Balance Inspection Checklist
Check blade sizes match. Look for rounded or dulled tips. These throw off balance. Check shaft pins for damage from drops or impacts. Fix these problems before mounting on your balancer.
Static vs Dynamic Propeller Balancing Methods
Most RC boaters need just one method. Static balancing solves 90 percent of hobbyist prop issues. Dynamic balancing? That’s for commercial workshops—unless you’re building competition race boats.
Static Balancing: The Hobbyist’s Primary Tool
Static balancing works at zero RPM. Mount your prop on a magnetic balancer or low-friction pivot. The heavy blade drops. Physics shows you where mass sits off-center.
The fix is straightforward. Remove material from the heavy blade. Add weight to the light side. Keep testing until the prop stays level in any position. No rotation needed. No sensors required.
Cost runs $30-50 for quality equipment. The Du-Bro Tru-Spin handles most RC boat props. Magnetic balancers work great for smaller blades. Setup takes five minutes. The balancing work finishes in 10-20 minutes.
Precision has limits. You’re eyeballing balance at rest. You can’t correct to the microgram level. Over-adjustment happens easily. You file too much. Then compensate. Then file again. Visual inspection can’t match sensor accuracy.
Perfect for consumer RC boats. Small props under 60mm. Boats you don’t race. Routine care between seasons. Beginners learning prop maintenance. You get smooth operation for casual boating and weekend racing.
Dynamic Balancing: Beyond Static Methods
Dynamic balancing measures during rotation. Your prop spins at operating RPM on a test stand. Sensors capture vibration data. Software pinpoints where centrifugal forces pull.
ISO 21940-11:2016 compliance means real precision. Dynamic systems measure to G 6.3 standard. Professional-grade accuracy. Equipment tells you exact counterweight specs. Position and mass down to milligrams.
The investment jumps up. Test stands cost hundreds to thousands. Software needs technical knowledge. You must understand rotor mass, target RPM, and balance grades. This isn’t beginner territory.
Setup runs fast once you know the system. Under five minutes per prop. Input parameters. Run initial spin. Add calibration weight. Software calculates correction. Verify with final test. Automated workflow beats manual filing.
Commercial operations need this precision. High-speed racing boats above 50 mph. Competition setups where every tenth of a knot matters. Props larger than 70mm. Jobs needing vibration below G 6.3. Extended run times where bearing life is critical.
The Hybrid Approach That Works
Start static. Finish dynamic if needed. This two-stage method saves money and delivers results.
Run static balancing first. Add tape to light blades. File heavy sides. Get the prop level on your magnetic balancer. This removes obvious mass differences for free.
Mount the statically-balanced prop on your boat. Test at operating speed. Still getting vibration? Camera footage shows jello effect? Thrust feels uneven between blades? Dynamic balancing pays off here.
Dynamic testing reveals air flow issues. Blade pitch variations. Surface finish differences. These problems show up under rotation. Static balancing can’t detect them.
The combined workflow catches everything. Mass imbalance goes first via static method. Air flow imbalance gets fixed with dynamic testing. Target vibration below G 6.3 for professional results.
Most hobbyists stop at static balancing. It solves vibration problems. Extends component life. Costs almost nothing after tool purchase. Dynamic balancing? That’s for serious racers, large props, or times static methods fail to stop the shake.
Step-by-Step: How to Balance Nylon/Plastic RC Boat Propellers (Static Method)
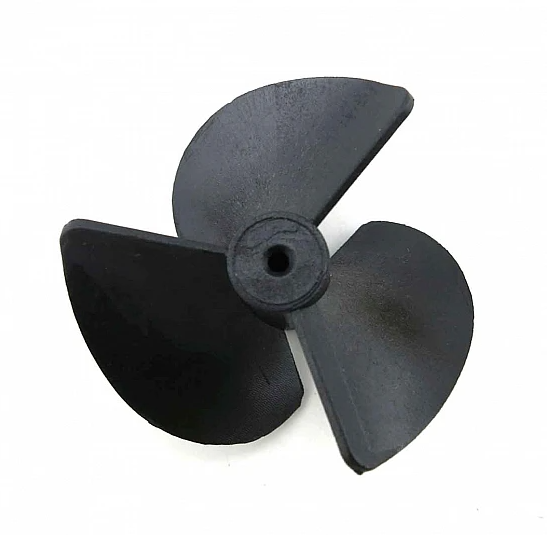
Grab your propeller and a balancing shaft. You’re about to fix that wobble in under 15 minutes.
Nylon and plastic props dominate the RC boat world. They’re cheap, durable, and forgiving when you hit debris. Static balancing works great for these materials. No expensive equipment needed. No complex sensor arrays. Just physics, patience, and a simple balancer.
What You’ll Need Before Starting
Your balancing shaft matters most. It must spin free without wobble. Check yours by rolling it on a flat surface. Any deviation ruins your readings. Chamfer one end a bit with sandpaper—this helps the prop slide on smooth.
The balancer itself needs friction-free movement. Horizontal rollers work great. Magnetic needle pins get rid of friction. Some hobbyists swear by bubble level rails with thumb screw adjustment. Pick what fits your budget. All three methods give accurate results.
Keep a permanent marker handy. You’ll mark one blade tip for tracking rotation. Black works best on light-colored props.
The 7-Step Balancing Process
Step 1: Prep your balancing shaft (2 minutes). Inspect the shaft end-to-end. Roll it across your workbench. Straight shafts stop at the same point every rotation. Bent ones keep rolling. Sand any burrs off the shaft surface. These cause false readings by adding friction.
Step 2: Install the propeller (1 minute). Slide your nylon prop onto the shaft. The fit should feel a bit loose—not sloppy, just easy. Tight fits damage the hub and give bad readings. Mark one blade tip with your marker. This tracking dot shows you which blade needs work.
Step 3: Mount on the balancer (1 minute). Place the shaft across your horizontal rollers or needle pins. Using a bubble level balancer? Adjust the thumb screws until the bubble centers. The shaft should sit flat with zero effort.
Step 4: Identify the heavy side (30 seconds). Let go. Gravity takes over right away. The heavy blade rotates downward and stops at the bottom. The light blade rises to the top. Mark the heavy blade position in your head. Spin the prop 90 degrees. Release again. The heavy blade always drops to the same bottom position. That’s your target for material removal.
Step 5: Remove weight from the heavy blade (2-5 minutes, repeat as needed). Sand the forward face of the heavy blade with care. Use 120-grit sandpaper on a foam block. The foam curves into tight hub areas. Avoid the blade edges—grinding edges kills water flow and adds drag. Work in small passes. Remove a tiny amount. Test. Repeat. This takes patience. Over-grinding wastes time because you can’t add material back with ease.
Alternative method for plastic props: Add small tape strips to the light blade’s trailing edge instead of grinding. Start with 0.1 grams. Test. Add another layer if needed. Maximum two layers prevents blade twist. This works better for thin plastic that might crack from hard sanding.
Step 6: Verify balance (1 minute). Rotate the prop to any random position. Release it. Balanced props stay still. No drop for at least 10-20 seconds. No slow drift. Balanced props hold position for 30+ seconds no matter the starting angle. Rotate to six different positions. Test each one. All six should stay level.
Step 7: Final operational check (2 minutes). Remount the balanced prop on your boat’s drive shaft. Run at 50-75 percent maximum RPM in water or on a test stand. Feel the hull for vibration. Listen for noise. Zero vibration means you nailed it. Any shake means you need another balancing pass.
How to Judge Heavy vs Light Blades
The heavy blade drops below the shaft centerline within one second of release. Quick movement. No hesitation. The light blade rises above center just as fast. Physics doesn’t lie here.
Watch for false drops. Friction on the shaft makes light props appear balanced when they’re not. Add powdered graphite to your balancer pins. Wipe excess away. Now your prop moves free without resistance fooling your eyes.
Common Mistakes That Ruin Balance
Over-grinding blade edges creates drag and turbulence in water. Your boat slows down despite perfect balance. Keep your sanding work on the forward blade face. Stay away from leading and trailing edges.
Forcing tight props onto shafts damages the hub bore. Cracks form. The prop wobbles from structural failure, not mass imbalance. Sand the shaft or bore a bit until the fit feels easy.
Ignoring hub burrs throws off readings. Burrs add friction at random spots. Your heavy blade reading changes position between tests. File all burrs smooth before mounting.
Adding opposite-plane weights causes dynamic twist. Tape on the top surface of one blade and bottom surface of another creates torque during rotation. Keep all correction weights on the same plane—either all trailing edges or all forward faces.
Precision Targets for RC Boat Props
Your prop should hang still in gravity for 10-20 seconds minimum before any slow drift starts. Perfect balance holds 30+ seconds with no problem.
Static tolerance for RC applications: Unbalance below 5-10 gram-millimeters. Blades should weigh within 0.1 grams of each other by eye. You can verify this with a precision scale if you want data instead of feel.
The ultimate test: Remove the heavy blade. The opposite blade should drop right away. Full balance means still in any orientation with both blades installed.
First Balance vs Maintenance Rebalancing
First-time balancing takes the full 15 minutes. You’re setting baseline measurements. Check hub concentricity. Measure blade pitch and yaw values if you’re serious about racing. Grind or tape to achieve zero imbalance. Run strobe RPM tests to verify at operating speed. Document your work.
Maintenance rebalancing after 10-15 runs takes 5 minutes. Mount the prop. Identify which blade got heavy from debris impacts or uneven wear. Make minor corrections with light sanding or tape addition. Verify static balance. Done. You’re targeting under 2 gram-millimeters leftover imbalance for post-run vibration checks.
The difference matters. New props need dimensional checks, static balancing, and dynamic verification. Used props just need quick static correction unless you notice performance changes.
Mount your balanced prop. Hit the water. Feel the difference right away—smooth acceleration, quiet operation, zero shake through the hull. That’s proper static balancing giving you what you need.
How to Balance Metal and Wood RC Boat Propellers

Metal and wood propellers need different techniques than plastic. The materials fight back harder. Precision matters more. Get it wrong and you’ll chase vibration problems for weeks.
Metal props need both static and dynamic balancing. Wood props forgive more mistakes but splinter if you push too hard. Each material has specific tools and methods that work.
The Material Difference That Changes Everything
Metal propellers carry uniform density. CNC-machined aluminum or brass distributes mass evenly. This consistency helps—until you realize static balancing alone won’t cut it. Metal props develop top-to-bottom wobble that gravity-based balancers can’t detect. You need dynamic testing with the prop spinning at speed.
Wood propellers hide density changes inside the grain. Two blades that look the same weigh different amounts. Moisture content and grain direction cause this. Hardness varies across a single blade. You’re sanding soft spots faster than hard ones without realizing it. Thickness matching becomes critical.
The weight difference matters for racing setups. Metal props maintain constant motor load through precise weight distribution. Wood props get the same result through careful thickness matching.
Essential Tools for Metal and Wood Props
Start with a precision shaft. A 1/8-inch steel drill blank works well. Grind one end to a fine point. The shaft must run straight. Test by rolling it across your workbench—any wobble ruins dynamic balance readings. This shaft costs $3-5 at hardware stores. Balance the shaft itself before mounting any propeller.
Metal props need aggressive cutting tools. Stock a 12-inch coarse metal file from Home Depot. Add a jeweler’s file set for cleaning hub flashing. Oil-based sandpaper in 240, 320, and 600 grits handles finish work. The oil prevents metal dust from clogging the paper.
Wood props respond better to sandpaper blocks. Mount 200-320 grit paper on a large hardwood block for thinning heavy blades. Use soft pine blocks for final smoothing passes. The hard block removes material fast and flat. The soft block conforms to blade curves without gouging.
Four-Stage Balancing Process for Metal Props
Stage 1: Start with dimensional balance. Mount your prop on the precision shaft. Check blade outlines match. File away any hub flashing with jeweler’s files. Press the hub into an ink pad, then rotate 180 degrees and press again. The two impressions should overlay. Any mismatch shows where to file. Work the oversized portions with your metal file and oil-based emery board. Progress through 240, 320, then 600 grit for smooth finishing.
Stage 2: Static tip-to-tip balance comes next. Place the shaft across your horizontal balancer. The prop should stay level with either blade on top. Sand thickness from the heavy blade’s back side—never touch the front face or edges. Use 240 grit on a hard wood block. Remove tiny amounts. Test after each pass. Work up to 320 grit once you’re close.
Stage 3: Dynamic balance reveals hidden problems. Mark one blade tip with permanent marker. Spin the prop on your shaft balancer. Aim a strobe light at the spinning propeller. Watch the shaft. A balanced prop shows the shaft running straight. An unbalanced prop makes the shaft wobble in a circular pattern. The heavy blade pulls outward during rotation—you’ll see it under the strobe.
Stage 4: Correct the dynamic imbalance with patience. Apply light oil to 320-grit sandpaper. Sand the back of the heavy blade in small strokes. Spin and strobe again. Repeat until the shaft runs true with zero circular motion. This stage separates good props from competition-grade props.
Wood Propeller Balancing Shortcuts
Wood skips dynamic balancing in most cases. The lower mass and slower typical RPMs don’t generate the same centrifugal forces as metal.
Focus on thickness matching. Mount on your balancer shaft. Find the heavy blade through static testing. Sand the back surface with 200-grit paper on your hardwood block. Check grain direction first—sand with the grain to prevent splintering and tearout.
Remove material in careful passes. Wood comes off faster than metal. Over-sanding happens in seconds if you’re not paying attention. Recheck balance after every three or four strokes. Switch to 320 grit for final smoothing once the prop holds level.
The soft pine block matters for finish work. Hard blocks remove material flat but leave scratches. The pine block smooths without cutting deep. Use it for your last few passes with 320 grit.
Critical Mistakes That Waste Hours
Never change blade outline or pitch. Your prop was designed with specific dimensions. Filing edges or front faces changes water flow. You’ll maintain balance but destroy thrust efficiency. All material removal happens on the back side.
Coarse files on wood cause splinters and gouges. Metal props handle aggressive filing. Wood doesn’t. Stick with sandpaper blocks for wood. Save the metal files for metal and hub flashing.
Skipping shaft balance creates false readings. Your precision shaft must be straight and balanced before you mount any propeller. Spend the time getting this right first. A bent shaft makes every prop test worthless.
Skipping dynamic balance on metal racing props costs you speed. Static balance gets you 80 percent there. The strobe test reveals that last 20 percent. Competition racers need both. Casual boaters can stop after static balance succeeds.
Precision Targets for Professional Results
Metal props should show zero shaft wobble under strobe light at operating RPM. The shaft appears as a single steady line, not a blurred circle. Static balance must hold level in all four cardinal positions—0, 90, 180, and 270 degrees.
Wood props need static balance within 0.2 grams between blades. Test by removing one blade and checking if the opposite blade drops right away. Perfect balance means the prop stays level with either blade at top position.
Mount your balanced metal or wood prop on the boat. Run at three-quarter throttle. Zero vibration through the hull confirms success. Any remaining shake means you need another dynamic balancing pass with finer grit sandpaper.
Advanced Dynamic Balancing for Racing RC Boats
Racing props spin at 40,000-60,000 RPM. Static balancing can’t handle this precision. The forces at these speeds turn tiny weight differences into vibration that kills performance.
Competition-grade dynamic balancing targets 0.1-gram tolerance. This precision cuts vibration by 95 percent. Your motor bearings last through brutal race conditions. Electronics stay safe from high-frequency shake. Speed gains show up fast—5-10 percent faster runs with zero chine walk.
The High-RPM Balancing Protocol
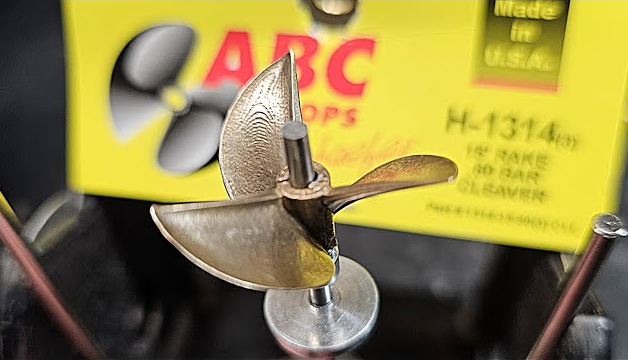
Mount your prop on a precision balancer with blades horizontal. The Du-Bro works fine for basic setups. Multi-plane balancers like Dynamics Research handle three-blade props better. The ABC 1314 three-blade design needs vector measurement. Single-plane tools can’t provide this.
Release the prop and watch gravity work. The heavy blade rotates down in one second. Mark it with permanent ink. This is your reference point.
Add micro-weights in 0.01-0.05 gram steps. Stick tiny tape bits to the lighter blade’s back surface. Recheck horizontal position after each addition. Work step by step. Patience wins here. Rushing leads to over-correction that wastes time.
Spin-test reveals true dynamic balance. Hand-spin the prop at moderate speed. Balanced props stop at random positions each time. Stopping at the same blade means you need another pass. Test in still air—even gentle drafts throw off readings.
Wind Simulation for Water Flow Dynamics
Static balancing ignores one key factor: water flow resistance at speed. The air blow method simulates this force.
Spin your prop at racing RPM using a hand motor or powered balancer stand. Direct controlled low-speed wind at the blades—start at 5 mph. The heavy side deflects more under air pressure. You’ll see wobble peaks that gravity testing missed.
Match wind speed to your boat’s operating velocity. A boat running 6 meters per second (13.4 mph) needs 15 mph wind testing. Scale the air speed up in steps. Watch for deflection differences between blades. The heavy side moves outward more.
Correct imbalance with 0.01-gram tape additions opposite the deflection. Increase wind speed in 5 mph steps. Retest at each level. Even deflection across all blades confirms dynamic balance under load.
Wind speed control matters here. Too little air and you miss subtle imbalances. Too much and you’re testing beyond your boat’s real-world performance.
Competition-Grade Precision Techniques
Three-blade props need vector analysis. Single-plane balancers show one dimension. Multi-plane tools measure imbalance across multiple axes at once. The ABC 1314 racing prop shows this need—three blades create force vectors that build at 60,000 RPM.
File or sand the heavy blade in 0.005-gram steps. Work with 600-grit wet sandpaper on the blade back. Remove tiny amounts. Test after every three strokes. Or add calibrated epoxy weights to light blades for permanent correction.
Verify balance at actual operating RPM—40,000+ for racing setups. Bench testing at low speed misses problems that appear under extreme load. Mount the balanced prop on your race motor. Run full throttle on a test stand. Zero shaft vibration confirms success.
Performance Gains You’ll Measure Right Away
Acceleration jumps 20-30 percent with proper dynamic balance. Testing data from balanced rudder and propeller combinations shows peak acceleration hitting 41 meters per second squared at 6 m/s boat speed. That’s competition-winning thrust.
Yaw rate reaches 6.5 radians per second. Balanced props let you carve turns without fighting vibration. Cornering becomes predictable and repeatable—key for racing consistency.
Top speed climbs 5-10 percent from reduced drag and zero vibration losses. Straightaway stability prevents chine walk that kills momentum. Your boat tracks laser-straight instead of wandering.
Energy efficiency improves 10-15 percent at sustained high RPM. Less vibration means less wasted energy. Your battery draw drops. Longer run times or higher speeds—you choose the trade-off.
Motor and electronics protection extends component life. The 95 percent vibration reduction prevents the high-frequency damage that destroys bearings and speed controllers in racing.
Integrating Dynamic Balance with Hull Setup
Dynamic propeller balance works with your hull’s center of gravity positioning. Deep-vee racing hulls perform best with CG at 28 percent of hull length from the bow. Keep CG low for straightaways—1-2 millimeters above hull bottom gives maximum stability. Raise it 3-5 millimeters for corner grip.
Weight distribution affects turn balance too. Shift 5-10 grams right for 16-degree vee turns. This counters prop torque and prevents the boat from tightening unevenly mid-corner.
Strut and trim integration matters just as much. Twist your strut 2-5 degrees opposite prop walk direction. Adjust outside tabs 0-2 millimeters up for linear turn characteristics. These small tweaks work together with balanced props to eliminate vibration and instability that ruins race times.
Dynamic balancing separates recreational props from championship-winning setups. The precision takes patience. The performance gains justify every minute spent chasing that 0.1-gram tolerance.
Troubleshooting Common RC Boat Propeller Balancing Problems
You balanced your prop. Mounted it with care. Hit the water. The vibration came back worse than before.
Something went wrong between the balancer and the boat. Here’s how to find it and fix it fast.
Your Prop Won’t Stay Balanced
The prop keeps returning to the same heavy position on your balancer. You filed it. Added tape. Tested again. Same result. The heavy side drops every single time.
This points to hub imbalance, not blade weight. The center hub carries uneven mass. Gravity pulls the heavier hub section down no matter what you do to the blades.
The fix needs careful hub work. Remove your prop from the balancer. Inspect the hub casting. Look for thick spots or extra material on one side. Mark the heavy section with permanent marker.
File the hub with 200-grit sandpaper. Work in tiny amounts—0.05mm per pass maximum. Mount back on the balancer. Test horizontal release. Repeat until the prop stops at random positions instead of favoring one side.
Hub filing comes last. Try all blade balancing first. Over-filing the hub enlarges the bore too much. You’ll need spacers to secure the prop on your drive dog after that mistake.
Vibration Returns After Perfect Balance
Your prop tested great on the balancer. Zero movement. Held level for 30 seconds in any position. You installed it. The boat shakes like crazy at half throttle.
Four problems cause this gap between bench testing and real use.
Debris stuck to blade surfaces throws everything off. Small rocks. Dried algae. Tiny wood chips from hitting docks. These add weight you didn’t account for during balancing. The weight shifts during runs as debris breaks loose or repositions.
Clean your prop before every balance session. Use a soft brush and warm water. Inspect each blade under bright light. Feel the surfaces for rough spots. Sand these smooth with 320-grit paper before balancing.
Chipped or bent blades hide damage until you run at speed. Hairline cracks spread under load. Bent sections flex in ways straight portions don’t. Static balance can’t detect these issues.
Hold each blade against bright light. Rotate it. Look for shadow differences that reveal cracks or bends. Flex the blade by hand. Undamaged blades spring back firm. Damaged blades feel soft or make crackling sounds.
Replace damaged props right away. Balancing can’t fix broken parts.
Bad mounting creates wobble that looks like imbalance. The prop sits crooked on the shaft. Drive dog ears don’t seat all the way in the hub slots. The mounting nut torques down uneven.
Remove your prop. Check the drive dog fit by hand. The prop should slide onto the dog with light resistance—not loose, not forced. Ream the hub bore if needed. Use a 3/16-inch bit for standard shafts. Spin the drill in reverse to clear burrs without making the hole too big.
Reinstall the prop. Tighten the mounting nut in three steps instead of one hard pull. Quarter turn. Check alignment. Quarter turn. Check again. Final quarter turn. This seats everything level without binding.
Shaft problems cause ongoing vibration despite perfect prop balance. Your prop shaft bent a bit. The coupling has play. The motor mount shifted.
Disconnect the prop shaft from the motor. Spin the bare shaft by hand. Watch the free end. Wobble here confirms shaft problems, not prop imbalance.
Check the flexible coupling for wear. Squeeze it between fingers. Too soft or visible cracks mean replacement time. These couplings fail after 15-20 hours of hard running at 50+ percent max RPM.
Test motor mount bolts for tightness. Vibration loosens them over time. Retorque to spec using threadlock on the threads.
The Tape Fell Off Mid-Run
Nylon props balanced with tape lose it during use. Water flow, heat, and vibration all attack the adhesive. Your balanced prop becomes unbalanced five minutes into your run.
This happens if you rush the tape application or use too much.
Start over with proper technique. Remove all old tape. Clean the blade back surface with rubbing alcohol. Let it dry—two minutes minimum.
Sand the attachment area with 200-grit paper. This roughens the surface so tape grips better. Wipe dust away with a clean cloth.
Cut fresh tape pieces small—5mm x 5mm maximum. Start placement mid-blade, not at the hub. Add one piece. Test balance. Still heavy? Add another piece closer to the tip.
Tip placement uses physics. Weight at the blade tip creates 2-3 times more balancing force than the same weight near the hub. Use this to keep total tape to a minimum.
Press each piece down hard. Rub it with your fingernail for 30 seconds. This activates the adhesive and stops edges from lifting.
Maximum two layers at any single spot. More than this causes blade twist under load. Your balanced prop gets handling problems at speed.
You Sanded Too Much Material Away
The prop won’t balance no matter what you try. You removed too much from the heavy blade. Now the opposite blade is heavy. You sand that one. The first blade becomes heavy again.
This death spiral destroys props fast.
Minor over-sanding has a fix. Add tape to the blade you over-filed. Start with 0.1 grams. Test. Add more if needed. You’re building weight back up to match the untouched blade.
Heavy over-sanding kills the prop. You took off more than 0.3mm from a single blade. The thickness gap changes water flow. You’ve destroyed thrust power even if you get perfect balance.
Toss it. Buy a new prop. Learn from the mistake.
Stop this by working in tiny steps. Three light strokes with 200-grit sandpaper. Stop. Test balance. Three more strokes if still heavy. Test again. Patience stops over-removal every time.
High-Speed Wobble That Doesn’t Show Up at Low RPM
Your boat runs smooth at quarter throttle. You open it up past half power. Vibration hits hard. The hull shakes. Your ESC overheats. Top speed drops off.
This pattern points to dynamic imbalance or mechanical failure, not static balance problems.
Run this diagnostic step by step.
Throttle up from idle. Note the exact RPM where vibration starts. Does it happen at the same speed every time—like always at 60 percent throttle? That suggests prop imbalance. Random vibration at changing speeds points to loose hardware or bearing failure.
Stop right away. Pull the boat from water. Inspect the coupler for play. Grab the prop. Try to wiggle it side to side. Any movement means the coupler wore out. Replace it before running again.
Check prop shaft straightness. Remove the prop. Roll the shaft across a flat surface. Bent shafts show visible wobble. Replace these—you can’t straighten them well enough.
Check prop installation one more time. The drive dog ears must sit all the way in hub slots. Partial fit creates high-RPM wobble that static balancing can’t fix.
Problems that persist after these checks need dynamic balancing. Static methods can’t detect blade pitch variations or airflow imbalance. Check the Advanced Dynamic Balancing section for strobe testing and wind simulation techniques.
Quick Fault Identification Chart
Match your symptoms to find the root cause fast.
Prop drops to same position every test = Hub imbalance. File the hub as last resort. Sand the heavy hub section in 0.05mm passes.
Sudden vibration after smooth operation = Debris or damage. Clean well. Inspect for chips. Replace if cracked.
Wobble just at high RPM = Shaft misalignment or coupler wear. Check shaft straightness. Replace worn coupling.
Balance fails after multiple tries = Over-sanding. Add tape to fix minor cases. Replace prop for heavy removal.
Tape keeps falling off = Poor surface prep. Clean with alcohol. Sand a bit. Use small pieces. Press hard for 30 seconds each.
Boat veers despite balance = Dull or uneven blade edges. Sharpen after balancing, not before. File from trailing edge toward tongue. Never roll the leading edge.
Run through this troubleshooting flow every time vibration appears. Most problems trace back to mounting, debris, or rushed balancing work. Fix the real cause instead of rebalancing a prop over and over that tested fine the first time.
Best Practices and Pro Tips for Propeller Balancing
Balance your prop at the exact RPM you’ll run it. That number matters more than hobbyists think. A prop balanced at 3,000 RPM won’t perform the same at 8,000 RPM. The weight solution shifts. Phase angles change. Different speeds mean different physics.
Choose your target RPM based on how you use your boat. Racing boats need balancing at 40,000+ RPM. Casual cruisers balance at 15,000-20,000 RPM. Scale boats running realistic speeds work best balanced at 8,000-12,000 RPM.
Dynamic forces scale with speed. A propeller reads perfect at low RPM. But as centrifugal force increases, it develops imbalance. The heavier blade section pulls outward harder. Your static tester shows balanced. Hit full throttle and it becomes unbalanced.
Rotation Tricks That Cut Balancing Time in Half
Two-blade props hide a shortcut. Before adding weight or filing anything, rotate your prop 180 degrees on the drive dog. Remount it. Test again. This simple flip can cut your correction weight by 50 percent or more.
The prop hub rarely centers on the drive dog. Small manufacturing variations exist. Rotating 180 degrees moves these flaws to the opposite side. The result? Some imbalance cancels out on its own.
Three-blade props need 60-degree rotation tests. Try all three mounting positions—0°, 60°, and 120°. Mark each position with tape on the hub. Test vibration at each angle. Pick the orientation with the lowest shake. You just saved yourself grinding and tape work.
This rotation technique addresses mounting offset, not blade mass. A balanced prop offset by just 0.0005 inches generates 0.6 IPS vibration. That’s enough to feel through the hull. Plus, it stresses bearings.
The Two-Step Method That Guarantees Results
Static balancing comes first. This removes 50 percent of vibration issues before you power up the motor. Gravity-based testing costs nothing after you buy the tool. You can fix obvious mass differences in 10 minutes on your bench.
Mount the prop horizontal. Let the heavy blade drop. Remove material or add tape. Repeat until it holds level in any rotation position. This baseline work makes dynamic balancing faster and more accurate.
Dynamic balancing finishes what static started. Install your statically-balanced prop on the test stand or boat. Run at target RPM. Measure vibration with your phone app or sensor. Static methods can’t detect aerodynamic forces and blade pitch variations. That’s where the remaining shake comes from.
This two-step approach cuts total balancing time by 30-40 percent. Compare that to jumping straight to dynamic testing with unbalanced props.
Environmental Factors You Can’t Ignore
Wind kills accurate readings above 20 MPH. Gusts over 5-7 MPH make consistent measurements impossible. Your vibration numbers bounce all over. 0.3 IPS one moment. 0.8 IPS the next. Same prop, same RPM, different wind.
Test indoors if you can. Outdoor testing needs calm mornings or evenings. Check local weather for sustained winds under 15 MPH with minimal gusts. Patience here prevents wasted balancing work you’ll redo later.
Temperature affects plastic props more than metal. Nylon and ABS expand with heat. Balance a prop at 70°F in your garage. It runs different at 95°F on summer water. Thermal expansion changes mass distribution enough to matter for racing setups.
Balance props at the temperature you’ll race them. Run your motor until it reaches operating temp. That’s 10-15 minutes at 50 percent throttle. Then balance. The heat-expanded dimensions give you real-world results.
Understanding Measurement Variability
Consecutive runs showing ±0.03 IPS difference are identical. Your balancer isn’t broken. The prop didn’t shift. This variation is normal measurement noise. Stop chasing perfection below this threshold. You’re wasting time on readings that mean nothing.
Target 0.07 IPS or lower for smooth operation. Getting down to 0.03 IPS takes patience and careful attention to detail. Vibrations this low are too small to feel with your hands. You need instruments to detect the difference.
Phase angle gets weird as you approach zero vibration. The angle reading jumps around more at ultra-low shake levels. This confuses beginners who think something broke. Nothing’s wrong. Just physics being physics. Lock in your weight position once IPS drops below 0.1. Stop second-guessing the phase number.
The Post-Maintenance Rule That Saves Motors
Balance your propeller every season. Also balance after any maintenance that removes it. Prop shops, bearing replacements, shaft repairs—all change the mounting relationship enough to throw off existing balance.
Annual balancing catches gradual wear. Blades pick up tiny chips. Hub bores wear oval. Drive dogs develop grooves. These changes build up over time. Last year’s balanced prop vibrates this season. The 15-minute rebalance check prevents bearing damage that costs $40-80 to fix.
Advanced Diagnostics: Aerodynamic vs. Mass Imbalance
Rotating mass imbalance shows one pattern. IPS increases with RPM. Phase angle stays constant. The problem is blade weight distribution. Static and dynamic balancing both help here.
Aerodynamic imbalance shows different behavior. Both phase angle and IPS change with RPM and throttle position. This points to blade pitch differences. Or surface finish variations between blades. You need prop shop evaluation. Balancing alone won’t fix it.
Your initial vibration reads above 1.25 IPS after careful static balancing? Stop. The prop needs professional assessment. Blade tracking or angle issues exist that home balancing can’t correct.
The 80 Percent Problem Nobody Talks About
Most RC boats run with unbalanced props right now. Factory QC focuses on dimensional accuracy, not dynamic balance. Your new prop arrives meeting specs. But it carries enough imbalance to stress bearings and kill 10-15 percent of your speed potential.
This means every new prop needs balancing before first use. Don’t wait for vibration problems to appear. Balance as prevention. The 20 minutes you invest protects your $50-200 motor. Plus, you get faster lap times from day one.
Quick Reference: RC Boat Propeller Balancing Checklist
Print this page. Tape it to your workbench. You’ll use these steps every time you prep a prop.
The 7-Step Fast-Track Process
Step 1: Prep your propeller (3 minutes). Grab a small round file. Remove burrs from the hub bore—those rough casting edges that catch on your balancing shaft. The prop should slide on loose, never tight. A snug fit throws off every reading you’ll take. Clean casting flaws on blade surfaces with 220-grit sandpaper. Test-fit the prop on your boat’s drive dog ears now, not after balancing. Problems here waste all your work.
Step 2: Set up the balancer (2 minutes). Place your balancer on a solid surface without vibration. Your kitchen table works better than a shaky garage bench. Rotate the thumb screws until the bubble level centers. Remove stationary shafts from the balancer body. Store them in the top rail slots where they won’t roll away.
Step 3: Mount and identify (1 minute). Install your prop on the balancing shaft. Place the shaft across the balancer rails. Release it. Watch gravity work. The heavy blade rotates below shaft center within two seconds. Mark the back of this heavy blade with permanent marker. Number all blades 1-2-3 with your Sharpie. This tracking system stops confusion on multi-blade props.
Step 4: Balance the mass (5-15 minutes). Here’s the trick most guides miss: you can remove material from the light blade’s back surface or the heavy blade’s back—both methods work. Pick the lighter blade to avoid over-grinding your heaviest blade. Use 200-220 grit sandpaper in small, controlled strokes. Three passes maximum before retesting. The prop achieves balance once it stays horizontal with no preferred resting position. Test at 0°, 90°, 180°, and 270° orientations. All four must hold level.
Step 5: Sharpen after balancing, never before (5 minutes). This sequence matters. Balance first. Sharpen second. Use a flat file from trailing edge toward the tip on the front blade face. Avoid rolling the leading edge—this creates drag. Fold 220-grit sandpaper for precision work on the leading edge. You’re targeting a razor-sharp front edge. Square off the trailing edge. Don’t sharpen it. Dull trailing edges reduce cavitation.
Step 6: Final verification (2 minutes). Rotate your balanced prop to six random positions. Release at each one. A balanced prop stays level for 15+ seconds with zero drift. Any slow rotation means you need one more light sanding pass.
Step 7: Install and test run (3 minutes). Mount on your boat’s drive shaft. Hand-tighten the retaining nut. Run at 50 percent throttle for 30 seconds. Zero vibration through the hull confirms success. Any shake sends you back to Step 4.
DIY vs Professional Service Breakdown
|
Factor |
DIY Balancing |
Pro Shop Service |
|---|---|---|
|
Time investment |
10-30 minutes total (5 min prep + 5-25 min balance/sharpen) |
1-2 hours labor + 1-3 days shipping each direction |
|
Cost per prop |
$0 after tool purchase |
$10-20 balancing fee + $10 shipping = $30-50 total |
|
Equipment needed |
Precision balancer ($30-50), sandpaper ($3), flat file ($5), marker |
None—ship your prop bare |
|
Learning curve |
First prop takes 30 min; fifth prop takes 12 min |
Zero learning required |
|
Long-term value |
One balancer handles 50+ props over years |
Pay per prop forever |
The Du-Bro Tru-Spin Balancer costs $44.99 and handles props up to 12 inches. Precision Prop Balancer systems come with base, shafts, O-ring keepers, thumb adjusters, and bubble level for $35-45. Both pay for themselves after balancing three props.
Troubleshooting Fast-Reference Table
|
Problem |
Root Cause |
Fix It Now |
|---|---|---|
|
Prop binds on balancing shaft |
Hub casting burr or debris |
File the hub bore with small round file until prop slides on loose |
|
One blade drops fast |
Severe mass imbalance (factory defect common) |
Mark heavy blade; sand light blade back in 0.1mm passes; return prop if difference exceeds 0.5g |
|
Vibration persists after balancing |
Dull blade edges or shaft misalignment |
Sharpen leading edge post-balance; check shaft straightness by rolling on flat surface |
|
Multi-blade prop won’t level |
Blade pair imbalance on 3-4 blade props |
Number each blade; balance heaviest blade first; rotate to second-heaviest; repeat until all orientations hold level |
|
Speed loss despite smooth operation |
Dull prop reducing thrust |
Square trailing edge; sharpen leading edge to razor finish; avoid rounding edges |
|
Balancer readings inconsistent |
Unlevel base or loose thumb screws |
Center bubble level before each test; tighten thumb screws finger-tight |
Essential Tools Checklist
The balancer itself:
– Precision Prop Balancer with base, dual shafts (stationary + balancing), O-ring shaft keepers, thumb-screw adjusters, and built-in bubble level
– Du-Bro Tru-Spin alternative with centering cones, tension spring system, and 12-inch prop capacity
Abrasives and files:
– 200-220 grit sandpaper (fold technique for tight edge work)
– Flat metal file for post-balance sharpening
– Small round file dedicated to hub bore cleanup
Marking supplies:
– Permanent Sharpie for blade numbering (critical for 3-4 blade props)
– Bright marker for identifying heavy blade back surface
Example props for practice:
– ABC H4 recreational model
– VooDoo 17-4 PH stainless racing prop
Performance Benchmarks That Confirm Success
A balanced propeller shows three clear signs. First, it stays horizontal on your balancer with zero movement for 15+ seconds minimum. Second, the heavy side settles slowly—never a rapid drop. Third, rotation to any position (0°, 45°, 90°, 135°, 180°, 225°, 270°, 315°) produces identical level results.
Roller balancers fit props up to 12 inches diameter. Larger props need professional equipment with extended rail systems.
Material removal happens in tiny increments. Remove 0.05-0.1mm per sanding pass maximum. For temporary testing, add 1-3 small tape pieces to the light blade back. This quick-check method shows if you’re sanding the correct blade before making permanent changes.
Print this checklist. Laminate it. Keep it where you work on props. The steps stay the same on your first prop or your fiftieth. Speed and confidence both increase with practice.
Conclusion
Balancing your RC boat propeller matters. It’s what separates a boat that limps across the water from one that dominates. You now have what you need: skills to spot imbalance before it gets worse, methods for static and dynamic balancing, and fixes for common problems.
Start with static balancing using a basic tool. You’ll see less vibration and better performance right away. Race competitively? Dynamic balancing is worth the extra time. That 5-15% speed boost is real. Your motor will also last years longer.
Check your current propeller now with a balancing tool. Brand-new props often need adjustment too. Save this guide’s quick reference checklist. Make propeller balancing part of your pre-run routine. Spend fifteen minutes today. You’ll save hundreds on replacement parts tomorrow. Plus, you get that edge during races. Get out there and show what a balanced prop can do.