
You’ve hit something underwater, seen your boat slow down, or want better efficiency? Learning to replace a boat propeller yourself ranks as one of the top skills for any boat owner.
This repair might look scary. You might think you need a pro. But it’s a basic DIY task. You can save $300-800 in marina fees. Plus, you’ll be back on the water in under an hour.
Get the right tools first—a quality prop wrench, marine grease, and a few basic supplies. You’ll handle emergency propeller swaps in remote waters. You can also do planned upgrades for better performance.
This guide walks you through each step. You’ll remove a damaged propeller and check the propeller shaft. You’ll torque the propeller nut to the right setting. You’ll secure that critical cotter pin. Your outboard motor propeller, stern drive propeller, or inboard propeller gets installed right the first time.

Essential Tools and Materials for Propeller Replacement
Get your equipment ready first. The right tools make this job smooth. You won’t deal with mid-repair frustration from missing a critical piece.
Basic Tool Kit
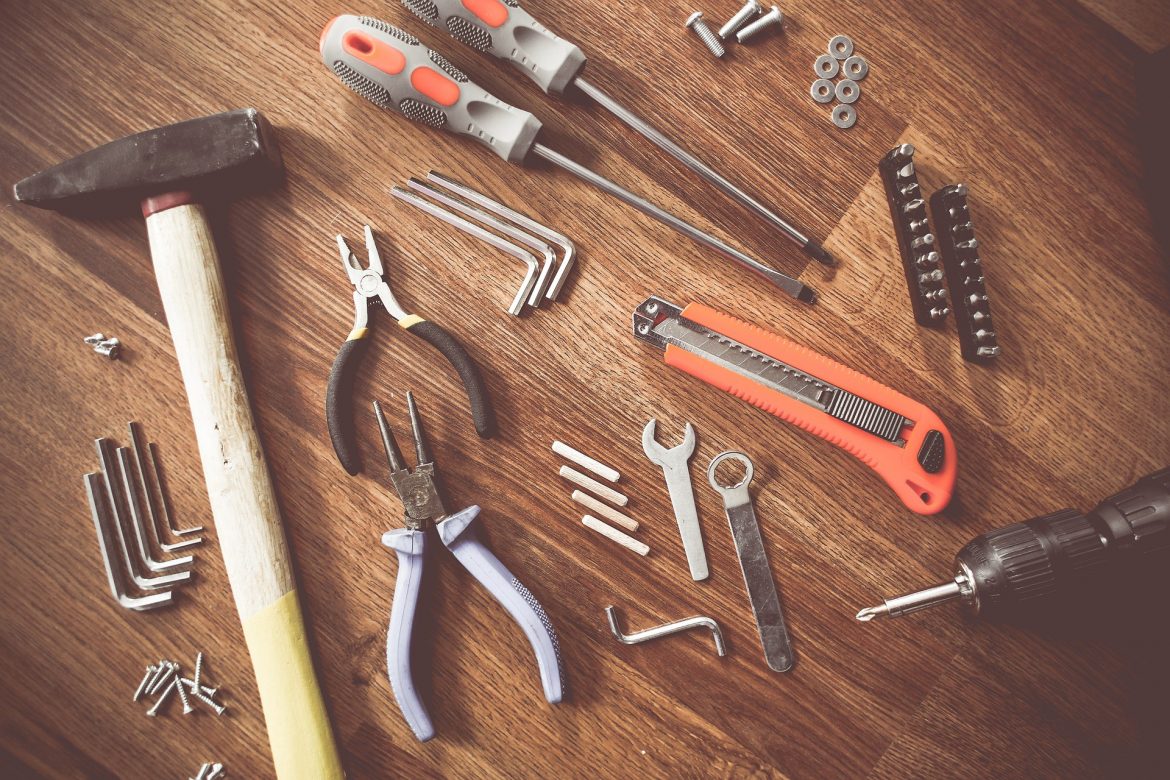
Prop wrench or socket set tops your list. This removes and torques the propeller nut. Match the size to your outboard motor propeller or stern drive propeller hardware.
Needle nose pliers pull out the cotter pin that locks your propeller nut. Never reuse old pins. They weaken after bending.
A small block of wood becomes your third hand. Wedge it between the prop blade and cavitation plate. This stops the propeller shaft from spinning as you loosen stubborn nuts.
Flashlight shows hidden damage. Shine it into the propeller hub and along the shaft. You’ll spot cracks, fishing line, or rust you’d miss otherwise.
Round out your toolkit with a sharp knife (trim extra marine grease or worn seals) and a screwdriver (bend lock-nut tabs on some inboard propeller systems).
Essential Materials Checklist
-
New cotter pin – Toss the old one. These cost pennies but prevent $800 disasters
-
Spare propeller nut and thrust washer – Carry extras. Losing one overboard ends your day
-
Waterproof marine grease – Lubricate shaft splines and hub. Skip graphite types that speed up rust
-
Clean rags – Wipe down parts before you put them together
-
Disposable gloves – Shield hands from grease and sharp prop edges
Annual maintenance tip: Remove your boat propeller once each year. Relubricate and retorque the nut. This fights saltwater rust before it fuses parts together.
Pre-Replacement Safety Checks and Preparation
Safety starts before you touch a single bolt. Pre-operation checks stop up to 23% of equipment accidents. They catch mechanical problems before they hurt you. Your boat needs this same care.
Kill the Engine and Disconnect Power
Turn off your outboard motor and pull the key. Accidental starts cause severed fingers every year.
Disconnect the battery on inboard and stern drive propeller systems. Remove the negative terminal first. Tape it away from the post. Electrical shorts burn through wiring or worse.
Wait 10 minutes after shutdown. The propeller shaft needs to cool if you’ve been running. Hot metal expands. It traps nuts or burns skin through work gloves.
Stabilize Your Boat
Trailer your boat for home repairs. You’ll work at a comfortable height without rocking. The propeller sits at waist level. No bending or kneeling in tight spaces.
Secure in-water boats before starting. Tie off at both bow and stern. Ask a friend to hold position if you’re in a slip. The boat shifts hard during propeller removal.
Block the lower unit on outboard motors. Wedge a cushion or foam blocks underneath. This stops the drive from swinging while you work on the propeller shaft.
Inspect the Work Area
Clear fishing line and debris from around the propeller hub. Tangled line hides shaft damage. It also catches your knife.
Check for fuel or oil leaks near the stern drive propeller housing. Wipe up puddles before they ignite from tool sparks. Marine grease catches fire when it becomes a mist.
Open engine compartments on inboard propeller systems. Let them air out for 5 minutes. Fumes build up fast in sealed spaces. One static spark near gasoline vapor causes an explosion.
Step-by-Step Propeller Removal Process
Position yourself at the propeller with all your tools within arm’s reach. The removal sequence matters more than speed. Miss one washer or reverse the order? You’ll spend an hour fixing the problem during reassembly.
Remove the Cotter Pin and Propeller Nut
Straighten the cotter pin using needle-nose pliers. Bend both legs until they’re parallel with the shaft. Pull it straight out through the propeller nut hole. Corroded pins resist—wiggle it side to side while pulling.
Insert your wood block between two propeller blades and the anti-cavitation plate. Push it tight against both surfaces. This locks the propeller shaft from spinning.
Fit your prop wrench or socket onto the propeller nut. Turn counterclockwise to loosen. Most nuts need 40-80 lb-ft of force to break free. Older installations resist more. Salt fuses threads over time.
Unscrew the nut all the way but don’t remove it yet. Leave about two full threads of space between the nut and propeller hub. This gap protects the propeller shaft threads during the next step.
Break the Propeller Taper
The propeller hub sits on a tapered section of the shaft. Friction holds it tight—sometimes too tight for hand removal.
Strike the exposed end of the propeller nut with a rubber mallet or hammer. Use firm taps, not full swings. Three to five hits break the taper seal in most cases. You’ll feel the propeller shift forward a bit.
Got a stubborn outboard motor propeller? Put penetrating oil around the hub-to-shaft connection. Wait 10 minutes, then repeat the striking process.
Slide Off All Components in Order
Remove the propeller nut all the way once the taper breaks. Set it in a container—not on the deck where it rolls overboard.
Slide the boat propeller straight off the shaft. Support its weight as it comes free. Propellers weigh 5-25 pounds depending on size.
Collect the thrust washer behind the prop. This flat metal ring protects the gear case. Some systems use two washers—one forward, one aft of the hub.
Note the propeller hub orientation if it’s a pressed-in rubber hub. The splines inside align one direction. Take a photo for reference before removal.
On stern drive propellers with forward thrust washers, remove the Delrin sleeve and any spacers. Lay parts out left-to-right in removal order. Reverse this sequence during installation.
Inspect the propeller shaft right after removal. Run your finger along the splines. Feel for burrs, nicks, or fishing line grooves. Shine your flashlight on the taper surface. Any scoring here stops proper seating of your new prop.
Wipe marine grease from all parts using clean rags. Old grease hides hairline cracks in the hub or washer damage you need to spot now.
Propeller Shaft Inspection and Maintenance

The propeller shaft handles huge rotational forces in corrosive saltwater. Check it regularly. This stops major failures that can leave you stranded offshore.
Visual Damage Assessment
Run your bare hand along the entire propeller shaft from hub seat to seal housing. Feel for raised burrs, fishing line grooves, or pitting. Your fingertips catch defects your eyes miss in shadowy lower units.
Inspect the spline teeth where the propeller hub connects. Look for rounded edges, cracks between teeth, or twisted patterns. Damaged splines make the boat propeller slip under load. Your engine revs but speed drops.
Check the tapered section where the hub seats. Shine your flashlight at a low angle across the surface. Scoring marks or color changes show the old prop slipped or corroded in place. Deep grooves (over 0.5mm) stop your new propeller from seating right.
Examine the thrust washer contact area behind the prop. A shiny wear pattern is normal. Dark pitting or step-worn grooves show too much play between parts.
Lubrication and Corrosion Prevention
Put fresh waterproof marine grease on all shaft surfaces before you reinstall parts. Focus on splines—coat every valley between teeth. This stops saltwater corrosion between your maintenance cycles each year.
Inspect rubber seals around the propeller shaft housing on stern drive propellers. Cracked or flattened seals leak water into bearings. Replace any seal that shows hardness or visible splits.
Check sacrificial anodes if your inboard propeller system uses them. Anodes protect the shaft from electrolysis in saltwater. Replace them at 50% of original size.
Commercial vessels get professional shaft surveys every 5 years. Recreational boat owners should remove and inspect each year. This catches wear before it damages the gear case. You avoid emergency shaft replacement too.
Installing the New Propeller
Your cleaned propeller shaft and new prop sit ready. Installation reverses the removal process. Precision beats speed here. A misaligned spline damages your lower unit. A backwards thrust washer creates vibration that wrecks components.
Prepare the Shaft and Hub
Wipe down the propeller shaft one final time with a clean rag. Remove any lint, old grease residue, or metal particles from your inspection work. Small debris stops proper seating.
Apply marine-grade grease in a thin, even coat across all splined surfaces. Don’t glob it on. Excess grease traps air pockets. This causes corrosion. You want just enough to coat the metal with a visible sheen. Work grease into each spline valley using your gloved finger.
Coat the tapered hub seat where the boat propeller sits. This stops galvanic corrosion between different metals. Plus, it makes removal easier next season.
Align and Install Components in Sequence
Position the thrust washer first if your system uses a forward washer. The smooth side faces the propeller hub. The indented or chamfered side contacts the gear case. Getting this backwards creates too much play. The washer fails.
Slide the new propeller onto the shaft with steady, even pressure. Match the hub splines to shaft splines—they fit one way. Rotate the prop while pushing until splines engage. You’ll feel it drop into place.
On Newport Vessels outboard motor propellers and similar designs, insert the drive pin through the shaft hole before mounting the prop. Twist the shaft until the pin runs parallel to the ground. This aligns with the propeller hub ridges.
Push the propeller toward the gear case until it sits almost flush. You should see 1/8 inch of space between the prop and motor compartment. A larger gap means misaligned splines. Remove and reinstall.
Add the aft thrust washer over the shaft threads. Smooth side contacts the propeller hub. This washer transfers thrust loads. It prevents the spinning prop from rubbing the nut.
Secure the Propeller Nut

Thread the propeller nut onto the shaft by hand. Turn clockwise until finger-tight. Cross-threading ruins shaft threads in seconds. If resistance feels wrong, back off and restart.
Tighten as far as your fingers allow. This seats all components together without damaging threads. Never skip straight to wrench tightening.
Insert your wood block between prop blades and the anti-cavitation plate. This stops shaft rotation during final torquing.
Use your prop wrench and turn another 1/4 turn past finger-tight. This works for most recreational boat propellers. Over-tightening bends drive pins. It strips aluminum threads on smaller outboards.
Test the tightness by removing your wrench. Try spinning the propeller nut with one finger. If it turns, add another 1/4 turn. Stop when one-finger spinning becomes impossible.
Lock with New Cotter Pin
Line up the propeller nut holes with the shaft hole. Sometimes you need to back the nut off a bit—never more than 1/8 turn—to align them. Under-torquing beats cross-threading this safety device.
Insert a new cotter pin straight through both nut and shaft. Push it until equal lengths stick out both sides. Reused pins break from metal fatigue.
Bend both legs of the cotter pin outward using needle-nose pliers. Wrap them around the nut in opposite directions. They should grip tight against the nut body. Loose pins vibrate out after a few hours of running.
Final Installation Checks
Spin the propeller by hand. It should rotate without grinding or binding. Rough rotation means misaligned components or pinched seals.
Check the hub gap one more time. That 1/8 inch spacing prevents prop-to-motor contact. This matters during flexing under load.
Use threadlocker on the nut threads if you run in harsh saltwater or high-vibration conditions. Medium-strength formulas work for most jobs. Skip this if you change props each season. You’ll need heat to remove the nut next time.
Reconnect your battery on inboard propeller and stern drive propeller systems. Double-check that all tools and parts containers are clear of the prop area before starting.
Your new boat propeller is installed and secure. A proper installation lasts an entire season. No loosening. No damage.
Proper Torque Specs and Tightening Methods
Most propeller shaft failures happen because of wrong nut torque. Too loose? The propeller walks off mid-cruise. Too tight? You strip aluminum threads or snap the drive pin. You need precision tools and the right method to get this right.
Match Torque Values to Your System
Outboard motor propellers need 40-60 lb-ft of torque on the propeller nut. Smaller motors (under 50 HP) sit at the lower end. Larger units need the full 60 lb-ft. Check your owner’s manual. Manufacturers list exact specs there.
Stern drive propellers need 55-80 lb-ft depending on shaft diameter. MerCruiser Alpha drives use 55 lb-ft. Bravo units jump to 80 lb-ft because they have larger propeller shafts.
Inboard propellers range from 70 lb-ft on sailboat auxiliaries to 200+ lb-ft on high-performance ski boats. Never guess. Too much torque cracks propeller hubs. Too little lets the boat propeller slip and damage spline teeth.
Use a Calibrated Torque Wrench
Beam-type and click-type wrenches work for most marine jobs. Calibrate your wrench every 12 months if you’re a professional. Recreational users should check calibration every 3-4 years or after dropping the tool.
Pick the right capacity range. Your torque wrench reads best between 20% and 100% of its max rating. A 150 lb-ft wrench gives bad readings below 30 lb-ft. Match the tool to your propeller nut spec.
Pull the wrench smooth and steady until it clicks or the beam hits your target. Jerking or quick pulls give false readings. The tool measures steady force, not impact.
Never use a regular socket wrench and guess by feel. Studies show skilled mechanics miss target torque by 15-40% without calibrated tools. That gap destroys expensive marine parts.
Installing and Securing the New Cotter Pin
The cotter pin locks everything in place. This tiny bent wire stops your propeller nut from vibrating loose. It also prevents your boat propeller from flying off at speed. Never reuse an old pin. Corrosion and metal fatigue make them fail after the first bend.
Insert and Position the Pin
Align the propeller nut slots with the hole through your propeller shaft. The torque wrench work you just finished positioned the nut close. You may need to turn it 1/8 turn backward to line up the holes. Don’t go past your maximum torque spec during this step.
Push a new rust-resistant steel cotter pin straight through the aligned holes. The head sits flush inside the castellated nut slot with no gap showing. Feed it through until equal lengths stick out both sides of the shaft.
Bend and Secure the Pin
Grab needle-nose pliers and split the two prongs apart at 180 degrees. One leg bends up and wraps over the top flat of the propeller nut. The other leg wraps around the exposed end of the propeller shaft.
Bend each prong outward in opposite directions using firm, smooth pressure. Wrap them tight against their surfaces—nut body and shaft end. Sharp angles cause breakage. Use a gentle curve when forming the bends.
Tap the bent ends with a rubber mallet to seat them flat. This stops them from catching fishing line or snagging gloves during maintenance.
Trim any excess length that extends beyond the nut diameter using diagonal cutters. Wear eye protection—cut pins can shoot out. Never use side-cutting pliers that nick and weaken the metal.
Pull-test the setup by trying to rotate the propeller nut with one finger. Zero movement confirms you installed it right. If it shifts at all, remove the pin and install the next size up.
Common Mistakes to Avoid During Replacement
Propeller replacement looks simple until you make one wrong move. Small errors add up fast. A backwards washer creates vibration. A reused cotter pin fails at cruising speed. Over-torqued threads crack your expensive hub. Here are the mistakes that damage your boat propeller, propeller shaft, and lower unit.
Skipping the Propeller Shaft Inspection
Never install a new prop without checking the shaft first. Fishing line grooves, corrosion pits, or bent splines hide under old marine grease. You’ll seat your new boat propeller onto damaged surfaces. The hub wears in patches. Performance drops within weeks.
Run your bare hand along every inch of shaft before applying fresh grease. Feel for burrs that catch your skin. Shine a flashlight at the tapered seat. Scoring marks show where the old prop slipped under load. Fix shaft damage before mounting new hardware.
Reusing Old Hardware Components
Cotter pins bend during removal. Metal fatigue weakens them for good. A reused pin vibrates loose after 5-10 hours of running. Your propeller nut backs off. The boat propeller walks off the shaft mid-cruise.
Buy new cotter pins every replacement. They cost $0.50 each but prevent $800 disasters. Replace worn thrust washers too. Grooved or pitted washers transfer uneven loads. This cracks propeller hubs on outboard motor propellers and stern drive propellers.
Check your propeller nut threads under good light. Stripped or crossed threads won’t hold torque specs. The nut loosens from vibration even with a fresh cotter pin installed.
Wrong Torque Application
Guessing torque by feel fails 40% of the time according to marine mechanic studies. Under-torqued nuts (below 40 lb-ft on most systems) let the propeller slip on splines. You hear engine revs increase but boat speed drops. Over-torquing (above 80 lb-ft on aluminum shafts) strips threads or snaps drive pins.
Use a calibrated torque wrench matched to your specs. Outboard motor propellers need 40-60 lb-ft. Stern drive propellers range 55-80 lb-ft. Inboard propeller systems go higher. Sometimes 200+ lb-ft on performance boats. Check your owner’s manual for exact numbers.
Pull the wrench smooth and steady until it clicks. Jerking or impact-style tightening gives false readings. The tool measures constant force, not shock loads.
Installing Components Backwards
Thrust washers have directional mounting. The smooth side contacts the propeller hub. The chamfered or indented side faces the gear case. Reversing this creates too much play between parts. The washer hammers itself to pieces within hours.
Propeller hub splines align one direction on most designs. Forcing the boat propeller onto misaligned splines rounds off teeth. You’ll strip the hub or shaft—both expensive repairs. Rotate the prop while pushing with gentle pressure. It drops into place as splines match.
Mixing Up Marine Grease Types
Automotive grease speeds up saltwater corrosion. It lacks the water-resistant compounds in marine-grade formulas. Your propeller shaft splines rust together between maintenance cycles. Next year’s removal requires heat and penetrating oil. Sometimes you need professional extraction.
Skip graphite-based greases on aluminum components. Graphite speeds up galvanic corrosion between different metals. Use waterproof marine grease with anti-corrosion additives instead.
Apply grease in thin, even coats. Not thick globs. Excess grease traps air pockets. These create corrosion cells that eat through metal faster than bare surfaces.
Ignoring the Wood Block Trick
Trying to loosen or tighten the propeller nut without blocking the shaft lets everything spin together. You strip bolt heads. You round off nut flats. Or worse—the prop wrench slips and gashes your hand on sharp blade edges.
Wedge a block of wood between any two propeller blades and the anti-cavitation plate. This locks rotation. Your wrench transfers full force to the nut threads instead of spinning the whole unit.
Forgetting Final Safety Checks
Spin the installed propeller by hand before reconnecting power. Rough rotation or grinding noises mean misaligned components. You might have pinched a seal. Or cross-threaded the nut. Or seated the hub crooked on the propeller shaft.
Verify the 1/8-inch gap between prop and motor housing. Zero clearance means the spinning boat propeller will contact metal under load. This destroys both surfaces and creates dangerous vibration.
Pull-test the cotter pin installation by trying to rotate the propeller nut with one finger. Any movement means loose hardware. Remove and restart the securing process before you launch.
Post-Installation Testing and Verification
Your new boat propeller sits locked on the shaft with fresh marine grease, proper torque, and a bent cotter pin securing everything. But you’re not done yet. Test before you launch. This prevents failures that strand you offshore or destroy your lower unit.
Initial Static Tests
Rotate the propeller by hand through five complete revolutions. It should spin without binding, grinding sounds, or rough spots. Any resistance? Your components are misaligned. Remove the boat propeller and check spline engagement. Rough rotation damages seals. It also wears hub surfaces in an uneven pattern.
Check the hub-to-motor clearance one final time. You need 1/8 inch of space between the propeller and gear case housing. Measure at three points around the edge. Zero clearance at any spot causes contact under load. This creates vibration. The vibration cracks propeller hubs and damages the propeller shaft seal.
Verify the cotter pin security by trying to rotate the propeller nut with one finger. Zero movement? Your installation is good. Any shifting means the pin bent wrong or the nut lost torque during alignment.
Water Testing Protocol
Start your engine in neutral and let it idle for 30 seconds. Listen for odd vibration or metallic sounds from the lower unit. These tell you hardware is loose or the thrust washer sits wrong.
Shift into forward gear at idle speed while the boat sits tied to the dock. Watch the propeller through clear water. It should rotate without wobble. A wobbling prop means you cross-threaded during installation or the hub is damaged and needs replacement now.
Run a short test cruise at half throttle for 5-10 minutes. Monitor engine RPMs against your baseline numbers. RPMs much higher than normal (500+ above spec)? The propeller is slipping on the shaft splines. Lower RPMs? You picked the wrong propeller pitch.
Check for cavitation during acceleration. Too many bubbles trailing the blades or a high-pitched whine? The propeller nut backed off a bit. Return to dock now and retorque to specifications.
Inspect the propeller nut after your first 2-hour run. The cotter pin should stay tight with both legs wrapped around nut and shaft. Any looseness means you need to reinstall with a new pin.
Troubleshooting Guide: Common Propeller Problems
Boat owners run into snags during propeller replacement. The nut won’t turn. The pin hole doesn’t line up. The propeller wobbles after you install it. These issues are frustrating, but each one has a simple fix.
Propeller Nut Won’t Loosen
Use penetrating oil around the nut threads. Saltwater often corrodes them together. Wait 15 minutes. Tap the nut with a rubber mallet to break the bond. Try your prop wrench again.
Heat the nut with a heat gun on tough cases. Warm it for 30-45 seconds. The metal expands and breaks the corrosion seal. Wear heat-resistant gloves.
Check your rotation direction. Most shafts use right-hand threads. Turn counterclockwise to loosen. Some stern drive propellers use left-hand threads. Your owner’s manual shows the correct direction.
Cotter Pin Holes Won’t Align
Back off the nut by 1/8 turn maximum. Don’t go past this point. You’ll lose proper torque on the propeller.
Use a smaller cotter pin if the shaft hole is a bit off. Drop one size down. The bend creates enough grip to secure the nut.
Install a castle nut on misaligned shafts. These nuts have multiple slots instead of two holes. You’ll find alignment within the proper torque range.
Propeller Won’t Slide Off Shaft
Tap the exposed nut harder with a hammer. Leave two threads engaged to protect the shaft. The taper releases after firm impacts.
Use a gear puller on stuck outboard motor propellers. Hook the arms behind the blade edges. Tighten the center screw slowly. Press evenly across all contact points.
Soak overnight with penetrating oil. Corrosion can fuse the hub to the shaft. Wrap the connection in oil-soaked rags. The chemical action loosens bonds that a hammer can’t break.
Choosing the Right Replacement Propeller
Your boat propeller controls acceleration, top speed, fuel efficiency, and how your boat handles. Pick the wrong prop and you’ll burn extra fuel, strain the engine, or struggle to get on plane. The right choice transforms performance.
Understanding Propeller Sizing Notation
Propeller specs use a simple diameter x pitch format measured in inches. A 10×13 means 10-inch diameter with 13-inch pitch. Diameter measures straight across the circle that spinning blade tips form. Pitch shows how far forward the prop travels in one full turn—like a screw going through wood.
Larger diameter props absorb more engine power. They create higher thrust at lower speeds. Your propeller shaft opening and gear case clearance limit how big you can go. Most outboard motor propellers range 9-15 inches in diameter.
Pitch controls your speed range. Lower pitch numbers (10-13) give stronger acceleration and better hole shot. You’ll plane faster with heavy loads or watersports. Higher pitch (15-21) delivers top-end speed on light, fast hulls. Every 1-inch pitch change moves engine RPM by 150-200 at wide-open throttle.
Material Selection Based on Conditions
Aluminum propellers cost $80-200. They work for most recreational use. Aluminum bends on impacts instead of breaking apart. This protects your lower unit from shock damage. You get solid performance across normal conditions.
Stainless steel runs $250-600+ but delivers 5x the strength of aluminum. Blades stay thinner and stiffer under load. Less flex means better fuel economy—typically 10-15% savings at cruise speeds. Durability jumps 4x higher. Stainless takes rock strikes and debris hits that destroy aluminum props. Go with stainless for rough water, high-performance boats, or saltwater where rust resistance matters.
Composite or plastic props serve as emergency spares. They cost $30-80 but sacrifice performance and durability. Keep one aboard for the trip home after damaging your main prop offshore.
Blade Count and Performance Trade-offs
|
Blade Count |
Thrust Level |
Efficiency |
Best Applications |
|---|---|---|---|
|
2-blade |
Baseline |
Highest |
Rare; sailboat auxiliaries |
|
3-blade |
Moderate |
High |
Most common; balanced performance, quick spin-up |
|
4-blade |
Higher |
Lower |
Hard-to-plane hulls, pontoons, watersports, heavy loads |
|
5-blade |
Highest |
Lowest |
Rough conditions, maximum acceleration priority |
Three-blade designs are the most common for stern drive propellers and outboard use. They spin up fast with minimal drag. Four-blade props produce 15-20% more thrust at low speeds. This helps heavy boats get on plane or pull skiers from the water. The extra blades reduce vibration too. Five-blade setups maximize bite in choppy water but burn more fuel at cruise.
Matching Specs to Your Engine
Gather your engine data first. You need rated horsepower, wide-open throttle (WOT) RPM range from the manual, and propeller shaft specs. Check shaft diameter and spline count. 14-spline shafts fit 15-35 HP engines. 13-spline versions handle 40-140 HP motors.
Your engine performs best within its WOT RPM range—printed on a cowling decal. A typical 90 HP outboard wants 5000-5800 RPM at full throttle. Test your current setup first. Run wide open with optimum trim (maximum angle without ventilation). Measure actual RPM.
RPM too high? You need more pitch. Each 1-inch increase drops RPM by 150-200. Running 300 RPM over spec burns the engine. Go up 2 inches in pitch.
RPM too low? Drop pitch to let the engine breathe. Running 400+ RPM under spec kills acceleration and loads the powerhead. Reduce pitch until you hit the target range.
Propeller Examples for Common Setups
Evinrude/Johnson E-TEC 40-130 HP owners: Part number 765175 gives you a durable 4-blade stainless steel design. The extra blade helps acceleration on heavier hulls.
General purpose 40-60 HP use: Try 765178 (10-inch diameter, 12-inch pitch, 3-blade stainless). This design handles most fishing boats and bowriders well.
Performance-focused setups: The Viper™ series offers 3-blade stainless construction with wide pitch selection. These work great for recreational boats where you want both strong acceleration and top speed flexibility.
Bass boats running 60+ mph: Raker™ stainless props work best for extreme speed use. These fit tournament rigs with high-output engines.
Rough water operation: Rogue™ 4-blade stainless steel props grip better in chop. The extra blade area reduces ventilation during wave impacts around the lower unit.
Testing Your Selection
Mount your new boat propeller using proper marine grease and torque specs. Run identical test conditions each time you evaluate props. Load the boat the same way. Use the same fuel level. Test on calm water.
Push to wide-open throttle and trim to maximum angle before the prop ventilates (sounds like racing, boat slows down). Hold this for 30 seconds. Record your GPS speed and engine RPM with a tachometer.
Compare results against your target WOT range. You’ve got the right match once RPM lands in spec and boat speed meets your goals for the hull type and load.
Maintenance Tips to Extend Propeller Life
Regular maintenance adds years to your boat propeller’s service life. It stops failures that leave you stranded. A good inspection schedule catches small problems before they turn into expensive replacements.
Annual Propeller Removal and Inspection
Remove your propeller once each season even if it looks fine. Pull it off the propeller shaft. Clean all surfaces. Check the hub interior for cracks or fishing line damage. This once-a-year teardown stops saltwater corrosion from fusing parts together. You’ll also spot wear on splines before they strip under load.
Apply fresh marine grease to all shaft surfaces during reinstallation. Old grease loses its water-resistant properties after 12 months of saltwater exposure. New grease creates a barrier against rust between your propeller hub and shaft metals.
Monthly Visual Inspections
Check blade edges before each trip for nicks, dents, or bent tips. Run your finger along the leading edge of each blade. You’ll feel damage your eyes miss. Small nicks (under 1/4 inch) can be filed smooth with a fine metal file. Deeper gouges need professional repair to stop cracks from spreading.
Examine the propeller nut and cotter pin each month during boating season. The cotter pin should stay wrapped tight around the nut with no loose ends. A bent or missing pin lets the nut vibrate loose. Your prop walks off the shaft within hours of running.
Spin the propeller by hand and feel for rough spots or grinding. Smooth rotation means proper alignment. Binding means a damaged thrust washer or bent propeller shaft. This needs quick attention.
Balance Testing Every Two Years
Professional propeller balancing removes vibration that damages your lower unit bearings and seals. Corrosion, blade repairs, and normal wear shift weight distribution over time. Even 0.5 ounces of imbalance creates harmful vibration at 5000+ RPM.
Take your prop to a marine shop with computerized balancing equipment. They’ll add small weights or remove material to restore factory balance specs. This service costs $60-120. It prevents $800+ lower unit rebuilds from bearing failure.
Conclusion
You now have the confidence to replace your boat propeller yourself. This skill puts you in control of your vessel’s performance. Plus, it saves you hundreds in marine service costs.
Got a damaged propeller from hitting something underwater? Need to upgrade for better efficiency? The steps you’ve learned help you handle the job right every time.
Three things make a successful propeller installation. First, secure that propeller nut with the correct torque. Second, apply marine grease to protect the shaft from rust. Third, never skip the cotter pin safety step. These basics protect your investment and keep you safe on the water.
Ready to get started? Browse high-quality replacement propellers for your outboard motor, inboard, or stern drive at VIF Propellers. Grab the right prop wrench and bookmark this guide. You’re all set to keep your boat running at peak performance—no matter where your next adventure takes you.