
You throttle up, the engine screams to life — and the boat goes nowhere. That sinking feeling isn’t your imagination. It isn’t your engine giving out on you either.
Your Suzuki DF115 or DF140 prop hub likely just spun. The fix starts with a dead-simple test. Run it at the dock in five minutes.
Don’t hand your rig over to a mechanic and wait three weeks for a diagnosis you can make yourself. Walk through this first. We’ll show you how to confirm rubber hub slippage, rule out anything more serious, and find the right replacement — so you’re back on the water, not sitting in a service queue.
Why Your DF115/DF140 Revs Up But Won’t Move — Spun Prop Hub Explained
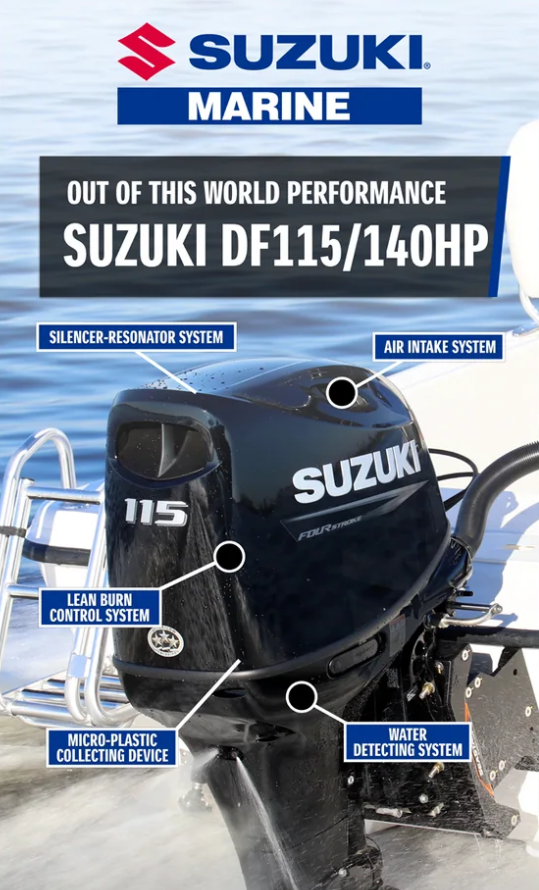
There’s a specific kind of mechanical betrayal that happens on the water. The tachometer climbs — 3,000, 4,000, 5,000 rpm — and the boat just… floats there. Not stalling. Not sputtering. Just refusing to go.
That disconnect between engine noise and actual movement has a name: spun prop hub.
What’s Going On Inside Your Propeller
The DF115 and DF140 don’t use old-fashioned shear pins. The propeller connects to the driveshaft through a pressed rubber hub insert instead. It’s a thick elastomer ring — about 50–70 mm in diameter — sitting between the metal inner hub (which spins with the shaft) and the outer prop body (which pushes water).
Under normal load, that rubber transfers torque without slipping. The shaft turns at 4,000 rpm. The prop turns at the same speed. You get thrust. The rubber also absorbs gear-engagement shock and sudden load spikes. Think of it as a mechanical fuse built right into the system.
That fuse blows, and the inner hub keeps spinning. The outer prop lags behind. You can lose 90% of effective propeller speed while the tachometer reads a normal rpm.
Why It Feels the Way It Does
At idle — 800 to 900 rpm — the torque demand is low. Even a damaged hub generates some friction. The boat nudges forward. Everything seems fine.
Push past 3,000 rpm, and the torque load jumps hard. The worn rubber can’t hold grip. The shaft overspeeds, the prop underspeeds, and your GPS barely moves. Boat owners describe it the same way: “like flooring a car that’s in neutral.”
A few patterns point straight at hub failure — not the engine, not the gearbox:
-
Shifts clean into forward and reverse with a solid clunk
-
Low-speed thrust feels normal, then drops off mid-acceleration
-
Backing off the throttle restores some movement — push it again and it slips
-
Symptoms get worse with heavier loads — full fuel, extra passengers, dive gear
That load-sensitivity is the tell. A fuel or ignition problem kills rpm. A gearbox failure creates grinding or no engagement at all. A spun hub lets the engine run free while stealing every knot above idle.
Why the DF115/DF140 Takes the Hit More Often
These engines go on 18–22 foot fishing and recreational boats. Most run 13–14 inch props with 19–23 inch pitch. At full throttle, that setup pushes the rubber hub close to its design torque limit — even under normal conditions.
Hit a submerged log, scrape a sandbar, or hammer the throttle into reverse a few too many times — the rubber doesn’t just slip once. It deforms for good. Many owners trace the exact start of symptoms to one specific moment: a shallow-water bump, a hard dock approach, a strike against floating debris. The hub did its job absorbing the impact. It just never bounced back.
Techs who work on DF115/DF140 units know this pattern well. A boat rolls in with clean engine response but zero thrust — the prop comes off first. No one touches the gear oil, clutch dogs, or driveshaft splines until that’s ruled out. Checking for hub slippage takes five minutes and costs nothing.
That’s the test we’re about to walk you through.
Spun Hub vs. Other Causes: How to Tell the Difference Before You Touch Anything
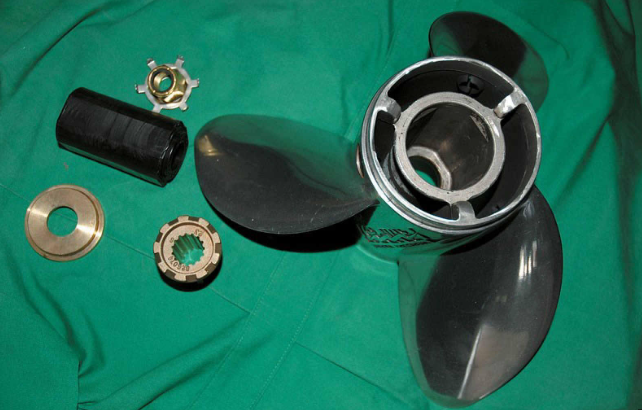
Three symptoms tell the whole story: RPM climbs hard, thrust drops off, and the throttle feels like something’s slipping underneath you. That combination doesn’t show up with fuel problems. It doesn’t show up with ignition issues. It points to the hub — nearly every time.
That distinction matters. Knowing what you’re dealing with saves you from spending money fixing the wrong thing.
The Signature Pattern of a Spun Hub
A failing rubber hub insert produces a distinct set of symptoms. Burn these into your memory:
-
High RPM + low or zero thrust — the engine spins 500–1,500 rpm higher than normal just to hold the same (or worse) speed
-
Planing time doubles or disappears — what used to take 3–5 seconds now takes 10+ seconds, or the boat never gets on plane at all
-
A slip moment at hard throttle — there’s a brief bite as you push up, then the load drops away. Think of a clutch losing friction mid-grab
-
Load sensitivity — the heavier the boat, the worse it slips. Every added passenger and every full fuel tank makes it worse
Severe cases show something harder to miss. You may catch a faint burnt rubber smell near the prop. You might spot small black rubber fragments squeezed out around the hub barrel. Neither of those is subtle. See either one, and the hub insert is gone.
What It’s NOT: Ruling Out the Engine and Gearbox
Fuel and ignition problems behave in a different way. Those failures cause RPM to drop too — the engine chokes, misfires, or won’t rev past a certain point. You get low RPM and low thrust at the same time. A spun hub gives you the opposite. The engine pulls hard. The boat just sits there.
Gearbox failure has its own feel. Kill the engine, pull the key, and shift in and out of forward and reverse a few times. A hub problem still gives you clean, firm gear engagement — a solid mechanical clunk with light resistance. Grinding sounds, a lever that goes nowhere, or a gear that feels like permanent neutral — those point to a lower unit issue. Stop there and take it to a shop.
Also pull a few drops of gear oil. Clean oil with no visible metal flakes points away from internal gearbox damage. A spun hub fails at the prop-to-shaft interface. It doesn’t put metal into the oil.
The 30-Second Pre-Test Check
Do this before you run the full five-minute hub test. Stand at the stern and work through each step:
-
Engine off, key out. Confirm neutral. Keep everyone away from the prop.
-
Ask yourself three questions: Did RPM spike while thrust dropped? Did the acceleration feel like the power was spinning free? Has the boat hit anything hard lately — a sandbar, floating debris, a rough dock approach?
-
Shift and feel. Engine off, engage forward gear. Does the lever land in a clear, firm position? Grinding or zero resistance is a gearbox red flag — not a hub problem.
-
Hand-twist the prop blades. Motor in gear, try rotating a blade by hand. Any rotational play — even a few degrees — points strongly to hub slippage. A healthy hub in gear holds firm. The prop shouldn’t move relative to the shaft at all.
-
Look and smell. Burnt rubber near the hub. Black melted material along the barrel. Either one confirms hub damage before you’ve touched a single bolt.
Gear engagement feels solid. The oil is clean. Your symptoms match the high-RPM/low-thrust pattern. That combination points straight to a spun hub. The five-minute test ahead will confirm it with a permanent marker and a short run.
What You Need for the 5-Minute Hub Test (No Special Tools Required)
Three items. That’s the whole list.
-
A socket wrench with a 24–26 mm metric socket (or 15/16″–1″ for imperial). A 200–300 mm ratchet or breaker bar gives you the leverage to break the prop nut loose without a fight.
-
A permanent marker — oil-based, black or red. It needs to write clean on bare aluminum or stainless steel and hold up through water and gear oil. A standard Sharpie does the job.
-
Your kill switch lanyard. It’s already on the boat. You’ll use it twice — pull it out to make the engine impossible to start while you’re near the prop, then clip it in to run the short power check.
That’s it. No prop puller. No torque wrench. No dealer diagnostic tool.
One Safety Step Before You Touch Anything
Key off. Lanyard out. Gear lever in neutral — move it forward and back once by hand to confirm nothing is engaged.
Running the test on a trailer? Two ratchet straps across the bow and stern are enough. Tied at a dock? Add a third line amidships before you touch the throttle. The engine runs at 1,000–1,500 rpm for just 15–30 seconds. The lines just need to hold the bow from walking forward while you watch the marker.
Both versions of the test — trailer static or dockside with the engine running — finish in under five minutes. The static version runs closer to three.
Step-by-Step Hub Slip Test for Suzuki DF115 and DF140
Mark it. Load it. Read it. Three moves, five minutes, and you’ll know what you’re dealing with.
Step 1: Pull the Kill Switch Lanyard and Remove the Prop
Lanyard out. Gear lever confirmed in neutral — move it forward and back once by hand. Don’t skip this. The propeller nut on DF115B and DF140B models is torqued to 50–60 N·m (37–44 lbf-ft) from the factory. It won’t break loose with finger pressure.
Fit your 24–26 mm socket and get the breaker bar behind it. Crack the nut counterclockwise. Once it’s off, slide away the washer and spacer in order. Then pull the prop straight off the shaft. Set the hardware somewhere it won’t roll into the bilge. You’ll need every piece for reassembly.
What you’ll see on the shaft: splines, a stopper block, and the inner hub face of the propeller you just removed. That inner hub face is where the test lives.
Step 2: Draw the Alignment Line
This is the whole test. One line. Done right, it tells you everything.
Hold the prop with the hub barrel facing you. Place it back on the shaft. Don’t torque the nut yet — seat it hand-tight. The inner hub and outer prop shell should rest in their normal position. Take your permanent marker and draw a single straight line across from the outer hub shell onto the inner hub’s spline-end face. One stroke. Both surfaces. Same point.
That line is your baseline. Those two surfaces move apart during the load test — the line breaks. That break is your diagnosis.
Step 3: Reinstall and Secure the Boat
Thread the nut back on and torque it to spec. Clip your lanyard in. Confirm your dock lines — or your trailer straps — are holding firm at bow and stern.
Step 4: Run the Load Test
Start the engine. Confirm cooling water is flowing from the pilot hole and the red TEMP lamp is off. Idle for 60 seconds.
Push the throttle to mid-to-high load — close to full throttle. Hold it there for 10–20 seconds. Watch the tachometer. RPM climbs hard but the boat barely moves — you already have your answer. Back off to idle.
For a cleaner read on early-stage slippage, split it into two 10-second runs. Return to idle between them. That two-pass method catches hubs just starting to slip — the ones that still bite for a moment before they let go.
Kill the engine. Lanyard out.
Step 5: Read the Line
Walk back to the stern and look at the marker line.
The line is offset — the two segments no longer connect. Hub slippage confirmed. The outer prop shell rotated on its own from the inner hub under load. The rubber insert is gone or deforming past its limit. You need a replacement prop.
The line is fully intact. The hub held. Check for propeller blade damage or deformation. Look at shaft spline wear or corrosion. There may also be a lower unit issue that needs a deeper teardown. Don’t replace the prop hub until you’ve ruled those out.
There’s no gray area here. Any visible gap between the two line segments — any break you can see — counts as a confirmed slip. Suzuki doesn’t publish a millimeter threshold. Working techs don’t need one either. If it moved, it failed.
What Your Test Results Mean — And What To Do Next
The marker line tells you everything. Now act on it.
If the Line Moved: Your Hub Is Gone
Stop running this engine under load. Not “limit your speed.” Not “finish the trip and deal with it Monday.” Stop.
Here’s why this matters more than it sounds.
A rubber hub insert slips. The inner spline hub and the outer prop shell stop moving as one unit. Every throttle push hits that interface — not a clean rotational load, but an impact. Repeated impacts on a spline connection degrade it fast. Contact stress that sits between 300–600 MPa can spike past 800–1,000 MPa under a slipping condition. That’s close to the yield limit of the steel involved. The spline teeth start deforming. The engagement surface drops from full-face contact down to edge contact. At that point you’re not just replacing a prop — you’re looking at shaft work.
The damage builds quietly. It moves through stages:
-
Early stage: Spline faces polish and micro-pit. The hub still transmits torque, but grip time during hard acceleration gets longer. Temperature at the interface runs 20–40°C higher than baseline.
-
Middle stage: Spline teeth develop localized galling. Axial play in the connection increases by 0.1–0.3 mm. The prop starts to feel vague on throttle input.
-
Late stage: Tooth height loss of 30–50%. Actual torque capacity drops below half of rated. Fatigue cracks form at the spline root — 45-degree diagonal cracks. Those cracks propagate and the shaft breaks. A $200–$400 prop hub replacement turns into a lower unit rebuild.
A hub replacement is a propeller-level repair. A competent shop handles it in one working day. The cost is a fraction of what comes next if you keep running. That gap — between a prop swap and a lower unit teardown — is the exact cost you’re trying to avoid.
If the Line Held: Look Elsewhere Before You Replace Anything
A clean, unbroken line means the hub did its job. The prop and the shaft moved together under load. Don’t buy a replacement prop yet.
Work through these in order:
1. Check your propeller pitch match.
Too little pitch lets the engine over-rev without loading up. The tachometer reads high, but effective thrust is low. It feels like slippage. It isn’t. Pull your prop specs and cross-reference them against Suzuki’s published WOT rpm target for the DF115/DF140: 5,000–6,000 rpm at full throttle. The engine hitting 6,200–6,500 rpm on a light load means the prop is under-pitched for your setup.
2. Look at the splines directly.
Pull the prop off. Inspect the shaft splines under good light. Corrosion, chipped teeth, or worn engagement faces can allow micro-movement that won’t show up clearly on the marker test — but it still bleeds thrust. Run your thumbnail across the spline teeth. They should feel sharp and uniform. Rounded or flattened tooth crests mean replacement.
3. Factor in your load.
A boat loaded 10–15% above designed displacement pushes the prop harder for the same speed. A full fuel load, extra passengers, and gear stowed heavy in the stern changes your effective trim angle and adds drag. Thrust feels weak only under that kind of load? Redistribute weight forward and retest before swapping any components.
4. Check lower unit gear oil.
Pull the drain plug. Let a few drops fall onto a white rag. Clean, amber-colored oil rules out internal gearbox damage. Metal flakes or a milky, water-contaminated color means the lower unit needs professional attention — and that’s a separate job altogether.
Your Next Step: Replacing the Hub
Hub slippage confirmed on a Suzuki DF115 or DF140 points to one repair: a new propeller with an intact hub insert, matched to your engine’s output and your hull’s load.
Guesswork won’t cut it here. The right prop pitch affects everything — hole shot, top-end speed, and how hard the new hub works under load. A prop that’s a touch under-pitched runs the replacement hub hotter than it needs to be. One that’s over-pitched strains the gearbox on every hard acceleration.
VIF Propellers stocks replacement props built for DF115 and DF140 applications. Each one matches engine output range, shaft diameter, and typical hull loading for 18–22 foot fishing and recreational boats. You want a prop that fits right, runs in the correct rpm band, and doesn’t push the next hub insert into the same overloaded condition that killed the first one. Start there.
You’ve done the hard part. You ran the test. You know what you’re dealing with. The rest is just a parts swap.
Choosing the Right Replacement Propeller for Suzuki DF115 / DF140
Two numbers lock in your replacement prop before anything else: 15-tooth spline and 4-1/4″ hub base. Every DF115 and DF140 uses this combination. Get those wrong and the prop doesn’t fit — full stop. Diameter, pitch, and rotation direction come after. Not before.
Match the Spec, Then Pick Your Pitch
The DF115/DF140 runs a 14-inch diameter prop in most configurations. Pitch is where the real decision lives.
Three starting points cover the vast majority of builds:
-
14×19 — heavy loads, frequent full-boat trips, boats that struggle to reach target rpm at the top end
-
14×21 — the most common match for mid-console fishing and recreational boats in the 18–22 foot range. This is the right first guess for most owners
-
14×23 — light loads, speed-oriented setups, boats that already hit the high end of the rpm band with no strain
Suzuki’s WOT target for both engines is 5,000–6,000 rpm. That’s your calibration number. Running 6,200–6,500 rpm wide open? Pitch up by 2 inches. Dragging below 5,000? Pitch down by 2. One adjustment at a time.
Aluminum First, Stainless to Finish
A compatible aluminum prop for DF115/DF140 runs around $134.99 for a 14×21. Use it as your pitch-verification tool. Run it, confirm the rpm band, confirm the hole shot. Once you know the pitch works for your hull and your load, move to stainless.
Stainless holds its shape under hard acceleration. It resists deformation under sustained load. It also outlasts aluminum by a wide margin on a 115–140 hp application. Aluminum gets you to the right spec. Stainless keeps you there.
What to Check on VIF Propellers
Check any VIF prop listed as compatible with DF115/DF140. The product description should show the 15-tooth spline and 4.25″ hub/base spec. Confirm both. Then match your pitch to the starting points above. For most owners replacing a failed hub on a mid-console or fishing boat, 14×21 is the call.
FAQ: DF115 / DF140 Hub Slipping — Quick Answers
These are the questions that come up every time. Short answers. No filler.
Q: How do I know it’s the hub and not the gearbox?
The rpm tells you. A spun hub lets the engine climb without resistance — often past 5,600–6,200 rpm — while boat speed stalls or drops mid-run. That “free-spinning” feeling is the hub’s rubber insert losing grip under load.
A gearbox problem sounds different. You’ll hear metal-on-metal noise. There’s resistance when you shift. Gear oil comes out milky or flecked with metal.
Shifts are clean? Oil looks fine? Engine revs without a fight? That’s a hub issue, not a gearbox issue.
Q: Do I need special tools? Can I run this test at the dock?
No special tools required. The hand-twist check described earlier needs nothing but your grip.
For a water-based check, watch your WOT rpm against actual GPS speed. A healthy DF140 should hit 5,800–6,100 rpm at full throttle and move at normal pace for your hull and load.
Tachometer is in range — or climbing past it — but GPS speed is down more than 20–30%? The hub is slipping. You don’t need a dealer tool to see that.
Q: Can I limp back to the dock on a slipping hub?
Sometimes, yes.
The slip is intermittent — the hub grabs, releases, grabs again? Keep revs below 3,000 rpm and a short, slow return trip is workable. Don’t accelerate hard. Don’t hold high throttle.
The hub is gone and the boat won’t move at any throttle position? Don’t push it. Running a destroyed rubber insert under repeated load burns the bushing down to nothing and starts eating the spline teeth.
Drop the anchor or call for a tow. That one decision is the difference between a prop swap and a lower unit rebuild.
Q: What are the torque specs and installation checkpoints when replacing the prop?
Suzuki specifies 50–60 N·m (37–44 lbf-ft) for the propeller nut on DF100/115/140 models. Use a torque wrench. Don’t estimate it.
Before you install:
– Coat the driveshaft splines with marine-grade waterproof grease. Bare splines corrode fast and seize against the hub.
– Install components in order: thrust washer → spacer → prop → washer → nut.
– After torquing, confirm the cotter pin or lock tab fully seats into the nut slot. Zero play. Any movement there and the nut backs off under vibration.
After installation, run a short test. Check for vibration. Confirm WOT rpm returns to the 5,600–6,200 rpm range. Confirm boat speed comes back.
RPM still high and speed still low after a fresh prop? Check the splines before assuming the new hub is bad.
Q: What should I check after replacing the prop to avoid slipping again?
Three things:
-
Spline condition. Before the new prop goes on, inspect the driveshaft splines up close. Run a thumbnail across each tooth. Sharp, uniform edges are good. Rounded or flattened crests mean the engagement surface is worn down.
Spline wear above 20–30% of original tooth height is a problem. A new hub insert will slip faster than it should — there’s not enough mating surface left to hold full torque transfer. Get the shaft inspected before putting new parts on a worn interface.
-
Prop pitch match. A prop that’s under-pitched for your setup keeps the engine running above its WOT target band. That forces the rubber hub to absorb excess torque on every hard run. Confirm your WOT rpm lands between 5,800–6,100 rpm with your typical load. RPM is running high across multiple outings? Pitch up by 2 inches.
-
Gear oil check. Pull a few drops from the lower unit drain. Clean amber oil means the gearbox is intact. Milky white or metal-flecked oil means a seal or gear failure alongside the hub problem — that job needs a shop, not a prop swap.
Q: What causes hub slippage in the first place?
Three patterns cover most failures on DF115/DF140 units:
-
Sustained under-pitching — too little pitch keeps WOT rpm stuck below 5,600 rpm on every outing. The rubber insert absorbs torque beyond its design limit each time.
-
Hard-launch habits — repeated full-throttle starts from rest spike shear stress in the elastomer. One hard hit doesn’t kill it. Fifty do.
-
Undertorqued prop nut — a nut below 50 N·m lets the prop micro-shift on the shaft during acceleration. That micro-movement shears the hub from the inside out — slow, silent damage — until it fails.
Quick three-step check: (1) rpm high, speed low = suspect hub. (2) clean oil, no grinding = rule out gearbox. (3) recent impact or prop work = high probability the hub took the hit.
Q: I still can’t confirm the diagnosis. What do I do?
Write down these numbers before you contact anyone:
-
Engine model: DF115 / DF115A / DF140 / DF140A / DF140B
-
Gear ratio (DF140 standard: 2.59:1)
-
Current prop: diameter, pitch, material
-
WOT rpm and GPS speed under normal load
-
Hull length and approximate loaded displacement
Send that to VIF Propellers’ technical support or product selector. With those numbers, you get a pitch recommendation and hub diagnosis fast — no guesswork, no trial-and-error ordering.
Splines look damaged or the hub failure was severe? Take it to an authorized Suzuki service center. They source the correct OEM hub kit, confirm shaft condition, and sign off on the lower unit all at once.
Still unsure which prop fits your DF115 or DF140 after the test? Go to the VIF Propellers DF115/DF140 product page and use the model selector. Filter by spline count (15-tooth) and hub base (4-1/4″), then match your pitch to the WOT rpm band. Or leave a message for the technical team — they’ve seen this failure pattern enough times to give you a straight answer in one round.
Conclusion
A spun hub feels catastrophic on the water. But it’s one of the cheapest, easiest fixes in boating — once you know what you’re dealing with.
You came here with a frustrating problem: throttle up, engine screams, boat goes nowhere. Now you have a five-minute test. It tells you whether your Suzuki DF115/DF140 prop hub is the culprit — no marina visit, no guesswork, no $150 diagnostic fee for something you already figured out yourself.
The hub failed? Don’t replace it with the same prop that let you down. This is the moment to upgrade. Better materials. Tighter tolerances. Built for your engine’s torque curve.
Browse VIF’s DF115/DF140 propeller lineup, punch in your specs, and get back on the water before the weekend’s gone.