
You’re ready to launch your RC boat, but the stock propeller just isn’t cutting it. Maybe it’s the wrong pitch for your motor. Or you need a specific diameter that nobody makes.
Here’s what experienced hobbyists know: crafting your own rc boat propeller does more than save money. It helps you understand how propeller pitch, blade angle, and diameter work together. These three factors transform your boat’s performance.
You can work with salvaged aluminum cans. Or try 3D printing custom designs. Some people cast their own brass props. The process shows you what makes these spinning pieces of metal work.
I’ll walk you through three proven construction methods. We’ll start with simple beginner techniques. Then move to more advanced approaches. You’ll also learn the design calculations that matter. These separate a wobbling disaster from a balanced speed machine.
By the end, you’ll know how to build a propeller. More importantly, you’ll understand why each design choice matters for your specific setup.
Understanding RC Boat Propeller Fundamentals
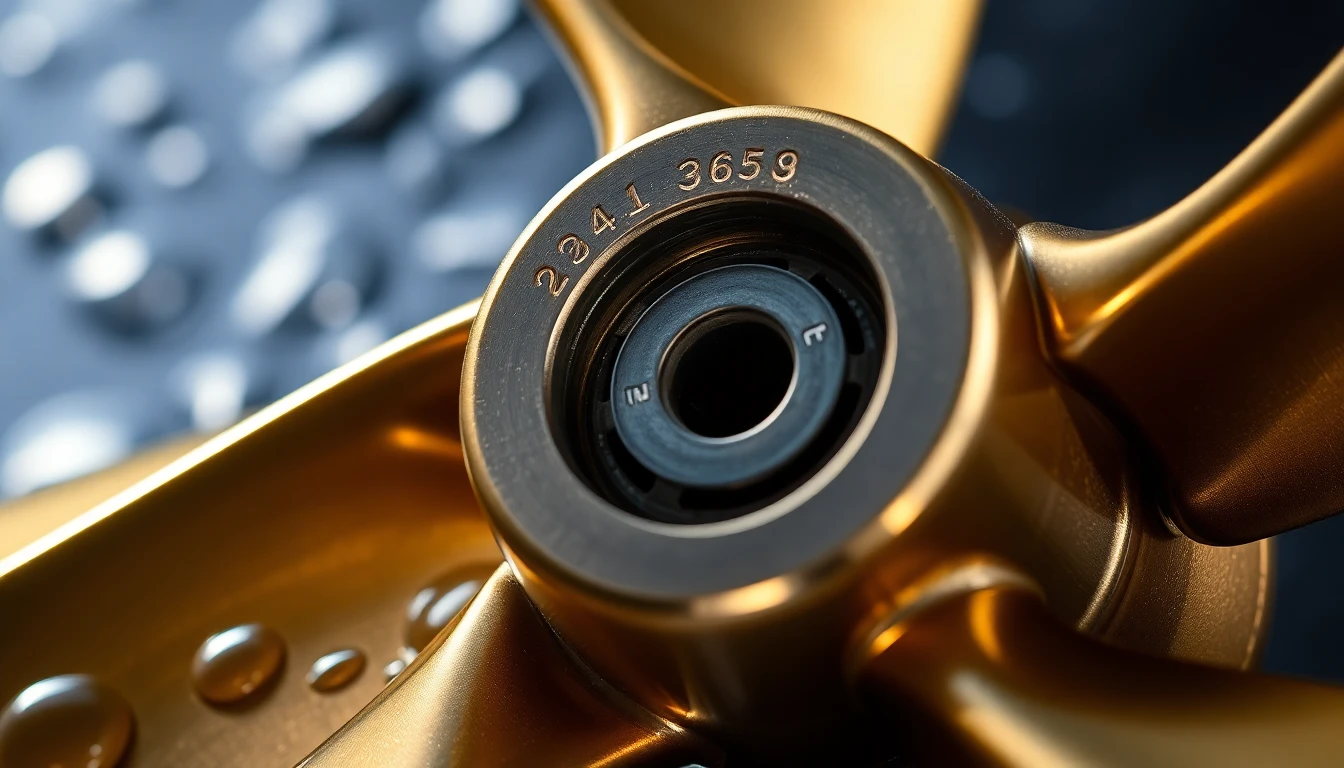
Every rc boat propeller has two numbers stamped on its hub. Take a 14 x 19 prop: that’s 14 inches of diameter and 19 inches of pitch. These numbers matter. They control everything your boat does on the water.
Propeller diameter decides how much water your prop can grab. A larger diameter gives you more thrust. It handles more power too. But it creates drag that limits your maximum RPM. Picture a sports car’s tight steering wheel versus a bus’s massive one. You get more leverage but lose quick response. Smaller diameters spin faster with less resistance. They trade raw pulling power for higher RPM.
Propeller pitch measures how far forward the prop travels per revolution. Here’s what counts: adding 1 inch of pitch costs you about 200 RPM at full throttle. Higher pitch gives better top speed but kills your acceleration. Lower pitch gets you on plane faster but caps your maximum speed.
Propeller blade design adds another factor. Two-blade props hit the highest top speeds. Three-blade setups accelerate faster from a stop. But start with a 20% smaller diameter than the same two-blade prop. This offsets the extra drag.
Match these parts to your goals:
-
Maximum speed runs: Small diameter + maximum pitch
-
Quick hole shots: Any diameter + low pitch
-
Heavy pulling power: Large diameter + any pitch
Upgrading from stock RTR props? Never go beyond a 2mm diameter increase without pro testing. Boost pitch? Cut the diameter to balance it out. Too much pitch spikes amp draw. It creates dangerous heat. Plus, you risk cavitation—that’s where your boat sits dead in the water. The propeller just spins in aerated foam doing nothing.
Shaft size compatibility is crucial. Standard Dumas plastic props fit 1/8-inch shafts. Their brass propeller options need 3/16-inch bores. The Octura 1445 (45mm diameter x 63mm pitch) fits 0.187-inch shafts. It costs $27.00 in beryllium alloy. Hot Racing’s M41 brass replacement set runs $48.99. This CNC-balanced set works with the Traxxas Spartan. It solves the flex and cavitation problems that plague stock plastic units.
Propeller balance makes the difference between smooth running and vibrating chaos. An unbalanced prop creates shaking forces. These forces stress your drive system. They drain battery life through wasted energy. Even 0.5 grams of imbalance destroys performance at 20,000 RPM.
Essential Materials and Tools for DIY RC Boat Propeller
You need different gear based on your build method. Start simple. Gather the basics first. Get special tools later as your skills grow.
Core Materials for Any Build Method
Plastic sheets work great for beginners. Pick 0.5mm to 1.5mm thickness polystyrene or ABS plastic. These materials cut with ease. They survive early testing without costly errors. Aluminum sheets take you to the next level. Use 0.8mm to 1.2mm thickness for hand-shaping projects. Thicker aluminum requires power tools.
Brass propeller stock comes in 1mm to 2mm sheets. This material cuts clean and smooth. It fights rust better than aluminum. Quality brass runs $15-25 per square foot. Stainless steel propeller blanks cost more at $30-40 per square foot. They last a lifetime. They survive high-power setups that melt plastic props in seconds.
For 3d printed propeller projects, use PLA filament for test models. Switch to PETG or ABS for water-proof final versions. Nylon filament makes blades that resist flex. But you need a heated print chamber for this.
Essential Hand Tools
A jeweler’s saw with 24-32 TPI blades cuts fine shapes. Get needle files in multiple types: flat, round, half-round, and triangular. These files shape blade edges with care. 220-grit to 600-grit sandpaper makes surfaces smooth. Rough surfaces wreck propeller efficiency.
Digital calipers with 0.01mm accuracy cost $20-30. They check shaft size fit. A pitch gauge keeps blade angles even. Machinists rely on these tools. You should too.
Epoxy resin and cyanoacrylate glue join hub parts together. Propeller balance stands find weight errors. Basic models start at $25. Pro magnetic balancers run $80-120.
Power Tools for Advanced Builds
A rotary tool with cutting discs, sanding drums, and polishing wheels does detail work. Dremel-style tools cost $40-80. Bench grinders shape brass and steel fast. Add a buffing wheel attachment for mirror finishes that cut drag.
Serious builders need small lathes to turn perfect hubs. Harbor Freight mini-lathes start around $600. Drill presses make centered shaft holes every time. Hand-drilling wrecks propeller balance before you test.
3D printers give you endless design options. Budget FDM printers cost $200-300. Resin printers make smoother blade surfaces. Entry-level units run $250-400. Both let you test propeller blade design changes fast. Print five different pitches in one afternoon. Find what works for your boat performance goals.
Method 1: Hand-Crafted Aluminum Can Propeller (Beginner Level)
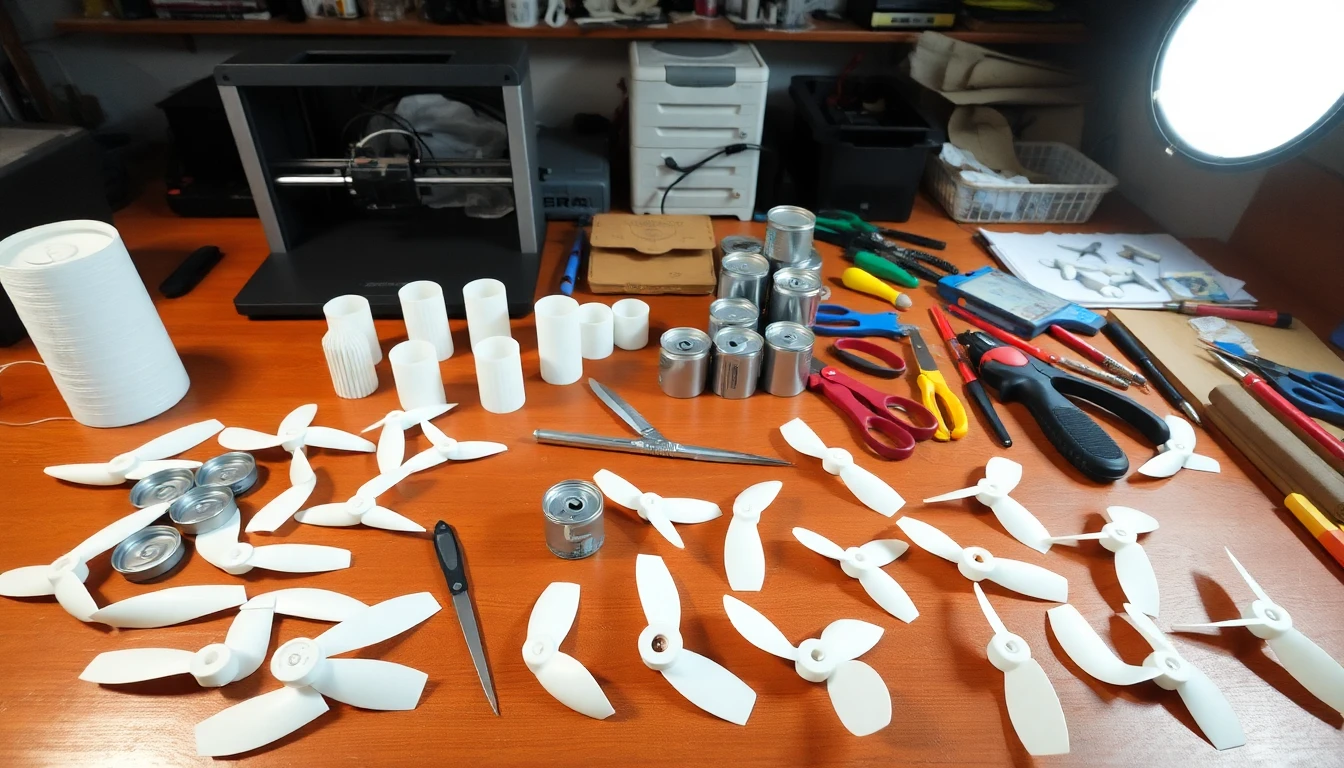
Grab those empty soda cans from your recycling bin. They’re about to become your first custom rc boat propeller. This method costs almost nothing. You have everything you need sitting in your garage right now.
What You’ll Need
Collect 24-36 clean aluminum cans without dents or creases. Damaged metal creates weak points. These fail under water pressure. You’ll also need 5-inch precision scissors, ultra fine point Sharpie, Loctite Super Glue Gel, and a hobby knife with fresh blades. Add a wooden dowel for shaping curves. Download free propeller templates online or trace an existing prop you like.
Most builders overlook shaft size until they finish. Measure your drive shaft first. Standard RC boat shafts run 1/8-inch (3.175mm) or 3/16-inch (4.76mm). Mark this diameter on your template. A loose fit creates vibration. This kills propeller efficiency. Too tight and you’ll never mount it.
Cutting and Shaping Your Blades
Trace your template onto flattened can sections using the Sharpie. Cut outside the lines by 1-2mm. This gives you material to file down for perfect edges. Your scissors will bite through aluminum like paper. Keep cuts smooth and continuous. Stop-and-start cutting leaves jagged edges. You’ll need extra filing time to fix them.
Shape blade curves using the wooden dowel. Press the aluminum against the dowel’s curve. Roll it back and forth. Check your propeller pitch angle often. A 30-degree blade angle creates moderate pitch for balanced performance. Steeper angles boost top speed but hurt acceleration. Shallower angles do the opposite.
Putting It Together
Here’s where beginners mess up. Don’t use a nail through the center hub like those airplane models. RC boats need threaded attachment. Drill your center hole 0.5mm smaller than your shaft diameter. Use a small nut and bolt through the hub instead. This creates adjustable grip strength. Too loose and your prop spins free under load. Too tight and you crack the aluminum.
Stack two propeller discs together for the hub. Glue them with Super Glue Gel before drilling. This doubles your hub thickness to 0.16-0.20mm total. Single-layer hubs flex and warp at high RPM.
Test propeller balance before water trials. Spin the finished prop on a nail balanced across two cups. Heavy spots dip down. Sand them until the prop stays level at any position. Even 0.3 grams of imbalance creates vibration. This drains your battery 15% faster.
Your first aluminum can prop won’t match a professional brass propeller in durability. But it teaches you how propeller diameter, pitch, and blade shape affect boat performance. Plus you’ll spend under $5 including glue. That beats a $27 Octura prop for learning the basics.
Method 2: PVC Pipe Multi-Blade Propeller Design
PVC plumbing pipe sits in every hardware store for pennies per foot. This material handles impact strength, vibration resistance, and water pressure better than aluminum cans. Plus, standard pipe elbows give you pre-formed curves. No hand-shaping needed.
Why PVC Beats Other Materials for Multi-Blade Designs
Propeller blade design using PVC costs 70% less than brass stock. A 10-foot length of Schedule 40 PVC pipe runs $8-12. That’s enough material for five complete propellers. The polymer flexes under stress instead of cracking. Your blades survive underwater debris strikes that would bend metal props.
PVC’s real advantage shows up in propeller efficiency. The material’s flexibility creates self-adjusting blade angles under different loads. High-speed runs? The blades flatten to reduce drag. Acceleration from standstill? They cup deeper to grab more water.
Building the Best Setup
Standard PVC elbows become your blade tips. Split them lengthwise with a fine-tooth saw. Tests across 100mm, 110mm, and 130mm widths proved that 110mm elbow tips generate peak torque. This size creates a 200% torque increase over flat-blade designs at 30-degree angles of attack.
Start with your hub-side blade angle at 30 degrees. Twist the blade toward the tip until you reach 90 degrees at the outer radius. This spiral setup matches how commercial brass propeller and stainless steel propeller designs handle water flow. The concave elbow surface faces the tip at an angle. This grabs clean water flow without cavitation.
Stress Testing Results You Can Trust
CFD simulation data shows what your PVC prop handles. At 7 m/s water speed with 110mm elbow width, von Mises stress peaks at just 0.36688 N/m². Total blade displacement measures 1.9067mm. Zero red-zone stress appears across the entire blade surface.
Compare this to wider tips: 130mm elbows push displacement to 1.9067mm at the same speed. Narrower 100mm tips generate 1.8179mm displacement but give less torque. The 110mm sweet spot balances maximum thrust with structural strength.
Assembly Steps That Matter
Drill your shaft size hole through three stacked PVC discs. Use 3/16-inch bore for standard hobby shafts. Glue the hub stack with PVC cement before drilling. This prevents layer separation under load.
Space your blades around the hub. Three-blade setups need 120-degree spacing. Four blades require 90-degree marks. Uneven spacing destroys propeller balance fast. You’ll feel the vibration before you hit half throttle.
Test boat performance in calm water first. PVC props excel at mid-range speeds of 15-25 mph. They match 3d printed propeller efficiency at a fraction of the material cost.
Propeller Mold Casting Method for Replication

Professional builders copy winning designs through mold casting. This process captures every curve and angle from a master propeller. You’ll produce identical copies. No need to hand-shape each blade.
Box-Type Sand Mold Construction
The standard box-type sand mold splits at the blade page. Position blade pages in your lower sandbox. Mount the leaves and blades in the upper section. This separation lets you pull out the finished casting without damage.
Equal-pitch blades need one scraper for steady angles. Radial variable-pitch blades need a pair of scrapers. Each scraper keeps different angles from hub to tip. Modern propeller blade design varies pitch this way. You get maximum propeller efficiency.
Choose your casting direction based on size:
-
Top casting works for propellers under 1 meter diameter. The mold stays simple. Temperature spreads evenly. Heat moves from blade tips toward the hub. Riser fills voids as metal cools. Most RC boat builders use this method.
-
Bottom casting handles large propellers better. Molten metal enters at the hub’s lowest point. This stops oxides and shrinkage defects at the blade backs. The process takes more setup time. You get cleaner results.
Creating Your Master Model Mold
Surface quality on your master model matters most. Every scratch, bump, and flaw transfers to every prop you cast. Start with a plug that’s already perfect. Sand it to 600-grit smoothness before making your mold.
Put gel coat on the plug first. This creates the smooth outer surface. Cut fiberglass cloth into 2-inch strips. Lay these strips over the tacky gel coat. Mix fiberglass resin with hardener at the maker’s ratio. Brush or roll the mixture across your layup. Work out air bubbles with a plastic spreader. Trapped air creates weak spots.
Fiber-resin ratio maxes out at 35% fiber by volume. That equals 50% by weight. Going higher makes the mold brittle. Less fiber means weak structure.
Lay your material on a glass surface for even support. Pour resin onto the glass. Add roving and comb resin through the fibers. Add more resin. Use an old credit card as a squeegee. Push resin deep into the roving. Flip the piece and repeat on the reverse side.
Wait 24-48 hours for initial cure before removing the mold from your plug. Use plastic wedges or compressed air to separate them. Never use metal tools. They gouge the mold surface. Trim flash and sand rough edges smooth.
Casting and Post-Processing
Clamp your mold halves together tight. Pour your chosen metal—brass propeller alloy works great for strength. Aluminum casts easier but dents faster. Let the casting cure 24 hours minimum before removing clamps.
Place the clamped mold in an oven for 2 hours after pouring. This gets rid of internal stress. Cool it all the way before separating the halves. Put warm mold halves in boiling water to soften overflow material. Wax the mold while it’s still warm. This gets it ready for the next casting.
Cut off riser and gate pieces from your new prop. Create two flat surfaces at the front and rear of the hub. Bore along the hub center to match your shaft size. Put a keyway into the shaft hole. Use a lathe, boring machine, or custom vertical boring tool. Check your work against a template. You need to verify propeller diameter and hub size.
Process the blade surface first as your flat reference. Measure blade thickness again. Figure out how much metal to remove from the back. Drill to your target metal layer thickness. Machine the blade back based on your front surface. This keeps your designed propeller pitch.
Final Finishing for Performance
Balance testing comes before water trials. Mount your prop on a balance stand. Sand heavy spots until the prop holds any position without rotating. Even 0.2 grams off-balance ruins boat performance at high RPM.
Fill gaps or bumps with body filler. Sand the entire surface to 400-grit. Polish to 800-grit for less drag. Smooth surfaces cut through water better than rough castings.
Your fiberglass mold produces dozens of props from one master pattern. Each casting matches the original within 0.5mm. This beats hand-shaping accuracy by ten times. Weigh your original pattern or a similar carbon prop. This tells you fiber amounts for future batches.
That smooth master model surface? It’s still key. One scratch copies across every prop you cast. Take your time on the plug. Rush the mold and you’ll sand fifty props instead of one.
Key Design Numbers and Math
-1000x1000.webp)
Three numbers decide if your rc boat propeller pushes water well or just wastes battery spinning in foam. Get them wrong and your motor burns out before one battery pack runs out.
Propeller diameter sets your max thrust. The formula: Thrust (T) = 0.5 × ρ × A × V². Here ρ = water density (1000 kg/m³), A = propeller disc area, and V = water velocity through the disc. Double your diameter and you get four times the swept area. But larger diameters need much more torque to spin at useful RPM.
Check your motor’s torque curve against diameter before cutting metal. A 540-class brushed motor making 0.28 Nm torque maxes out around 50mm diameter props. Push to 60mm and your motor bogs down under load. Battery amps spike. Heat builds fast. The Octura 1445 at 45mm diameter stays safe for most sport setups.
Pitch Math and Speed Numbers
Propeller pitch turns rotation into forward motion. Calculate speed with: Speed (mph) = (Pitch × RPM × 60) / (63360 × Slip Factor). The slip factor covers water resistance. RC boat props usually run 0.85-0.92.
Take a 2-inch pitch prop at 18,000 RPM with 0.88 slip: (2 × 18000 × 60) / (63360 × 0.88) = 38.7 mph. Real tests show speeds hit 35-37 mph. Turbulence, hull drag, and cavitation steal extra power.
Here’s what builders miss: adding 1mm of pitch costs about 300 RPM on a 3S LiPo setup. Jump from 50mm pitch to 55mm and you lose 1500 RPM. Top speed might gain 2-3 mph. But acceleration drops hard. Time to plane doubles or triples.
Blade Angle and Thrust Setup
Propeller blade design turns pitch into blade angles. Calculate blade angle at any point: Tan(θ) = Pitch / (2π × Radius). For a 60mm pitch, 40mm diameter prop at 15mm radius: Tan(θ) = 60 / (2 × 3.14159 × 15) = 0.6366. This gives θ = 32.5 degrees.
Blade angle shifts from hub to tip on good props. Calculate at 25%, 50%, 75%, and 100% of blade radius. Mark these angles on your template. The hub section runs 40-45 degrees for max bite. Outer tips flatten to 20-25 degrees to cut drag at high speeds.
Three-blade props boost thrust but need diameter changes. Use the blade area ratio formula: Total Blade Area / Disc Area = 0.45-0.65 for best propeller efficiency. Three blades at 20mm width on a 50mm diameter give: (3 × 20 × 25) / (π × 25²) = 0.76. Too high. Cut width to 15mm for a 0.57 ratio. This stops wake patterns from killing thrust.
Weight and Balance Math
Propeller balance needs exact numbers. Calculate safe imbalance: Max Imbalance (g·mm) = 6350 × W / N. Here W = total prop weight (grams) and N = maximum RPM. A 12-gram brass propeller at 20,000 RPM allows: 6350 × 12 / 20000 = 3.81 g·mm max moment.
Turn this into weight difference: Imbalance Weight = Moment / Radius. At 20mm average radius: 3.81 / 20 = 0.19 grams max difference between opposite blade pairs. Most hobby balance stands catch 0.1-gram differences. Pro stainless steel propeller builds aim for 0.05-gram accuracy for boat performance at race speeds.
Shaft Size and Torque Setup
Shaft size math stops failures. Use this formula: T = (π / 16) × τ × d³. Here τ = material shear strength and d = shaft diameter. Stainless steel shafts take 400 MPa shear stress. For 0.5 Nm motor torque: d³ = (16 × 0.5) / (π × 400 × 10⁶) = 6.37 × 10⁻⁹. This gives d = 1.85mm minimum. Standard 3/16-inch (4.76mm) shafts give 15× safety factor. Plenty for hobby use.
Keyway depth matters more than most builders think. Cut too deep and you drop shaft strength by 40%. Standard rule: keyway depth = 1/4 shaft diameter, width = 1/4 shaft diameter. On a 3/16-inch shaft, that’s 1.19mm deep × 1.19mm wide. This moves full torque while keeping 85% of shaft strength.
Test your math before cutting expensive brass propeller stock. Build a 3d printed propeller test version first. Check propeller diameter, pitch angles, and hub fit. Printing costs $2-3 versus $15-40 for metal errors. Run the test at 50% throttle to check balance and thrust direction. Then cut metal.
Balancing and Performance Testing
Your new rc boat propeller sits on the workbench looking perfect. But looks mean nothing until you prove it works. Skip testing? You’ll dump a wobbly prop into the water. It eats batteries and shakes your drive system apart.
Static Balance: The First Critical Check
Mount your prop on a balance mandrel or a smooth nail suspended between two supports. A balanced prop stays put at any rotation angle. Heavy spots always swing to the bottom. Mark them with a permanent marker.
Remove material from the heavy blade using 220-grit sandpaper. Sand the blade’s back surface only—never the curved front. Check balance after every 10-15 strokes. Most brass propeller and stainless steel propeller builds need 0.05-0.15 grams removed from one blade. 3d printed propeller designs show larger imbalances of 0.2-0.5 grams. This happens due to filament density variations.
Test tolerances matter more than most builders think. A 50mm diameter prop at 18,000 RPM with 0.3-gram imbalance creates 3.2 Newtons of vibration force. That’s enough to crack motor mounts. It also drains 12-15% extra battery power through wasted motion.
Water Testing Protocol
Start your first water test at 30% throttle in calm conditions. Watch for these failure signs:
-
Surface cavitation: Prop churns white foam instead of biting clean water—reduce propeller pitch by 2-3mm or decrease blade count
-
Shaft vibration: Visible wobble at the coupling—recheck propeller balance right away
-
Motor overheating: Temps above 65°C in first minute—propeller diameter exceeds motor torque capacity
Run five-minute sessions at increasing throttle: 30%, 50%, 70%, full power. Record amp draw at each level. Compare against your motor’s spec sheet. A 540-size motor rated 35A maximum pulling 42A at full throttle? This signals propeller efficiency problems. Or you picked the wrong pitch.
Baseline vs. Optimization Testing
Set your baseline metrics first. Measure top speed, time to plane (stopwatch from throttle-up until hull lifts), and battery voltage drop after three-minute runs. Write these numbers down.
Make one change at a time. Adjust blade angle 2 degrees. Reduce diameter 2mm. Or switch from three-blade to two-blade setup. Retest using identical conditions. Same battery charge level. Same water location. Same wind conditions.
A 2mm pitch reduction improves time to plane by 1.5-2 seconds. But it cuts top speed 2-3 mph. Switching from aluminum to a brass propeller of identical dimensions adds 8-12 grams weight. The benefit? It stops flex-induced cavitation at high RPM. You often recover 4-6% boat performance.
Track amp draw changes with care. Adding 5mm diameter might boost thrust. But amps jumping from 28A to 38A? You’ve shortened runtime by 26%. That math doesn’t work out well.
When Numbers Reveal Problems
Compare your results against realistic targets. Sport RC boats with 3S LiPo setups should hit 25-35 mph depending on hull design. Time to plane under 3 seconds shows good propeller blade design matching your power system. Battery voltage shouldn’t drop below 10.5V during five-minute runs on fresh 3S packs.
Your test data builds a performance profile for future changes. Document shaft size, final blade angles at hub and tip, material choice, and all measured speeds. Build prop number two? You’ll know what worked and what failed.
Common Issues and Troubleshooting
Most rc boat propeller problems make themselves known. Your motor screams. The hull shakes. Water churns white behind the transom. Here’s how to decode what’s breaking and fix it fast.
Cavitation Destroys Performance
White foam erupting behind your prop means cavitation. The blades spin through aerated water instead of biting clean flow. Propeller efficiency drops to 40-60% of normal thrust. Your boat sits dead or moves very little despite full throttle.
Root causes:
– Excessive propeller pitch: Blades attack water at angles steeper than 35 degrees at the hub
– Blade damage: Nicks or bent edges disrupt smooth flow
– Undersized propeller diameter: Too small for your motor’s torque output
Quick fixes: Reduce pitch by 3-5mm through blade re-shaping. Sand out blade edge damage to 400-grit smoothness. Switch from two-blade to three-blade design. This spreads water load across more surface area. Test a brass propeller if you’re running plastic stock. Brass blades resist flex that triggers cavitation at high RPM.
Vibration and Balance Problems
Violent shaking at speed signals propeller balance failure. Even 0.2-gram imbalance at 18,000 RPM generates destructive force. Check for these specific issues:
-
Bent blades: Impact damage creates uneven weight distribution
-
Manufacturing errors: Poor 3d printed propeller layer adhesion leaves voids
-
Worn shaft coupling: Allows prop wobble independent of blade balance
Mount the prop on a balance stand. Mark heavy spots. Remove material from blade backs using 320-grit sandpaper. Take 15-20 strokes at a time. Recheck after each session. Replace props with visible blade cracks right away. No amount of sanding fixes structural damage.
Motor Overheating and Amp Spikes
Your motor hits 70°C+ within two minutes? You’ve mismatched propeller diameter or pitch to motor specs. 540-class motors rated 35A maximum pulling 42A+ means certain failure.
Diagnosis steps:
1. Check amp draw with a watt meter at 50% throttle
2. Compare against motor manufacturer specs
3. Measure actual propeller pitch with calipers—printed specs lie
Solutions: Drop diameter by 5mm or reduce pitch by 5mm. Change one at a time, not both. Stainless steel propeller builds dissipate heat better than plastic. But they can’t fix basic sizing errors. Switch to lower kV motors if you need larger props for pulling power.
Shaft Slippage and Hub Failure
Props spinning free under load signal hub or shaft size problems. This happens in these cases:
-
Hub bore drilled 0.3mm+ oversize
-
Missing or damaged keyway
-
Insufficient set screw torque
-
Cracked hub from over-tightening
Measure shaft diameter with calipers. Drill replacement hub bore 0.1mm smaller than measured size for press-fit. Cut keyway depth to 25% of shaft diameter—deeper weakens the shaft. Use medium-strength threadlocker (blue Loctite) on set screws. Torque to 2-3 Nm maximum on 3/16-inch shafts.
Boat Performance Regression
Speed dropped 5+ mph compared to earlier runs? Walk through this checklist:
-
Blade surface fouling: Algae or debris adds drag—clean to bare metal
-
Blade tip erosion: High-speed water strips material from edges
-
Bent shaft: Creates oscillating thrust vectors
-
Battery voltage sag: Test cells one by one; replace weak packs
Document baseline performance metrics after successful builds. Record top speed, amp draw, and time to plane numbers. This makes future troubleshooting data-driven instead of guesswork.
DIY vs Professional Propellers: Which One You Need
Build your own prop. You’ll learn more about water flow than any book teaches. But some performance needs CNC precision. That’s just how it works.
DIY Props Work Great for Learning
Hand-crafted props are perfect for beginners. Your first aluminum can rc boat propeller costs under $5 in materials. You’ll mess it up. You’ll remake it three times. That’s the goal. Each mistake shows you how propeller pitch and blade angle create thrust.
3d printed propeller designs let you test ideas fast. Print five different pitches in one afternoon. Total filament cost? $10-15. Run each version. Write down speeds and amp draw. Find what works before you cut expensive brass propeller stock.
Budget plays a big role here. Hobby-grade stainless steel propeller units from Hot Racing cost $48.99 for the Traxxas Spartan. That’s entry-level. Custom machine shop work? You’re looking at $200-400 just for balancing and blade repairs. DIY saves you hundreds on trial and error.
Simple maintenance keeps DIY props working well. Sand out small nicks with 400-grit paper. Polish blade surfaces every 3-6 months in warm water. Add biodegradable anti-rust coating. These steps cut fuel use by 10-20%. Better propeller efficiency makes the difference.
Pros Give You What You Can’t Make
CNC-machined propellers cut vibration by 25-50% versus hand-built ones. That’s real data, not hype. Professional propeller balance hits 0.02-gram accuracy. Your hobby balance stand stops at 0.1-gram detection. Race speeds above 20,000+ RPM? That gap shows up.
Bad damage needs expert help. Bent blades, cracked hubs, or shaft size wear? Machine shops straighten metal without making it weak. They re-pitch blades to exact angles. They solve problems that wreck DIY tries.
Variable pitch propeller blade design from hub to tip needs precision tools. Pros measure pitch at 25%, 50%, 75%, and 100% blade radius. They adjust each section on its own. This tuning adds 0.6 knots top speed. Plus it burns 10% less fuel at cruise.
Material cost decides repair value. Aluminum props at $160-220 cost more to fix than buy new. But stainless steel propeller units at $400-800? Repair makes sense. Bronze props over $500? Expert work pays off.
Check your propeller’s slip percentage first. Best performance sits around 10% slip. That’s the gap between theory travel per spin and real distance. Your engine hits max RPM at full throttle? Your propeller diameter or pitch is too much for the motor. Pros spot these problems quick through boat performance tests.
Conclusion
Making your own rc boat propeller saves money. But there’s more to it. You gain full control over your boat’s performance. You now have three proven methods: the quick aluminum can hack tests concepts fast. The PVC design works great for daily use. The casting technique lets you copy your best designs. Each method teaches you about propeller pitch and blade shape. Small tweaks lead to real speed gains.
Here’s what matters most: start simple. Measure everything. Test constantly. Your first propeller won’t be perfect. That’s the point. Each version sharpens your skills. You’ll know what your hull needs.
Ready to level up? Grab some aluminum cans this weekend. Make your first prototype. Master the basics first. Learn what peak propeller efficiency feels like. Then you’ll know when brass or stainless steel makes sense. Competition-level performance needs precision-machined options. Your boat, your rules—now go make some waves.