
You’ve just pulled your RC boat out of the water. There it is—the dreaded sight: a broken rc boat propeller with bent or missing blades.
Don’t rush to order an expensive replacement yet. Here’s what most hobbyists miss—many propeller issues can be fixed in under 30 minutes with the right technique. This saves you 50-70% compared to buying a new rc boat motor and propeller kit.
But here’s the catch: the wrong repair method can damage your motor. It can also create dangerous imbalances that wreck your boat’s performance.
This guide cuts through the confusion. You get a practical damage assessment system that tells you when to grab your epoxy. You also learn when to invest in a replacement.
You’ll get step-by-step repair instructions using tools you already own. You’ll learn which marine grade adhesives hold up under water pressure. Plus, you’ll discover how to match motor compatibility for replacement.
Dealing with minor blade chips? Considering a full performance upgrade? You’ll walk away knowing what to do—and what not to do.
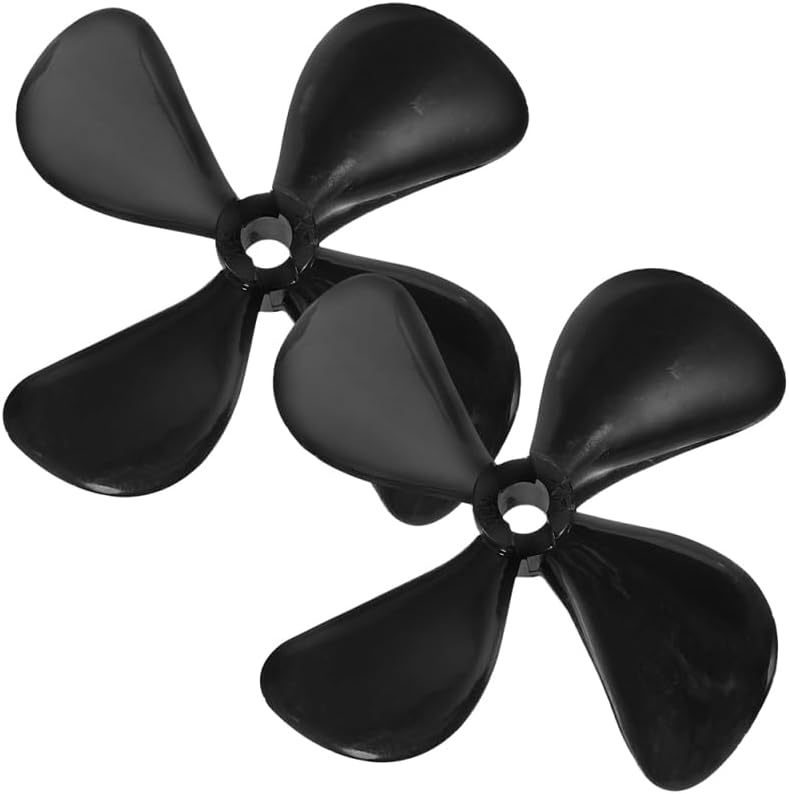
Assessing RC Boat Propeller Damage (Repair or Replace?)
Your first job is spotting what’s wrong. Damage falls into four categories. Each category tells you if you need a quick fix or a parts order.
The Four Types of Propeller Damage
Bent rc boat propeller blades happen from hitting rocks, sand bars, or submerged debris. The telltale sign? Your boat pulls to one side or vibrates at speed. Pull the prop off and lay it flat on a table. All blades should sit at identical angles. Even a 5-degree difference throws off your entire power system. This imbalance hammers your motor bearings. Over time, it can crack your transmission housing.
Cracks and fractures are sneakier. That hairline crack you notice? It’s a ticking time bomb. Water pressure forces it wider with every run. Nicks from hard objects create stress points. This is where your blade will snap in half. I’ve seen props fail mid-throttle. Boats end up dead in the water, miles from shore.
Warped blades twist out of their original pitch. Sometimes you’ll see missing chunks. Other times the blade sits at a weird angle that looks “off.” You can’t quite pinpoint why. Hold the prop up to eye level. Sight down each blade like you’re checking if a shelf is level. Warping isn’t obvious until you measure.
Surface damage goes deeper than cosmetic scratches. Cavitation erosion eats away material. These are tiny bubbles collapsing against the metal. Studies show surface roughness increases by 15 microns after just 12 months of regular use. Deep pitting means the outer blade structure is compromised.
The 50% Rule That Saves You Money
Here’s the math that matters. Fixing your damaged rc boat propeller blades costs more than half the price of a new rc boat motor and propeller kit? Buy new. Factor in your time too. A $15 epoxy repair takes 3 hours. A $35 replacement installs in 10 minutes. Which makes more sense?
Numbers Don’t Lie
Run these performance tests before making your call:
-
Top speed comparison: How much slower than your baseline?
-
RPM drop: Check your motor’s revolutions at full throttle
-
Vibration check: Hold your hand on the hull at cruising speed. Excessive buzzing means imbalance.
Any top speed reduction over 15% signals damage serious enough to replace, not repair.
The Visual Inspection Checklist
Strip the prop off and examine it:
-
Rotate each blade to the same position and compare angles
-
Run your finger along every edge. You’ll feel cracks you can’t see.
-
Look for discoloration patterns. These indicate stress points.
-
Check the hub for cracks radiating outward
-
Measure pitch on all blades with a propeller gauge (if you have one)
Critical damage includes any crack longer than 5mm. Also, blades bent more than 10 degrees. Or chunks missing larger than a pencil eraser.
Call in the Experts
Some damage needs professional eyes. Your visual check shows possible propeller shaft repair needs? Or performance drops but you can’t find obvious damage? Take it to a prop shop. They have precision measuring tools. These catch problems you can’t see. Professional assessment costs $10-20. Worth it before dropping $80+ on an unnecessary rc boat motor and propeller kit replacement.
Act fast: Even minor damage gets worse. That small crack this weekend becomes a catastrophic failure next month. Address propeller issues within 48 hours of discovering them. Your motor will thank you.
Essential Tools and Materials for RC Boat Propeller Repair
You need the right gear before touching that damaged prop. Skip even one critical tool and you’ll turn a 20-minute fix into a multi-day disaster.
The Core Toolkit (What You Need)
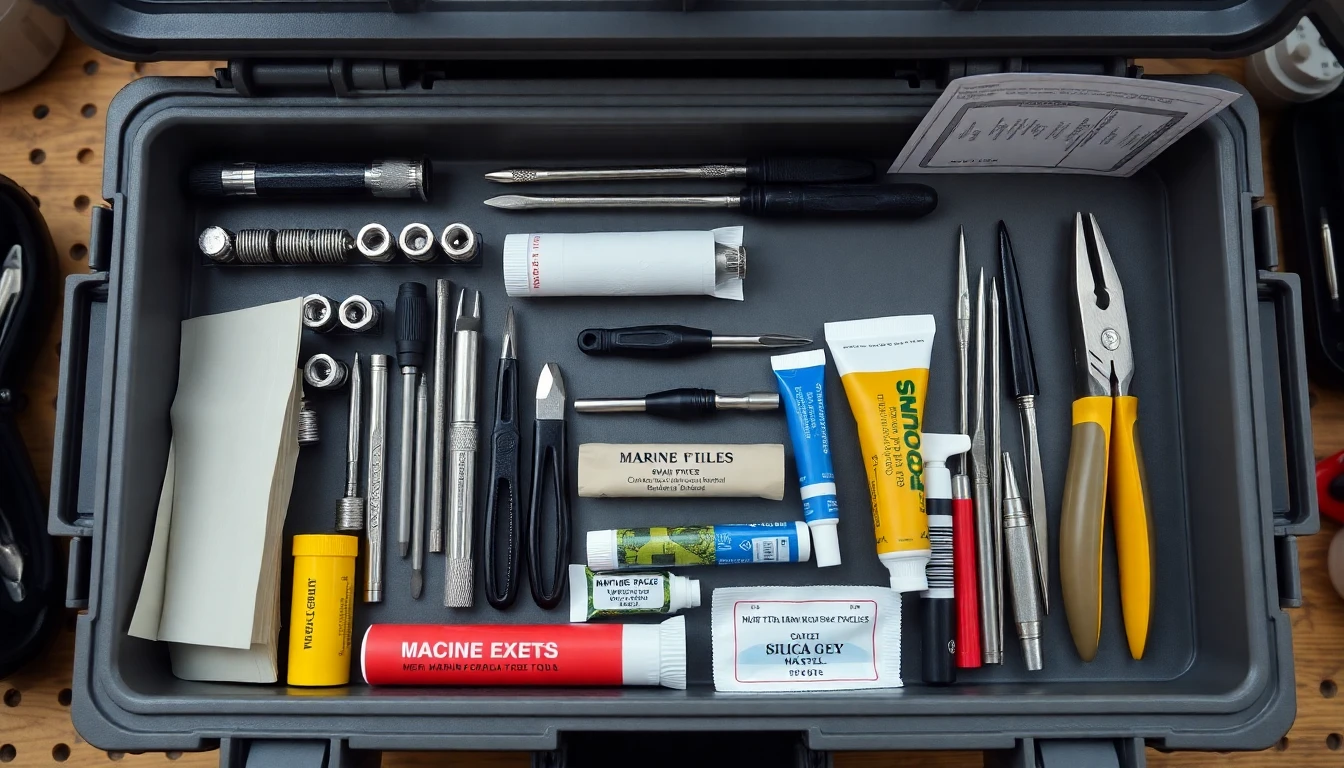
Start with hex drivers in 1.5mm, 2.0mm, 2.5mm, and 3mm sizes. Most RC boat propeller shafts use these Allen wrench sizes. Add nut drivers (4mm, 5.5mm, 7mm, 8mm) for hub assemblies. Your box wrenches should cover 5mm to 8mm range. Grab a 10mm and two 8mm wrenches. You’ll need both hands working at the same time during propeller shaft repair.
Pick up Phillips screwdrivers (#00, #0, #1) and a 3mm flat-head screwdriver. These handle motor mounts and cowling fasteners. Get needle-nose pliers with smoothed edges. Those grip lines that come standard? They’ll scar your blade surface during bending work.
The Pro Boat Start-Up Tool Set from Dynamite bundles most of these basics. You get hex drivers, nut drivers, screwdrivers, wrenches, and a ratcheting handle. Plus an 8cc tube of marine grease. Worth checking against buying pieces one by one.
Precision Balancing Equipment
Propeller balancing rc boat repairs require a Dubro True Spin balancer. Four wheels support your prop while it spins. Mark the heavy side with a Sharpie. Add self-stick weights opposite that mark. Stop adding weights once rotation stops at random spots.
Dust the balancer pins with powdered graphite. This removes friction that hides true imbalance. A prop spinning on dry pins but wobbling after you add lube? That’s your real problem showing up.
Material Removal and Shaping Tools
Your Dremel tool becomes your precision surgeon. Load these attachments: polishing wheel (final finish), sanding wheel (heavy stock removal), round diamond bit (detailed shaping), diamond oval wheel (hub corners and tight curves). Save grinding wheels as last resort. They remove too much material too fast.
Sandpaper in 80, 120, and 220 grit handles graduated smoothing. Here’s the trick: glue sheets to soft foam blocks. This backing follows blade curves instead of creating flat spots. Work through grits one by one. Jumping from 80 to 220 leaves visible scratches.
Diamond files give you control regular files can’t match. Use small diamond files for precision edge work. Switch to hobby files for removing heavier material from broken rc boat propeller sections.
Get a pitch gauge to measure blade angles. Bent blades throw off pitch consistency. Your gauge confirms all blades match after repairs.
Adhesives That Work
Marine grade adhesive means formulas rated for continuous water immersion. Regular super glue dissolves. Epoxy for propeller repair needs two specs: waterproof rating to 1ATM minimum, and cure time under 24 hours. J-B Weld WaterWeld and 3M Marine Adhesive Sealant 5200 both hit these marks.
Mix epoxy in throwaway containers. Those leftover pharmacy pill cups work well. Use toothpicks for crack filling. Popsicle sticks spread larger areas.
Blade Adjustment Tools
Ball bearing pliers or prop cupping pliers bend trailing and leading edges without cracking metal. Create dimples in a drill vise using your Dremel’s diamond bit. These dimples give pliers grip points for controlled bending.
Keep a small anvil and hammer for pitch adjustments. Tap gently. You’re finessing metal, not forging horseshoes. Each hammer strike changes pitch by 1-2 degrees. Measure after every three taps.
The Upgrade Path
Starting basic? Buy the Pro Boat set, a Dubro balancer, sandpaper, and J-B WaterWeld. That’s $65 total. You’ll handle 80% of repairs.
Going full rc boat performance optimization? Add the Dremel Multi-Max kit ($89), diamond file set ($24), pitch gauge ($31), and ball bearing pliers ($18). This equips you for modifications. You can do Texas cuts, Barr cuts, back-cutting, and diameter reduction.
Compatibility check: Before buying any rc boat motor and propeller kit as replacement, verify your motor’s shaft diameter and thread pitch. Tools won’t fix a prop that can’t mount to your motor. Check manufacturer specs or measure with calipers.
Storage tip: Keep tools in a tackle box with silica gel packets. Your waterproof repair methods fail once your precision files rust from shop humidity.
Step-by-Step: How to Repair Minor RC Boat Propeller Damage
Minor damage doesn’t mean game over. That three-blade prop now running on two blades? Those small nicks around the hub? Fix them in your garage this afternoon.
What Qualifies as “Minor” Damage
You’re looking at broken rc boat propeller blades where one blade snapped off clean. The remaining blades show no cracks. Small bends in blade tips count. So do burrs inside the hub bore—those tiny metal shavings that prevent smooth mounting. Surface nicks under 2mm deep qualify too.
What doesn’t qualify: Cracks radiating from the hub. Multiple broken blades. Bends exceeding 15 degrees. Those need replacement, not repair.
Gear Up Before You Start
Pull on leather gloves. Propeller edges slice skin easier than you’d think. Grab your pliers for stubborn nuts and bolts. Your boat came with an RC tool—find it. This tightens the prop nut without stripping threads. You’ll also need a .001 over-spiral reamer for cleaning hub burrs. This size removes metal debris. It won’t enlarge the bore.
Keep your prop spinner or just use your fingers to hold the shaft steady. Motors spin free during loosening. Someone needs to hold that shaft still.
Strip Down to the Propeller
Unscrew your motor cover. Expect 2-4 screws depending on your boat model. Remove the spindle tube holder next. Wipe the shaft clean. Old grease mixed with sand creates grinding paste. You want bare metal.
Now for the tricky part: removing the damaged prop. Hold the shaft tight with your fingers or prop spinner. Spin the propeller counterclockwise. Stuck? Your RC tool gives you leverage without damaging the nut.
That small nut or bolt at the prop’s end? It likely has thread lock compound. This glue prevents vibration loosening. Your pliers break through the compound. Turn counterclockwise until the fastener releases.
Slide the prop off the shaft. Stiff fit? Push straight back with steady pressure. Wiggling bends the shaft. Check that your motor lifts free afterward. A stuck motor means you’ve bent the spindle tube. That’s a bigger repair job.
The Actual Fix Work
Start with hub burrs. Insert your .001 over-spiral reamer into the hub bore. Rotate clockwise with light pressure. You’ll feel it catch on rough spots. Keep turning until the reamer spins smooth. Dump out the metal shavings.
Propeller balancing rc boat performance comes next. The blades need the same weight. Mount your cleaned prop on your Dubro balancer. Mark where it settles—that’s your heavy side. File or sand the heavy blade’s trailing edge. Test again. Repeat until the prop stops at random positions.
Polish all blade edges with 220-grit sandpaper on foam blocks. The foam follows blade curves. Work in one direction. Back-and-forth motion creates tiny scratches. These catch water and slow you down. VooDoo 17-4 PH stainless props shine up nice. Aluminum props show improvement but won’t achieve mirror finish.
Installing Your Repaired or Replacement Prop
Line up the prop slit with your shaft’s keyway groove. This groove prevents prop spin on the shaft. Slide the prop on until you hear a click. That’s the keyway seating.
Hand-tighten the prop nut clockwise. Then grab your RC tool. Add torque until you hit your hand strength limit. Stop there. Over-tightening strips threads or cracks the hub. Thread lock compound makes resistance feel higher than normal. That’s normal.
Your shaft nut goes on next if your setup uses one. Tighten with the tool. Sometimes the rudder blocks your access. Turn it aside for now.
Can you reach the spindle tube? Add a drop of marine grease. This stops corrosion. It keeps the shaft spinning smooth.
Button Everything Back Up
Reinstall the spindle tube holder. Screw on your motor cover. Tighten screws tight but not too tight. Cracked housings cost more than new props. Replace your battery holder and top cover.
Spin the prop by hand. It should rotate free with zero grinding sounds. Rough spots mean hub burrs remain. Or you’ve cross-threaded something.
The Water Test
Launch in shallow water first. Run at 50% throttle. Broken rc boat propeller repairs sometimes show balance issues under load. Watch for vibration through the hull. Listen for rattling from the motor housing.
No vibration? Bump to 75% throttle. Then full speed. Your boat should track straight. Pulling to one side signals blade imbalance. Back to the balancer you go.
When Repair Becomes Replacement
Spent 90 minutes balancing with no improvement? The damage was worse than “minor.” Order that rc boat motor and propeller kit instead. Check rc boat motor compatibility before buying. Shaft diameter and thread pitch must match. Manufacturers list specs in product descriptions.
Minor repairs buy you time. They keep you running while replacement parts ship. They also teach you how your propulsion system works. This knowledge prevents future damage. It speeds up your rc boat maintenance tips routine too.
Testing Your Repaired RC Boat Propeller
Your prop looks fixed. But looks don’t matter until you test it in water.
The Dry Spin Test Comes First
Grip the prop shaft. Rotate it by hand. You want smooth motion. No grinding. No stiffness. Rough rotation? That means shaft wear or bad hub placement. Check your flex shaft clearance next. It needs 0.05-0.1mm of space inside the stuffing tube. Too tight? File the shaft down 0.1-0.3mm. Test again.
The Balance Verification
Mount your prop on the balancer one final time. It should stop at random spots. Does it settle on the same blade over and over? You’re not done balancing. Grab 220-grit emery cloth or your Dremel. Remove material from the heavy blade’s trailing edge in 5-second bursts. Test between each pass.
Run your fingernail across all blade edges. Each should feel the same. Same sharpness. Same smoothness. Hold the prop at eye level. Blade reflections should mirror each other. See asymmetry? More filing work ahead.
The 30-Second Bench Run
Install the prop. Tighten your coupler. Add marine grease to the shaft. Power up your boat out of water for 30 seconds. Watch your ESC for color changes. Smell for burning electronics. Either sign means your rc boat motor and propeller kit doesn’t match. An oversized prop creates 20% failure risk on your motor.
Listen during this dry run. Clicking or rattling? Loose mounting hardware. Vibration through the hull? Blade imbalance still exists.
The Water Benchmark Test
Launch in calm, shallow water. Run at 50% throttle for two full minutes. Your boat should track straight. Zero vibration. Pulling to one side? Blade pitch is off. Back to your pitch gauge and adjustment tools.
Mark your GPS speed at 75% throttle. Now hit full speed. Compare these numbers to your baseline from before damage happened. Balanced and thinned props gain 5-15% speed. Match or beat your old numbers? Your rc boat performance optimization worked.
The 24-Hour Post-Test Inspection
Pull your boat after testing. Dry it for 24 hours. Inspect your rc boat propeller blades for corrosion under 0.1mm. Check all epoxy joints for separation. Water gets into cracks? Your waterproof repair methods didn’t work. You need that replacement after all.
Test runs show if you fixed the problem or just delayed replacement. Skip testing? You’ll find out mid-lake. Your prop will explode at full throttle.
Best RC Boat Motor and Propeller Kits (Replace, Don’t Repair)
Replacement beats repair once damage goes too far. Your prop shows cracks spreading from the hub? Blade chunks missing? Corrosion eating through metal? Time to shop for a new rc boat motor and propeller kit.
Spotting the Replacement Warning Signs
Structural failure means you’re done. Cracked hubs can’t hold torque. Missing blade pieces throw balance way off. No amount of filing fixes it. Saltwater corrosion weakens the blade structure through pitting. Minor surface pitting? Clean it. Deep pitting that feels rough under your fingernail? Replace.
Performance tells the truth. Your boat struggles to plane at full throttle? RPMs spike but speed drops? That’s a spun hub or worn blades. The engine screams at 40,000 RPM but you’re crawling at 15 mph. Classic prop slip. Normal slip runs 10-30%. Anything beyond that signals damage you can’t repair.
Strange grinding or clanging sounds point to internal propeller damage. Don’t ignore vibrations either. Even slight damage kills efficiency. That vibration also hammers your motor bearings. Replace the prop before the motor goes too.
Sizing Your New Motor and Propeller Kit
Hull length sets motor diameter. Under 600mm hulls need 28-29mm diameter motors. Jump to 600-800mm? Use 36mm motors. Running 800-1200mm? Install 40mm motors. The 2958 brushless motor fits 650-800mm boats well.
KV ratings control your RPM range. Multiply motor KV by your battery voltage. Running 6S LiPo? That’s 6 cells × 4.2V charged = 25.2V. A 1200 KV motor hits 30,240 RPM unloaded. Under load, calculate with 3.9V per cell instead. Your target RPM sits between 20,000-35,000 for standard setups. Around 30,000 RPM gives you the sweet spot. Experts pushing 40,000+ RPM run SAW (Straight-A-Way) setups.
Mono hulls use lower KV motors with larger props. Outriggers demand higher KV motors with smaller props. Eight-cell systems work best in the 675-1185 KV range. Match this to your hull type before ordering.
Propeller Specs That Matter
Material choice affects durability and speed. Hardness ranking: Plastic (softest), Aluminum, Carbon Fiber, Beryllium Copper, Stainless Steel (hardest). Plastic props distort at high RPM. They’re cheap but you’ll replace them often. CNC machined alloy or bronze props beat plastic every time.
stainless steel propellers add about 3 knots to your top speed compared to aluminum. The blades run thinner. They handle high-speed impacts better. Traxxas Spartan and M41 owners report 5-6 mph gains after upgrading to stainless steel props.
Standard diameters for gas-powered boats run 65-80mm. Most RC gas boats stick to this range. Electric boats vary more, but three-blade designs win. Two-blade props show up on speed boats. Four-blade configs are rare—you see them when low-speed grip matters more than top speed.
Pitch ratio sits at 1.1-1.4× diameter for three-bladed propellers. Total pitch equals diameter times pitch ratio. A 930 prop (1.18″ diameter × 0.9 pitch) delivers 1.062″ forward travel per rotation. Real-world slip steals 10-30% of that distance. Lower slip numbers happen with high-performance props.
Matching Motors to ESCs and Batteries
Your ESC needs headroom. Size it 20-30% higher than your motor’s maximum current. An 80-amp motor demands at least a 100-amp ESC. Better yet, grab a 110-amp unit. Running your ESC at the edge creates heat. Heat kills components.
All voltages must align. Motor voltage rating, ESC voltage range, and battery pack voltage work as one. Mismatches cause weak performance or smoke. Check specs three times before ordering.
Temperature limits matter. LiPo batteries, ESCs, and motors max out at 140°F (60°C). Go higher and you’re shortening component life. Monitor motor heat on every run. Touch the motor can after 30 seconds at full throttle. Too hot to hold? You need a different prop or lower KV motor.
Testing Your New Kit the Smart Way
Start with a smaller prop. Work up to the best size. Never mount an oversized prop first. That’s how you burn ESCs, motors, and battery packs. General rule: increase diameter about 2mm over stock. This boosts speed and acceleration without risking damage.
Buy at least three propeller sets in varying diameters. Test each one. Run full speed for 20-30 seconds. Note your planing speed and top speed. Check motor temperature with a 5-second touch test. Safe? Run 45 seconds and recheck temperatures on the ESC, motor, and battery. Still good? Push to 90 seconds.
What Comes in a Complete Kit
130 motor kits include: 2 motors, 2 motor seats, 2 copper connectors, 2 shafts (15cm length), and 2 propellers (1 clockwise + 1 counterclockwise rotation). Motor specs run 15.5×20.3mm with 2mm diameter output shafts. Voltage range: 3-6V. At 3V expect 80mA draw and 10,000 RPM. At 6V you’ll pull 150mA and hit 20,000 RPM.
180 motor kits pack: 2 motors, 2 motor mounts, 2 connectors (10mm), 2 shafts (150mm), 2 D36 propellers, 2 bottom plates, 4 metal connectors, plus mounting screws. Shaft specs: 6.5mm length, 2mm diameter. Voltage: 3-6V.
Most propeller shafts use M4 metric threads. The 4mm standard shaft diameter fits 500 and 550 size motors with 1/8″ standard motor shafts.
The Repair vs Replace Math
Stainless steel props cost $400-700 new. Repair often makes sense if the damage is minor. You’re looking at $50-100 for professional propeller shop work. Aluminum props run cheap—$35-80 for replacements. Don’t spend big on aluminum repairs unless the prop shows great overall condition.
rc boat motor compatibility checking happens before checkout. Verify shaft diameter and thread pitch match your existing setup. Makers list these specs in product descriptions. Measure with calipers if specs aren’t clear. A prop that won’t mount wastes your money and time.
Upgrading for rc boat performance? Focus on stainless steel propellers first. The speed gains justify the cost. Then look at motor KV ratings matched to your hull type and battery setup. Small, step-by-step changes beat big overhauls. Test each upgrade alone so you know what worked.
How to Choose the Right RC Boat Propeller Kit
Your factory prop works fine. But “fine” leaves performance on the table. Most makers install safe propellers to protect electronics and extend runtime. That safety margin costs you 5-6 mph on boats like the Traxxas Spartan or M41. Know the numbers behind rc boat motor and propeller kit selection. It changes everything.
Start With Blade Count Strategy
Two-blade props deliver maximum top speed. They’re the standard RTR setup for a reason. Less blade surface means less drag. Your motor spins faster at the same power draw. Choose two blades for straight-line speed.
Three-blade props accelerate 20% faster out of the hole. You sacrifice some top-end speed but gain punch off the line. The trade-off: run a diameter 20% smaller than your two-blade setup. Three blades work best on sport boats. Quick turns and fast acceleration beat raw speed here.
Four-blade props turn 50-100 RPM slower than three-blade props at the same pitch. You don’t see four-blade configs much in RC boats. They excel at low-speed grip—think scale tugboats or workboats. Skip four blades unless you need low-speed torque.
Master the Diameter and Pitch Math
The 2mm rule keeps you safe. Increase your stock prop diameter by 2mm maximum if you’re holding pitch constant. This small bump adds speed. It won’t overload your motor or ESC. Go bigger than 2mm? You risk overheating your system.
Pitch changes mean diameter adjustments. Want more pitch for higher speeds? Drop your diameter to compensate. Each 1-inch pitch increase pulls your RPM down 150-200. Each decrease raises RPM by 150-200. Your motor has a sweet RPM range. Stay inside it by balancing these two numbers.
Standard notation shows diameter × pitch. A 13×17 prop measures 13 inches in diameter with 17 inches of pitch. That pitch number shows how far forward the prop moves per turn. A 19×23 setup moves your boat farther with each spin but needs more motor power.
Pick Materials That Perform
Stock plastic props distort under load. High RPM bends the blades. Impact damage cracks them fast. They’re cheap—that’s their main benefit. Expect to replace plastic props often if you run hard.
CNC alloy or bronze props transform performance. They maintain blade shape at high RPM. They survive rocks and debris that would shatter plastic. The upgrade pays for itself in durability alone. Rc boat performance optimization starts here.
Stainless steel blades run thinner than aluminum ones. This material choice adds 3 knots to your top speed on the same motor. Traxxas Spartan owners report 5-6 mph gains after switching to stainless steel. Budget $400-700 for quality stainless props, but they last years.
Match Your Motor’s KV Rating
KV equals RPM per volt. A 600 KV motor on a 12S battery (48V loaded) generates 28,800 RPM in theory. Real-world numbers drop due to prop load and system resistance. This calculation shows if your rc boat motor and propeller kit works together.
Higher voltage needs ESC upgrades. Jumping from 6S to 12S? Your 200-amp ESC won’t cut it. Step up to 300 amps minimum. Under-spec’d ESCs overheat and fail. Check rc boat motor compatibility across all parts. Motor, prop, ESC, and battery must match voltage ranges.
Test Props Step by Step
Start small and work up. Mount the smallest prop diameter your shaft fits. Run at your target voltage. Feel the motor can after 30 seconds at full throttle. Ice cold? Step up to the next diameter. Still cool? Keep climbing.
Watch for the heat threshold. A motor running warm but comfortable means you’re close to the best prop size. Too hot to touch? Drop back one diameter size. That’s your ceiling. This testing method prevents blown motors and melted ESCs.
Monitor temps on three components during each test: motor, ESC, and battery pack. All three must stay under 140°F (60°C). Your weakest link sets maximum prop size. The ESC hits limits first most of the time.
Understand Pitch vs. Heat Trade-Offs
High pitch increases amp draw big time. More pitch means more resistance. Your motor pulls more current to maintain RPM. That current generates heat across your system. Safe heat at 19-inch pitch might become dangerous at 23-inch pitch.
Too much pitch causes cavitation. Your prop spins but your boat won’t plane. The blades can’t grab water right. You’re burning power and going nowhere. Drop pitch until your boat jumps on plane smooth.
Low-speed acceleration suffers with high pitch. Big pitch numbers work great once you’re moving. Getting moving becomes the problem. Choose moderate pitch for sport boats. Save extreme pitch for drag racing setups.
Add Cooling When Pushing Limits
Dual water pickups double cooling capacity. Standard single-pickup systems struggle with high-power setups. Adding a second pickup feeds more water through your cooling system. This extends your safe operating range.
Separate motor and ESC cooling through a dual-outlet rudder splits heat management. Each component gets dedicated water flow. This setup handles 12S power levels that would cook a single-line system.
Upgrading cooling buys you bigger props. That diameter size you couldn’t run before? Proper cooling makes it possible. Many speed boats hit limits from heat, not power. Fix cooling and unleash more performance.
Learn From Popular Upgrade Paths
Traxxas Spartan and M41 owners report consistent 5-6 mph gains from prop upgrades alone. Factory props focus on durability over speed. The upgrade path works: move from plastic to stainless steel, increase diameter by 2mm, test temperatures, adjust pitch for best RPM.
Proboat Sonicwake and Blackjack 42 boats respond well to three-blade conversions. The added acceleration helps these hulls plane faster. Top speed drops a bit but handling improves big time in choppy water.
Your boat probably has a documented upgrade path. Search owner forums for your model. Other hobbyists have already tested prop combinations. Learn from their trial and error. You’ll skip expensive mistakes and land on the right rc boat motor and propeller kit faster.
Installing Your New RC Boat Motor and Propeller Kit
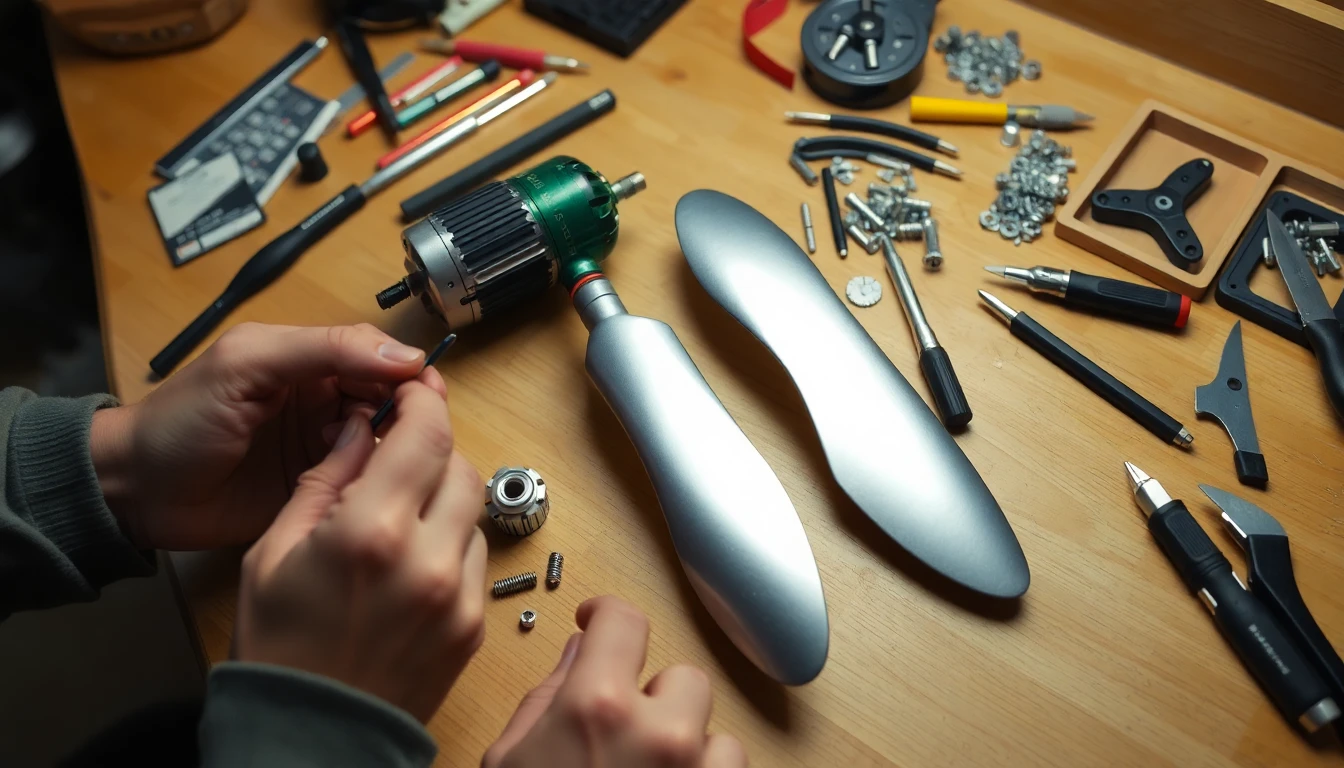
Your new rc boat motor and propeller kit sits on your workbench. Installation takes 15-20 minutes with proper prep. Rush it? You’ll strip threads or snap drive pins.
Size Your Shaft Before You Start
Most sport boats under 800mm use 4mm shafts. Your propshaft runs longer than 10 inches? Upgrade to 5mm diameter. The extra width stops flexing under load.
Order your propshaft tube to spec. The shaft inside runs one inch longer than the tube. This extra length handles prop and coupling fit. Measure twice. You’re ordering, not cutting, so no do-overs.
Match Your Motor Housing
A 500 can size motor housing fits many engine types. Low-drain 540 motors slot in. So do 555 and 600 types. This flexibility makes 500 can housings a safe starting point. Check rc boat motor compatibility before ordering. Your motor shaft width and thread pitch must match your propeller hub specs.
Disconnect Power First
Pull the battery connector. Every time. No exceptions. Accidental throttle turns your prop into a finger shredder. Position your propeller flat—parallel to the ground. This stops the drive pin from dropping out during setup.
Gather your tools: 1/2 or 9/16 inch wrench or socket depending on your model. Keep a flat blade screwdriver nearby for drive pin work.
Remove the Old Propeller
Hold your old prop flat using your hand. Grip it tight but keep fingers away from blade edges. Can’t get good grip? Wedge a wooden block between the prop and boat deck.
Turn the prop nut counterclockwise. Factory torque specs run 25 to 35 inch-pounds. That’s hand-tight. Don’t muscle it. Remove the nut and washer. Pull the propeller straight off the shaft.
Check your drive pin now. Look for cracks or breaks. Broken pin? Use your flat blade screwdriver to hold the prop shaft steady during removal. Replace a damaged drive pin before your new prop goes on.
Line Up Your New Propeller
Position the drive pin flat. Insert it into your new propeller’s slot. The pin must line up with the slot in the propeller’s back. Bad alignment shows up as resistance during installation.
Slide the propeller on. Snug the propeller nut. Then add one quarter turn more. Stop there. Too much torque cracks propeller hubs or bends drive pins. This error causes 40% of broken rc boat propeller failures in the first month.
Thread the nut by hand first. Bad threading ruins both nut and shaft threads. Feel resistance before the nut seats? Back it off and restart.
Check Your Lower Unit Seal
Look at the seal around your lower unit. Braided fishing line tears these seals during weed clearing. Wire leaders slice them too. A bad seal lets water reach your motor. Water kills electronics.
Replace damaged seals before running. Waterproof repair methods start with stopping water entry first.
Prep Your Shaft for Secure Attachment
Set screws and collars need flat spots on the shaft. Grab your Dremel with a cut-off wheel. Grind two flat spots 180 degrees apart. Keep your grinding even. Angled surfaces cause collar slippage during tightening.
Test your flat spots with a straight edge. Both spots should touch the edge at the same time. Uneven grinding means your collar won’t grip.
Choose Your Attachment Method
Set screws with shaft collars work for most setups. Add Loctite to set screw threads before setup. Tighten the first screw until it seats. Then tighten the second screw. This order stops shaft damage.
Brazed attachment gives you the strongest connection. Solid brass props accept brazing. This method removes all play between prop and shaft. You need a torch and brazing skills. Not sure about brazing? Stick with set screws.
Build Multi-Motor Setups in Order
Twin-motor boats need a specific build order. Install your propeller to the shaft first. Position the motor and measure from the coupling end to prop position. Ask your supplier for coupling length specs. These numbers stop motors from hitting each other.
Install the shaft collar next. Rotate the shaft until your flat spot lines up with the collar’s set screw. Install the shaft coupler to your motor. Lock all parts while you still have tool access space.
Crossmembers and supports block wrench access. Plan your build order around these blocks. I’ve seen builders take apart entire hulls because they installed parts backward.
Seal Against Water Entry
Your propshaft fits into a tube. That tube fits into your keel hole. Use a locknut with a washer between the nut and tube. This washer helps seal against water entry. Add marine grade adhesive around the tube-to-keel joint. Not inside where it blocks shaft spin—around the outside.
Seal all connections but let the shaft move. Your shaft needs to spin free. Test rotation by hand before final build.
Final System Check
Reconnect your battery. Power up your ESC. Spin the prop by hand. It should rotate smooth with zero binding. Grinding or catching means something’s off.
Run a 30-second bench test at 50% throttle. Watch for vibration. Listen for odd sounds. Feel the motor can for too much heat. All clear? You’re ready for water testing.
Keep your old propeller as a backup. This rc boat maintenance tips habit saves lake days during prop damage far from home.
Common RC Boat Propeller Repair Mistakes and How to Avoid Them
Propeller repair shops promise miracles. They deliver headaches. Most hobbyists learn this lesson after wasting $160-$175 on bad repairs that create more problems than they solve.
Outsourcing Means Losing Control
Your local shop claims they repair props in-house. They don’t. Half of them ship your rc boat propeller blades to third-party services. The result? Pitch varies more than 0.030 inches across blades. You’ll notice the problem fast—your boat pulls hard to one side. Worse, some blades return convex when they should curve concave. That’s backward shape. It kills performance.
Fix this: Confirm the shop performs repairs on-site before handing over your prop. Request a post-repair prop scan. The pitch must stay within 0.030-inch tolerance across all blades. No scan equipment? Find another shop.
Timeline Promises That Evaporate
“One week turnaround” becomes four weeks of silence. Shops quote fast timelines to win your business. Then your broken rc boat propeller sits in a queue behind hundreds of other jobs.
Fix this: Get written timelines with penalty clauses. Ask for references from customers who received work in the past 30 days. Shops claiming “hundreds of repairs each month” should prove it. Three phone numbers from recent customers tell you everything.
The Missing Post-Repair Inspection
Your prop returns looking hammered. Blade edges show tool marks. The hub sits off-center. Some shops inspect every prop. Others grab whatever comes off the bench and ship it.
Fix this: Insist on full inspection before accepting the prop. Measure blade pitch yourself with a pitch gauge. Reject any prop showing variance over 0.030 inches. That tolerance limit separates good repairs from junk.
Ignoring Small Nicks That Destroy Performance
That tiny blade nick? It vibrates your entire drive system. Vibration wears prop shaft seals. Water enters your motor housing. Stainless steel props make this problem worse. Their weight turns small imbalances into major issues.
Fix this: Repair nicks right away. Budget $200 for professional nick removal. Test at full throttle after repairs. Feel for thump or vibration through the hull. Blades curled at the edges? Missing chunks you can feel? Replace the prop. Epoxy for propeller repair won’t fix structural damage.
Installing Props Backward
Your Miss Geico 36 prop has a front and back. Install it backward and you lose 20% top speed. Sounds obvious until you’re working in bad light with cold fingers.
Fix this: Check prop markings before installation. Check shaft rotation direction. Spin the prop by hand after mounting. Wrong installation shows up as strange water flow patterns behind the boat.
Bent Blades and Debris You Don’t See
Weeds wrap around your propeller shaft repair point. They choke power by 30%. Bent blades reduce thrust. Debris caught in the hub creates drag.
Fix this: Inspect for bends, chips, and tangled material after every run. Clear shaft debris before storage. Spin the prop—it should rotate smooth with zero catching. Waterproof repair methods fail once debris sits against seals.
Over-Repairing Props Past Their Lifespan
Your prop shows four repair stamps. That’s three repairs too many. Each repair removes material. Each weakens the blade structure. Props handle three repair cycles max.
Fix this: Track repair count via stamps or permanent marker. Retire props after three to four repairs. Buy a replacement rc boat motor and propeller kit instead. Props with too many repairs fail hard at full throttle.
Skipping Basic Lubrication and Seal Checks
Dry shafts wear faster. Loose seals let water reach electronics. Both problems take 30 seconds to prevent.
Fix this: Put marine grade adhesive or marine grease on shafts before every run. Check hatches and seals during your pre-run inspection. This 30-second habit stops $200+ motor replacements.
The bottom line: Professional propeller balancing rc boat repairs cost $160-$175 for quality 14-inch CNC four-blade props. DIY fixes using proper technique cost $15-30. Bad repairs waste both amounts and leave you dead in the water. Pick your repair shop with care.
RC Boat Propeller Maintenance Tips to Prevent Future Damage
Prevention beats repair every time. Most propeller failures happen from three mistakes: skipping post-run cleaning, forgetting lubrication, and running props until they break.
The 5-Minute Post-Run Ritual
Pull your boat from the water. Open the hatch right away. Air flow dries electronics before rust starts. Remove your battery pack and foam inserts. Water hides under foam. It sits there eating away at metal parts and bearings while you pack up.
Rinse sand and mud off the hull. Keep water away from your ESC and receiver. Use a damp cloth instead of spraying near electronics. Dry the entire boat with towels. Don’t just wipe it. Dry it well. Moisture you leave today becomes rust next month.
Lubrication Points That Matter
Your drive shaft needs marine grease every third run. Regular grease washes out. Marine grease fights water pressure and stays in place. Yamalube Marine Grease or Molybdenum Disulfide Grease both work. Put a thin coat on the stuffing tube area. This stops wear and keeps water away from seals.
Saltwater users need to spray rust blocker on the propeller and nearby parts after each run. Salt speeds up metal damage by 400% versus freshwater. That $8 can of blocker saves you $200 in prop replacements.
Synthetic spray lube with PTFE works best for the prop shaft. This type handles heat from high-speed runs. It fights friction better than standard oils. One light coat before you install makes future prop removal easy. No fighting stuck threads.
Pre-Launch Visual Checks
Spin your prop before launching. Feel for drag or grinding. Both mean bearing wear or bent shaft. Look close at blade edges. Grit, sand, and dirt wear edges down slowly. You won’t notice until you lose 20% of your power.
Check for fishing line around the shaft. That hidden enemy steals 30% of your power. Run your fingers around the shaft base. You’ll feel line you can’t see.
Check all blades for bends, nicks, cuts, or cracks. Even tiny damage makes it vibrate. Vibration beats up your motor bearings and housing. Fix small problems now or replace big parts later.
The Inspection Items Nobody Checks
Pop your hatch and look at solder joints on your ESC. Shaking loosens these over time. Moisture around your receiver means your seals broke. Water inside electronics ruins parts in days.
Press every O-ring and seal. They should feel firm and bouncy. Flat or cracked seals leak. Replace them early. A $3 O-ring stops a $150 motor replacement.
Check your flex shaft by turning the prop by hand. Wobble means it’s bent. This makes heat, shaking, and power loss. Fix it before your next run.
Put Loctite on metal threads that shake loose—prop nuts, motor mounts, and rudder bolts. Skip this and you’ll lose parts in the lake.
Smart Storage Habits
Charge LiPo batteries to storage level if you won’t use them for a few days. Keeping them full or empty kills cells. Store packs in LiPo-safe bags. Keep them cool and dry, away from sunlight.
Take props off during long storage times. This stops rust on the shaft from trapped water. It also prevents damage from garage accidents.
The Spare Prop Strategy
Keep two backup props for your boat. Treat them like spare tires. One spare helps during emergencies like hitting rocks. The second lets you adjust for water conditions. Calm lakes need different pitch than rough river water.
Write down which prop you use in your log. Note water temp, wind, and how it runs. This info tells you which spare to bring next time.
When to Call It Quits
Props last three to four fixes maximum. After that, blades get too weak. Mark repairs with permanent marker. Stop using props that reach their limit before they break at full speed.
Replace any prop that shakes even after you balance it. Pro balancing costs $160-$175. A new prop costs about the same and runs better. Do the math before spending on old parts.
FAQ: RC Boat Propeller Repair and Replacement
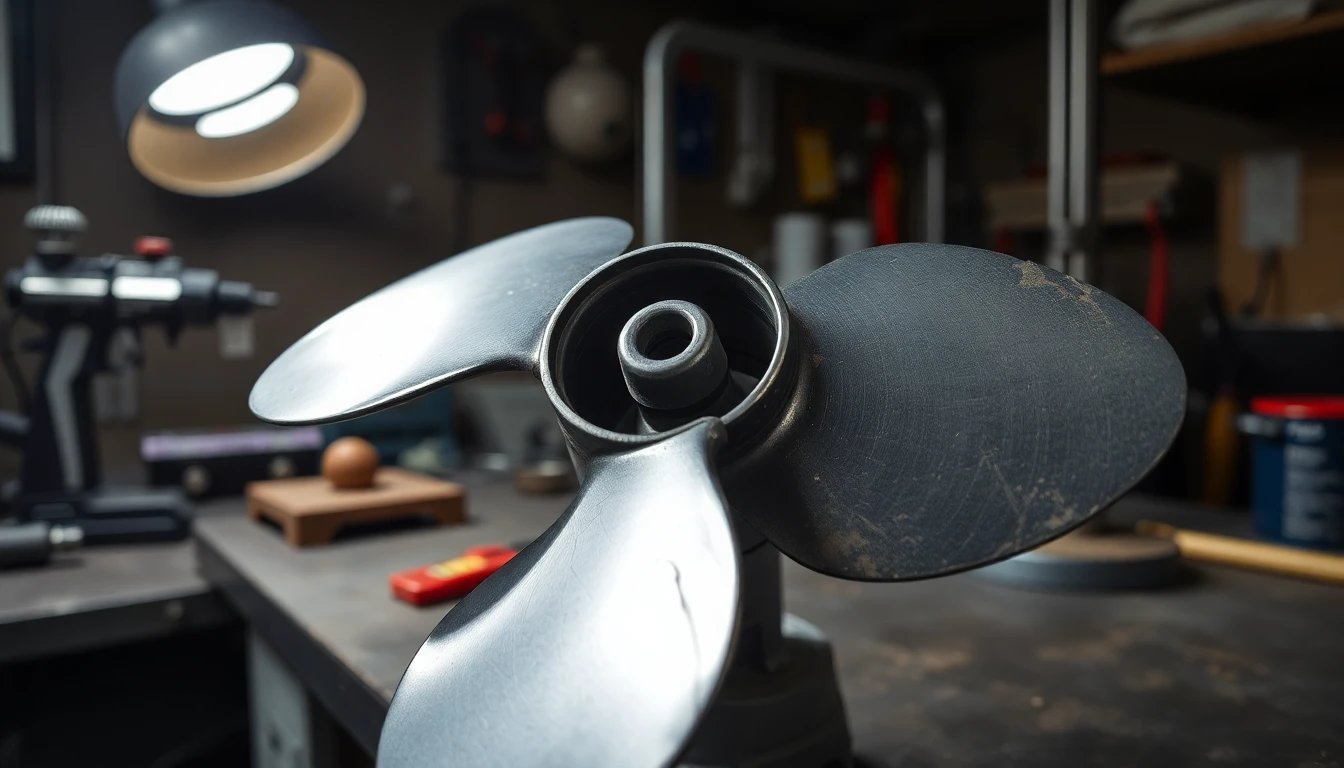
Propeller problems stop your fun fast. These questions cover what breaks most often and how to fix it.
Q: My propeller won’t come off the shaft. What’s wrong?
Thread lock compound holds it tight. Grip the shaft with two fingers to stop spinning. Turn the propeller left while you hold firm. Hand strength not enough? Use pliers on the nut. That nut sits tight by design—you’ll need to work for it.
Q: How do I know if my propeller is aligned right?
Look for the slit on your new propeller. Match it to the groove on the shaft. Push until you hear a click. Bad alignment? You’ll feel resistance during setup. Or you’ll see wobbling during test runs.
Q: What causes most propeller blade breakage?
Rocks and shallow groundings snap blades in seconds. Count your blades after every run in new water. Three-blade props running on two blades? Time for replacement.
Q: Can I reuse the retaining nut after removing it?
Yes, but check the threads first. Bad threads strip fast during setup. The nut’s small size makes losing it common—keep spares in your tool kit.
Q: How much lubricant should I use on the shaft?
A thin coat does the job. Too much lubricant attracts dirt and creates drag. Put it on before setup. This stops corrosion. Plus, it makes future removal easier.
Q: What’s the best way to test for hull leaks affecting my propeller area?
Fill the hull partway with water. Check for drips near the propeller shaft repair zone. Dry the area fully before you add marine sealant. Match the sealant to your hull material.
Conclusion
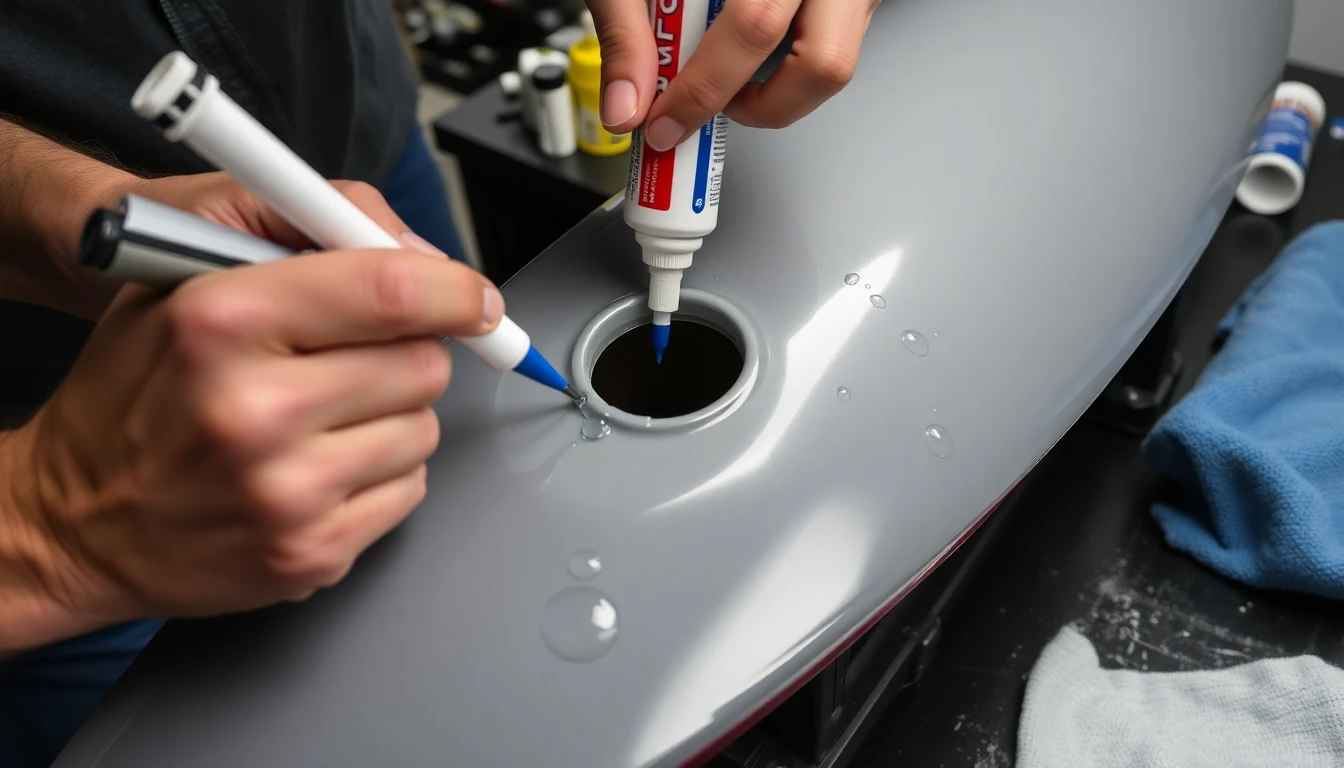
Your RC boat propeller doesn’t have to be a recurring headache. You’ve repaired a cracked blade with marine-grade epoxy or upgraded to a new RC boat motor and propeller kit. Now you have the knowledge to make confident decisions about your boat’s performance. A $5 repair can beat a $50 replacement. Know which one to choose.
Here’s what matters: assess, repair, and maintain. That broken rc boat propeller tells you something about how you’re using your boat. Listen to it. Check your propeller before every session. Balance after every repair. Keep quality epoxy in your toolkit. Ten minutes on preventive maintenance saves you hours of emergency fixes.
Ready to get back on the water? Start with what you’ve learned here. Shopping for replacement parts? VIF Propellers offers marine-tested components that match your motor specs. Your boat’s performance depends on getting these basics right. Everything else is just accessories.
Now go fix that propeller.