
A bad Boat Propeller won’t show its flaws at the dock. It waits until you’re out on the water — engine screaming at the wrong RPM, hull dragging for no good reason, or worse, blades eaten through by cavitation after just one season.
Here’s the frustrating part: most substandard propellers look fine straight out of the box. There’s no obvious red flag. The real difference between a marine-grade alloy that lasts for years and a cheap knockoff that fails you at the worst possible moment comes down to the details — the markings, the blade geometry, the hub integrity, the material finish.
This guide gives you a practical, hands-on process to check what you’ve actually got. You’ll be able to make a solid judgment call and know — without guessing — whether your propeller is helping your boat perform or quietly holding it back.
How to Check If You Bought a Qualified Marine Propeller
Five checks. That’s all it takes to know whether the propeller on your shaft is working for you — or working against you.
Here’s the framework:
1. Run the WOT RPM Test.
This is your ground truth. On flat, calm water, push to Wide Open Throttle. Hold it for 15–20 seconds until the RPM stabilizes. A qualified Prop puts your engine between 5,900 and 6,100 RPM. Too high? The pitch is too low. Too low? There’s too much pitch. Every 2 inches of pitch change moves RPM by 200–250. That’s your adjustment lever.
2. Read the Hub Stampings.
Blade count, diameter, pitch, rotation direction, part number — it’s all stamped into the hub. A Prop with no markings gives you no accountability. Walk away from those.
3. Verify the Material
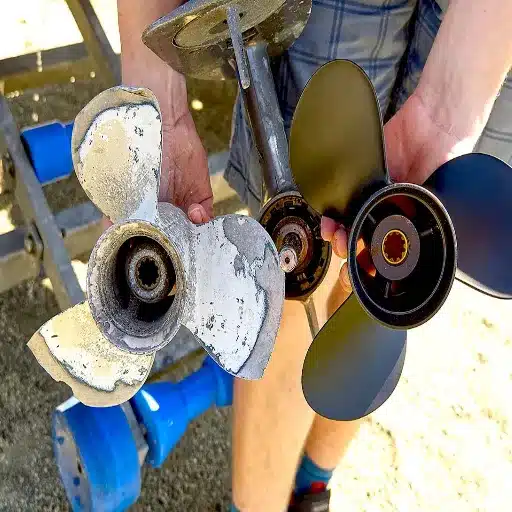
Aluminum is lighter and dents more often under impact. Stainless steel is heavier, polished, and holds up better at higher speeds. Neither is the wrong choice — but knowing which one you have tells you whether your prop fits your actual use case.
4. Inspect the Hub and Rake
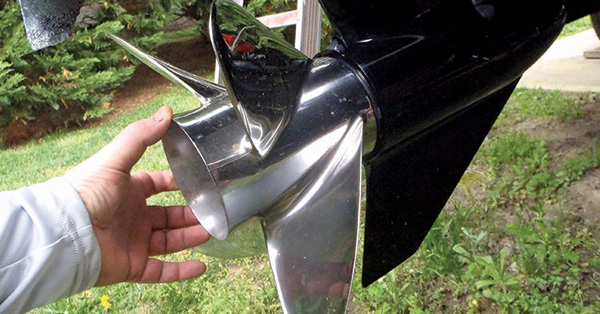
The center hub runs hot during operation. That’s your exhaust exit point. Give it a close look. Next, check blade rake — positive means the blades angle back, neutral sits straight, and negative means they face forward. Each position changes how your boat lifts out of the water and how it runs at speed.
5. Cross-Reference Engine Specs
Your engine’s rated HP, model year, gear case size, and shaft diameter all decide which prop belongs on it. Pull the part number. Check it against your engine specs. No match — or no way to verify — that’s a red flag. Don’t ignore it.
Step 1: Decode the Propeller Markings Before Installation
Every qualified marine propeller tells you what it is — stamped right into the hub. The problem is most boat owners never read it.
Those characters etched into the metal aren’t decorative. They’re a packed technical record of your propeller. Reading them takes about two minutes. Here’s the translation key.
The standard format looks like this: 14 x 19 3 RH A
Break it down left to right:
– 14 — diameter in inches (tip to tip)
– 19 — pitch in inches
– 3 — blade count
– RH — right-hand (clockwise) rotation; LH means counterclockwise
– A — material code (A = aluminum, S = stainless steel, C = composite)
Material codes are stamped near the trailing edge close to the hub, or on the hub face itself. Can’t find a material code at all? That’s worth noting.
What Good Markings Look Like
Genuine manufacturer stamps are crisp, consistent, and cut deep — between 0.015″ and 0.030″ into the alloy. Font height runs around 1/8″, with uniform stroke width near 0.02″. You should read them clearly from 12 inches away.
Here’s how qualified markings compare against counterfeit or reworked props:
|
Feature |
Qualified Propeller |
Red Flag |
|---|---|---|
|
Depth |
0.015–0.030″ |
Under 0.010″ or uneven |
|
Clarity |
Sharp, legible at 12″ |
Blurry, filled-in strokes |
|
Font |
Uniform width, serifs present |
Variable width, sans-serif |
|
Alignment |
Hub-centered within ±0.05″ |
Offset or noticeably rotated |
|
Surface |
Etched into alloy |
Painted on, chips or peels |
Your Pre-Installation Decode Checklist
Before the propeller goes anywhere near your shaft, run through these six checks:
-
Measure diameter tip-to-tip. It must match the stamped number within 1/16″.
-
Verify blade count. Count every blade — including any damaged ones — against the stamped figure.
-
Check rotation by hand. Spin it at a slow, steady pace. The leading edge should face forward in the direction of rotation. Right-hand props rotate clockwise when viewed from the stern.
-
Cross-reference the part number. Type the full marking (e.g.,
ABC-14x19RH) into the manufacturer’s database. Michigan Wheel and Solas both run searchable catalogs. Specs that deviate from the catalog listing by more than 2%? Reject the prop. -
Look for repitching distortion. Stretched or compressed digits — where a clean “14” starts looking like “1L” — signal the prop may have been reworked. Faded depth under 0.010″ is another warning sign.
-
Check hub taper contact. Put Prussian blue on the taper and test the fit. A transfer of 70% or more means proper shaft contact. Below that, you’ve got a fitment problem that no torque wrench will fix.
The markings won’t lie to you. So take the time to read them.
Step 2: Inspect Physical Quality — Blades, Hub, and Material
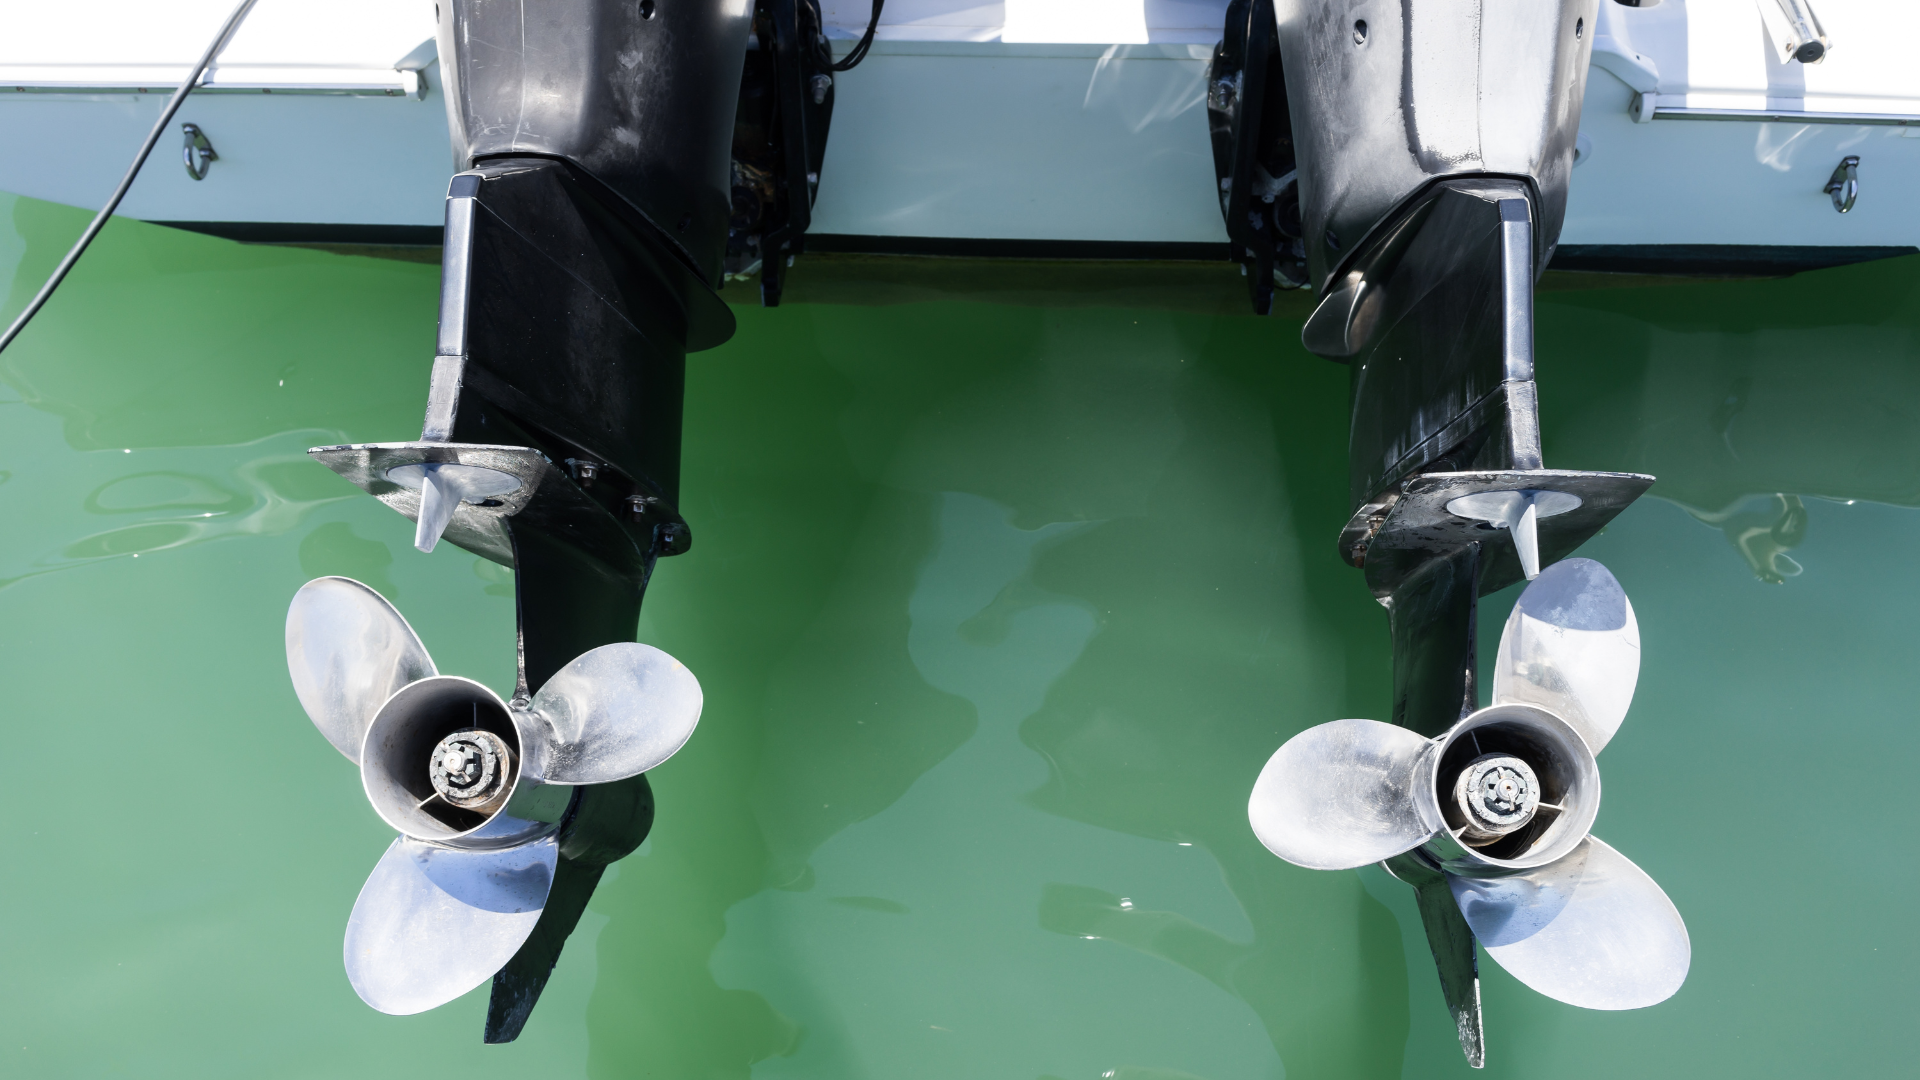
Pick the propeller up. Turn it over in your hands. What you’re holding is either a precision-built piece of marine hardware — or a problem waiting to show up at the worst time.
Physical inspection is where the truth lives. Markings can be faked. Packaging looks the same across every price point. But material density, blade geometry, and hub integrity? Those don’t lie under a close look.
Here’s what the metal is telling you — if you know how to read it.
Blade Inspection: What Your Eyes and Hands Should Catch
Start with the basics. Scan every blade surface for cracks, chips, dents, warping, and edge scuffing. Run a fingernail along the leading edge. Any nick or deformation that breaks a clean, straight profile is a rejection signal — not a “monitor it” situation.
Then go deeper:
-
Rake angle uniformity: Each blade should sit within ±1/2° of the manufacturer’s specified pitch angle. Use a pitch gauge and compare blades. One blade reading different from the others means that gap turns into vibration and drag on the water.
-
Surface roughness: A good blade isn’t mirror-smooth everywhere, but it shouldn’t have visible scratch patterns, micro-fractures, or an uneven finish. Get a loupe or hand microscope if you can. Focus on the trailing edge — that’s where stress builds up most.
-
Defect thresholds that matter: Any crack or dent deeper than 0.5mm is a hard reject. For composite blades, press along the surface and listen. A dull thud instead of a solid tap points to voids or delamination underneath — not visible from the outside, but dangerous under load.
Material Verification: Aluminum vs. Stainless Steel
Knowing which material you have matters. It tells you whether the propeller fits your use case — and whether you got what you paid for.
Here’s a quick comparison:
|
Property |
Marine-Grade 6061-T6 Aluminum |
316L Stainless Steel |
|---|---|---|
|
Density |
~2.7 g/cm³ — much lighter |
~8.0 g/cm³ — much heavier |
|
Magnet test |
Non-magnetic |
Faint magnetic pull (true 316L); strong pull = counterfeit |
|
Surface appearance |
Matte anodized finish; white oxidation = non-marine alloy |
Polished or mirror finish; pitting = corrosion or lower-grade steel |
|
Yield / tensile strength |
276 MPa yield (6061-T6) |
Min. 485 MPa tensile, ≤0.03% carbon |
Two fast field tests:
-
Weigh it. Use a postal or kitchen scale. Compare it against the manufacturer’s listed weight. A gap of more than ±5% from spec is a red flag for material substitution — someone swapped in a cheaper alloy and hoped you’d miss it.
-
Run a magnet across the hub. A strong magnetic pull on a supposed stainless steel propeller means you’re holding a non-austenitic substitute. That’s not the corrosion-resistant 316L the label claims. True 316L austenitic steel gives only a faint, weak magnetic response.
Hub Inspection: The Detail Most Buyers Skip
The hub is the propeller’s structural core — and it takes more abuse than any blade. Exhaust gases route through it. Torque loads transmit through it. Salt water finds every imperfection in it.
Check these three things, in this order:
-
Exhaust channels: Each channel should be open and clear. Run a probe or thin rod through every one. Any blockage larger than 1mm cuts exhaust flow and adds back-pressure your engine doesn’t need.
-
Calcification and biological buildup: White mineral deposits or green algae under 2mm can be cleaned off. Anything thicker — hard scaling bonded to the metal — means the propeller sat in poor conditions long enough to raise questions about its full history.
-
Rubber hub kit condition: This part absorbs impact shock and protects your gearcase. Squeeze and flex it. Look for cracks, swelling, or brittleness. A hub rubber measuring above Shore 70A hardness has lost its elasticity. Also check that torque bushings sit tight with no play. Look over the blade-to-hub joints for any erosion or corrosion creep.
Final spin check: Set the propeller on a flat, balanced surface. Give it a slow, steady hand rotation. Watch the blade tips. Any wobble greater than 0.5mm runout means the prop is out of balance. An unbalanced propeller sends that imbalance straight into your shaft, bearings, and hull — every single revolution.
The blades, the material, and the hub are three separate checks. Go through all three before you commit to installation.
Step 3: Run the On-Water WOT RPM Test — The Ultimate Performance Verdict
Numbers settle arguments. One number cuts through every debate about whether your Boat Propeller is qualified — not just stamped right, not just clean to the eye — and that’s your Wide Open Throttle RPM on the water.
Everything before this step was forensics. This is the verdict.
Set Up the Test Right
The conditions matter as much as the test itself. Pick flat, calm water. Wind under 10 knots. Current under 1 knot. Choppy water or tidal pull skews your readings. A skewed reading gives you a wrong conclusion.
Load the boat the way you use it in real life. Full fuel tank. Two to four passengers. Gear aboard. Run a bait tank? Fill it. A prop tuned on an empty hull will let you down the moment real weight comes aboard.
Trim matters too. Start trimmed down for the first burst of acceleration. Bring it up as speed builds — six bars maximum. You’re looking for the RPM and speed combination where both peak together before either one starts to fall.
Push to WOT at a steady pace. Hold it there for 15 to 20 seconds until your RPM settles — no more than 50 RPM of climb in the last few seconds. Write down that number. Run it two more times. Average the three. One reading is a data point. Three readings are a pattern.
Read Your RPM Against Your Engine’s Rated Range
Here’s what a “qualified” prop looks like at WOT under a normal load:
|
Brand |
Model Example |
Target WOT RPM Range |
|---|---|---|
|
Yamaha |
F300 Outboard |
5,000 – 6,000 RPM |
|
Mercury |
4.3L Sterndrive |
4,400 – 4,800 RPM |
|
Honda |
BF150–250 |
5,300 – 6,300 RPM |
|
Evinrude |
E-TEC G2 (150–300HP) |
5,200 – 5,800 RPM |
Hit inside that window and your propeller pitch and diameter match your engine. Land outside it, and the prop — not the engine — is the problem.
-
RPM running too high (over-rev by 600+ RPM): Pitch is too low or diameter too small. Increase pitch by 1–2 inches, or diameter by 0.5–1 inch. Retest.
-
RPM running too low (under-rev by 400+ RPM): Pitch is too high or diameter too large. That overloads the engine. Drop pitch by 1–2 inches and retest.
Every 2 inches of pitch change shifts RPM by about 200–250. That’s your adjustment lever — use it with precision.
Why Choose VIF Propellers?
At the end of the day, a good prop comes down to who makes it. At VIF, it honestly doesn’t matter if you’re a dealer ordering a whole pallet or a boater just grabbing a single replacement. We don’t cut corners on smaller orders. You get the exact same marine-grade alloy, precision balance, and strict quality control, every single time.
We don’t just talk about quality—we build it from scratch. If you’re curious about what goes into the process, take a quick look at how our boat propellers are manufactured.
Conclusion
A qualified boat propeller isn’t built on trust — it’s built on proof. Verify it step by step, before it ever touches the water.
You now have the tools to do that. Read the markings. Inspect the blades and hub with trained eyes. Run the WOT RPM test, and measure what you see against real industry standards. That knowledge protects your wallet — and everyone aboard.
Here’s what most buyers miss: a substandard propeller won’t show its flaws at the dock. It shows them at full throttle, miles from shore.
Don’t let that be your story.
Skip the guesswork. Explore VIF Propellers‘ certified lineup — every piece engineered to pass the exact checks you just learned. Browse our stainless steel marine propellers and aluminum options, or contact our team for a spec-matched recommendation.
Buy once. Verify first. Sail with confidence.